Grill Ribs Meat Side Up or Down? – Mistakes to Avoid
How to Grill Ribs Meat? Which Side to Cook First
Mastering the perfect rib recipe is essential for any aspiring grill master. The principles of first-class ribsmanship involve several key steps: skinning the ribs, rubbing the meat, and applying a mop sauce.
The art of glazing with barbecue sauce and harnessing the mouth-watering powers of wood smoke are crucial. This simple yet effective recipe is easy to prepare, from start to finish, taking about an hour and a half, with only ten minutes of actual work.
Following this foolproof recipe, you can create competition-quality ribs, where the bones and meat meld in a symphony of flavor and texture.
RECIPE NOTES
For this rib recipe, there’s None required for Advance Prep. The Yield is about six servings. The Method involves Indirect grilling along with some direct grilling for finishing.
Equipment needed includes cups of wood chips or chunks, preferably hickory or apple, which should be soaked for an hour in water, and then drained before use. Don’t forget the barbecue mop for basting.
INGREDIENTS
For the mop sauce
- Unsalted butter
- A cup of apple cider
- Bourbon
- Soy sauce
The rub for the ribs requires:
- Coarse salt (either kosher or sea),
- Brown sugar for a sweet touch,
- Paprika
- Freshly ground black pepper
- Dry mustard (Colman’s preferred)
- Garlic powder
- Celery seed
You’ll also need racks of baby back ribs (about four pounds total), and of course, your favorite barbecue sauce or the special Lemon Brown Sugar Barbecue Sauce for that extra zing.
RECIPE STEPS
Step 1: Mop Sauce Creation
Begin by making the mop sauce. Melt the butter in a nonreactive saucepan over medium heat. Then, stir in the cider, bourbon, and soy sauce. Keep this mixture warm until you’re ready to use it.
Step 2: Crafting the Rub
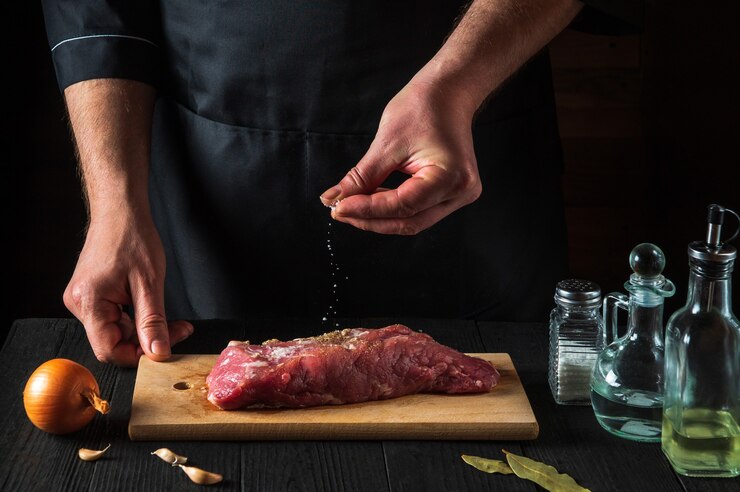
It’s time to make the rub. In a small bowl, place the salt, brown sugar, paprika, pepper, mustard, garlic powder, and celery seed. Mix these with your fingers, ensuring to break up any lumps of garlic powder.
Step 3:Prepping the Ribs
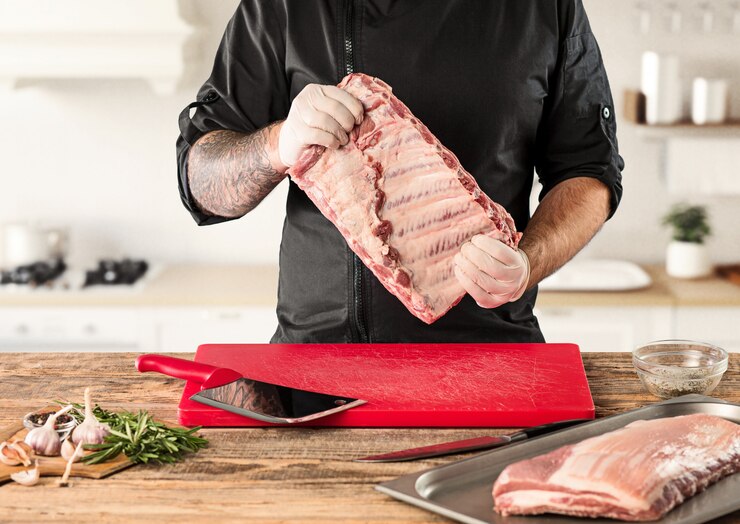
To prepare the ribs, lay a rack of meat side down on a baking sheet. Remove the thin, papery membrane from the back of the rack by inserting a slender implement, like a butter knife or the tip of a meat thermometer.
The best place to start is in the middle of the bones. Use a dishcloth, paper towel, or pliers to gain a secure grip and peel off the membrane. Repeat this with the remaining rack.
Step 4: Rub Application
Set aside a tablespoon of the rub for serving later. Sprinkle the remaining rub over all sides of the ribs, rubbing it into the meat thoroughly. Cover the ribs with plastic wrap and refrigerate them until you’re ready to set up the grill.
Step 5: Grill Preparation
Now, set up your grill for indirect grilling and preheat to a medium temperature (around 325° to 350°F). Place a large drip pan in the center of the grill to catch any drippings.
Step 6: Grilling the Ribs
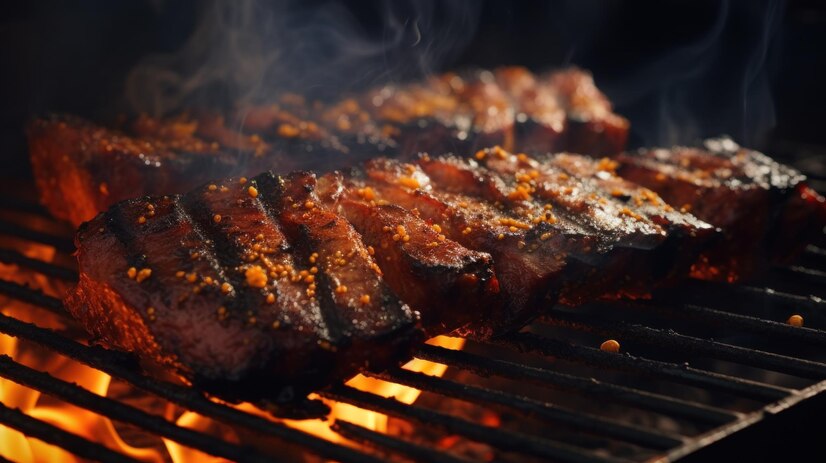
Ready to Cook: Once your grill is ready, brush the grill grate with oil. Place the ribs, bone side down, in the center of the grate, above the drip pan, and away from the heat.
If you have limited space, you can stand the racks of ribs upright using a rib rack. For those cooking on a charcoal grill, toss half of the wood chips over the mound of coals. Cover and cook for 45 minutes.
Step 7: Mopping the Ribs
Mop the Ribs: After the initial cooking time, mop the ribs on both sides with the mop sauce. Then, re-cover the grill and continue cooking until the ribs are browned, cooked through, and tender enough to pull apart with your fingers.
This could take another 45 minutes to an hour or longer (a total of 1 1/4 to 1 1/2 hours). The meat should have shrunk back from the ends of the bones by about an inch. Mop every 15 minutes, and if you’re using a charcoal grill, replenish the coals as needed.
Step 8: Final Glazing
Just Before Serving: Brush the ribs on both sides with Lemon Brown Sugar Barbecue Sauce and move them directly over the fire. Grill the ribs until the barbecue sauce is browned and bubbling, which should take about 1 to 3 minutes per side.
Step 9: Serving the Ribs
Transfer the ribs to a large platter or cutting board and let them rest for a few minutes. Then, cut the racks in half or into individual ribs. Serve at once, with barbecue sauce and the reserved rub on the side.
RECIPE TIPS
Cooking First-Timer’s Ribs on a Smoker: If you’re using a smoker, set it up and light it according to the manufacturer’s instructions. Preheat to a low temperature, around 250°F.
Place the ribs in the smoker, bone side down, and let them smoke until they are cooked through, which should take about 4 to 5 hours. Start mopping the ribs with the mop sauce after the first hour, repeating every hour.
Brush the ribs with Lemon Brown Sugar Barbecue Sauce during the last half hour of smoking. Remember, you may need to replenish wood chips or chunks during the first and second hours and check the coals every hour.
Smoke Unwrapped on the Grill
For the initial hours of smoking, start by coating your ribs with mustard, then applying Pit Boss Sweet Rib Rub. Lay them on the grill, bone side down, and smoke at 225°F. This slow-smoking process infuses the ribs with a rich, deep flavor.
Wrap Ribs in Foil
After a few hours, it’s time to wrap the ribs tightly in foil. Many pit bosses like to add a liquid to the process, so it’s worth trying different ways to see what you prefer.
A popular method is to lay down butter, brown sugar, and honey before sealing the ribs, then pour about ¼ cup of apple juice into the foil for a steamed, tender texture. Place these foil-wrapped ribs back on the grill, this time with the flesh side down.
Unwrap and Throw the Ribs Back on the Grill
After an hour of cooking wrapped, it’s time to UNWRAP and THROW THE RIBS BACK ON THE GRILL. For this final hour of cooking, you can leave them dry or slather them with barbecue sauce.
For added moisture, some recommend a spritz with a 50/50 mix of apple juice and cider vinegar. Lay the unwrapped ribs back on the grill, bone side down, and check for doneness after about 20 minutes.
This final 20-30 minutes of cooking is when you can apply or reapply barbecue sauce, then crank the grill temp up to get the sauce tacky.
Does It Matter What Type Of Ribs I’m Smoking?
When it comes to the type of ribs you’re smoking, whether it’s baby back ribs, spare ribs, short plate ribs, or beef back ribs, the type does make a difference in the cooking process.
Each cut from the beef or animal has its unique characteristics. The meat side and bone side play a role in how the ribs cook, with factors like heat distribution, bark formation, color, and protection during the hours of smoking.
Each type of rib can offer a good-looking and flavorful result, so understanding these differences is key to a successful smoking session.
Final Thoughts
In summary, when grilling ribs, the consensus is to start with the ribs bone side down, regardless of whether they are beef, baby back, or spare ribs.
This approach not only protects the meat from direct heat but also allows for better development of the bark and color. Even when wrapping the ribs, as debated in various smoking methods like the 3-2-1 method, positioning the rib’s bone side up can be beneficial.
This technique, particularly when adding liquids like butter and honey to the wrap, helps in braising the meat in its juices, further tenderizing it.
Thus, both bone side down for initial smoking and bone side up when wrapping contribute to optimally cooked, tender ribs.
FAQ
Do You Cook Ribs Bone Up or Down in the Oven?
When cooking ribs in the oven, it’s advisable to start with the ribs bone-side down. As the cooking progresses, you might want to flip them for even cooking.
Using an elevated rack in a large cooking tray or on a cookie sheet lined with aluminum foil ensures easy cleanup and allows for better airflow around the meat.
A large cooling rack can be handy. This setup ensures the meat is properly turned throughout the cooking process.
Difference between 321 vs 221 Ribs?
The 3-2-1 method is typically used for spare ribs, while the 2-2-1 method is often preferred for baby back ribs, which are generally less tough. These numbers represent the hours spent cooking the ribs at each stage.
The 3-2-1 method might result in ribs that are more ‘fall off the bone’, but depending on personal preferences, the last hour (where the ribs are placed bare on the grates) can be shortened to 30 minutes for a firmer texture.
Will Smoking My Ribs Bone Side Down Mean I Don’t Have To Remove The Membrane?
When smoking ribs bone side down, it’s still advisable to remove the membrane, especially for beef back ribs.
This membrane, or silver skin, is a thick layer that, during the cooking process, tightens and can result in a tough texture in the bite.
For tender ribs, proper prepping is key. Use a binder like yellow mustard before applying your dry rub. To remove the membrane, gently loosen it with a butter knife and then use a paper towel to pull it off. It requires patience, but the result is worth the effort.
Can I Make A Homemade BBQ Dry Rub For Ribs?
Yes, you can certainly make a homemade BBQ dry rub for ribs. For the instructions and ingredient list, gather some common spices from your kitchen. A typical Kansas City-style brisket rub can be a great base.
Your recipe might include smoked paprika (or normal paprika), salt, black pepper, garlic powder, brown sugar, onion powder, and a touch of cayenne powder for heat. The goal is to create a sweet, yet balanced blend that will contribute to a delicious bark on your ribs.


