

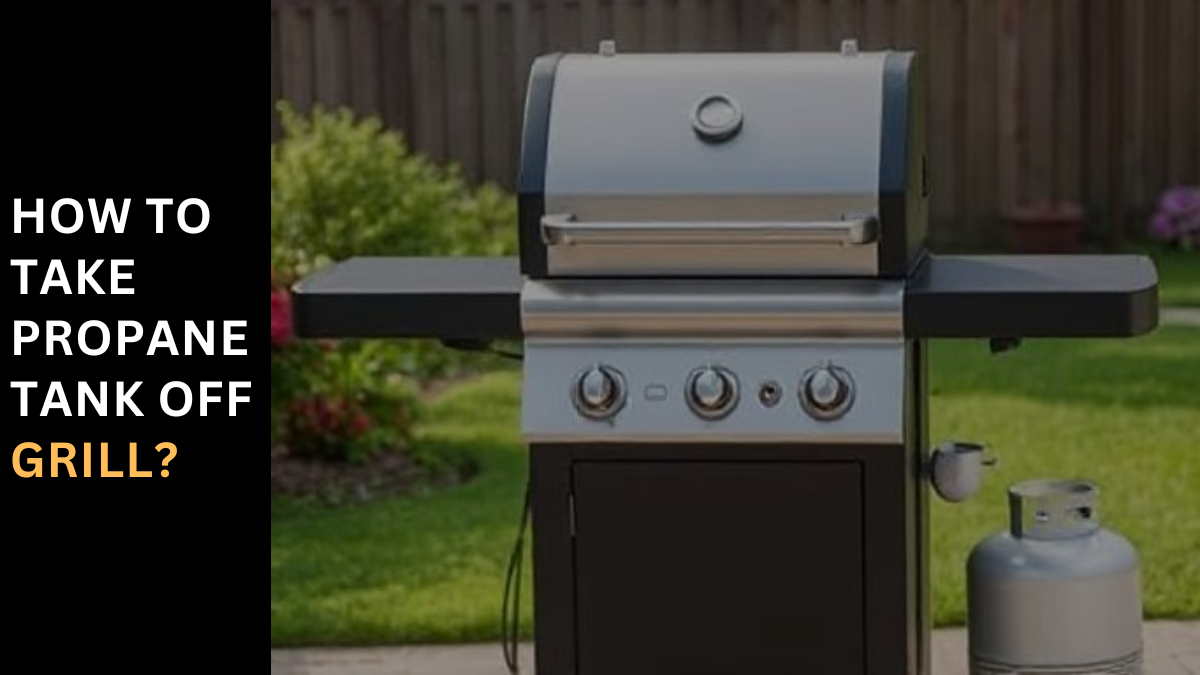
How to Take Propane Tank off Grill? How To Safely Remove A Propane Grill Tank? May marks the celebrated National BBQ Month, an ideal time to master the art of handling your propane grill. Whether you’re getting a head start on grilling or need to replace or refill a 20-lb propane cylinder, doing so safely is crucial. Grill Tank Replacement Guide Before attempting to remove the propane tank, ensure your grill is turned off. Begin by locating your propane cylinder, often hidden behind a door depending on your grill’s design. The two critical parts you’ll interact with are the tank valve and the barbecue’s pressure regulator. To disconnect the pressure regulator, first close the tank valve by turning it clockwise to the right until it is fully shut. Then, carefully twist off the threaded pressure regulator. If your tank is attached to the barbecue with a restraining bolt or screw, loosen this to remove the tank. Place the tank in a secure, well-ventilated location in your vehicle for transportation. Ensure it remains upright, and head directly to the refilling location. Never leave the tank unattended in the car. When reconnecting, reverse the process. Make sure the tank valve is closed when attaching the pressure regulator. New replacement propane cylinders often come with a plastic safety cap on the tank valve assembly—be sure to remove this before use. Through these steps, handling a propane tank during BBQ season can be done with confidence and safety, ensuring many enjoyable cooking experiences. Transport Your Propane Cylinder Safely, Too When you’ve disconnected your propane cylinder and are preparing for refilling, remember to Transport it in an upright position with the valve on top. Secure it well to prevent rolling, and always Close and plug the cylinder valve. Place the cylinder in a well-vented area inside your vehicle and Refrain from leaving the cylinder alone in a hot vehicle. Always drive straight to your propane dealer and then home after you pick it up. How to disconnect propane tank from house? Transitioning to home setups, disconnecting a propane tank from your house requires careful handling to ensure safety. First, shut off the gas supply by turning the main valve on the tank clockwise until it’s tight. It’s wise to call a qualified technician or your propane supplier to handle the disconnection and ensure proper disposal or storage of the tank. How to remove propane tank valve? When it comes to removing a propane tank valve, remember it can be quite tough unless you hold onto the tank securely. You might need to remove the bleed valve, which allows the tank to vent as it is being filled, followed by the main valve stem. A trip to the hardware store for some 1/4″ copper tubing adapted to a water hose end might be necessary. Always be sure the tank is 100% full of water before proceeding with these steps. How to turn on propane tank for house? turning on a propane tank for a house involves locating the shut-off valve (a screw-type handle under a lid on the tank) and turning it counterclockwise (to the left) until it’s in the open position. For safety, if you ever smell gas or suspect a leak, do not attempt to turn the tank on yourself; instead, Contact a qualified propane professional immediately. FAQ’s How to Turn On Propane Tank for Grill To turn on a propane tank for your grill, start by ensuring the grill is fueled by liquid propane. Then, completely open the valve located at the top of the propane tank by turning the knob counterclockwise until it stops. If your grill has an igniter button, turn the first burner knob all the way up and push the button to ignite the grill. How to Connect Propane Tank to Grill? To connect your propane tank to the grill, set the tank next to the grill and make sure the knob is in the off position. Remove the safety cap by pulling on the tab, then connect the end of the grill hose to the valve. After it clicks into place, turn the knob on the hose as much as possible to tighten it, ensuring a secure connection. Should I Disconnect Propane Tank from Grill for Winter? Yes, for safety and to prevent potential issues, it is advised to disconnect your propane tank from the grill and ensure the valve is closed before storing it for the winter. This step helps avoid any unexpected leakage or damage during the off-season. How to Disconnect Propane Tank from Weber Grill? To safely disconnect a propane tank from your Weber grill, first ensure the grill is off and all burners are closed. Then, turn the tank valve off (clockwise) and unscrew the pressure regulator from the tank valve. This method ensures that your grill is safely prepared for storage or maintenance without any propane hazards.
Master the Art of Grilling Cobia – Easy & Delicious!
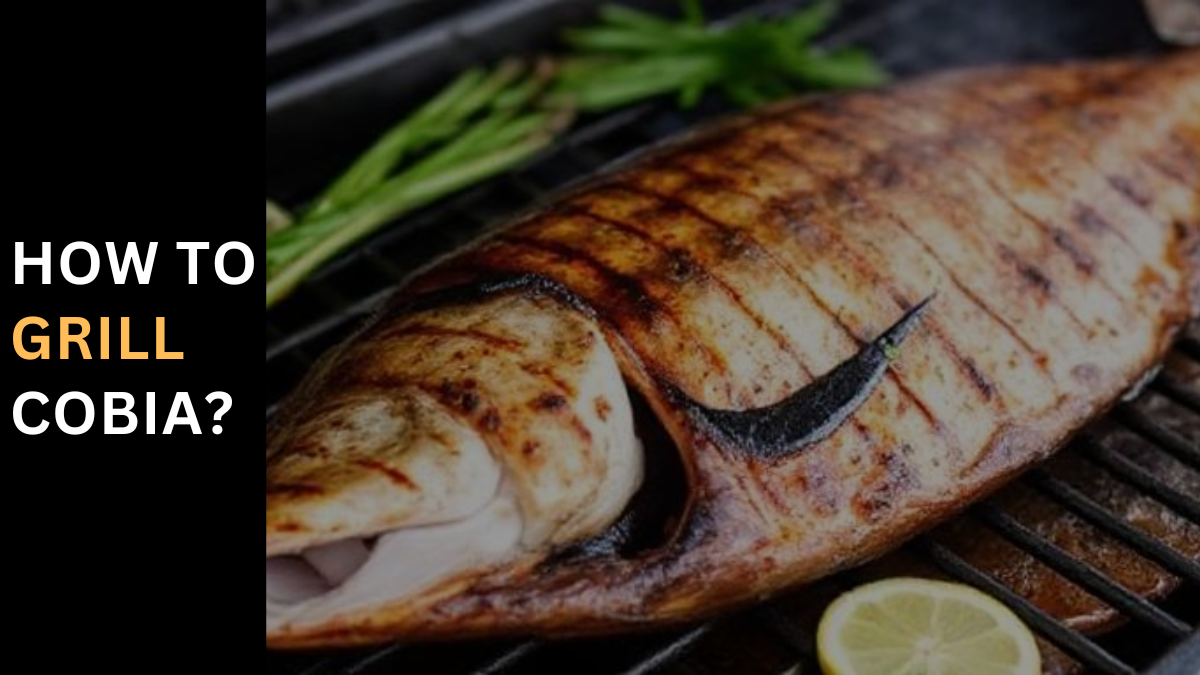
How to Grill Cobia? How to Cook Cobia on the Grill: The Ultimate Guide Grilling cobia, known for its firm and buttery texture that can almost melt in your mouth, is a favorite among seafood enthusiasts who cherish this succulent whitefish. Whether you call it lemonfish, black kingfish, or just cobia, the key to a perfectly grilled piece lies in the preparation. Start with the right ingredients at home, and ensure your cobia is thawed properly if coming from the freezer. This fish, enjoyable all year round, particularly shines during the summer, making it a natural choice for your grill. A Better Way to Enjoy Your Favorite Fish Cooking cobia on the grill might just become your new favorite way to prepare fish. The steps are simple yet crucial for achieving that deliciously moist and full-flavored result. First, brush the fish lightly with oil and season it to taste; this not only enhances its delicate flavor but also prevents sticking. Grill each side until the skin is crisply golden and the flesh flakes easily with a fork. This method highlights why cobia is a top pick for those who enjoy a variety of seafood recipes and seek a guide to cooking like a pro. Ingredients You’ll Need Olive oil as your preferred cooking oil, Lemon wedges for garnish salt, pepper, herbs, and spices. Consider adding vegetables to the grill to complement the fish. Equipment Ensure you have the right equipment: a Grill, Grill brush, Tongs, Basting brush, and some Aluminum foil to facilitate an easy and effective grilling process. Preparation Step 1: Preheat the Grill First, preheat your grill to medium-high heat (around 375–400°F or 190–204°C). Make sure the grates are clean to prevent the fish from sticking. Step 2: Prepare the Cobia Fillets As the grill is heating, prepare your cobia fillets: pat them dry with a paper towel to ensure they cook evenly and develop a crust. Brush them with a light coating of olive oil and your preferred seasonings for flavor. Common choices include salt, pepper, and herbs such as dill, thyme, and rosemary. Step 3: Oil the Grill Grates Using tongs and a folded paper towel dipped in cooking oil, oil the grill grates. This helps to prevent sticking and creates appealing grill marks on the cobia. Step 4: Grill the Cobia Place the cobia fillets on the grill, skin-side down initially, possibly on aluminum foil for easier flipping and cleaning. Close the grill lid and let the fish cook for 4–6 minutes, depending on the thickness of the fillets. Gently flip them with a spatula to avoid tearing the delicate fish and grill the other side for an additional 4–6 minutes. Step 5: Check for Doneness Check if the cobia is done when it flakes easily with a fork and the internal temperature reaches 145°F (63°C). Be careful not to overcook; cobia can become dry if left on the grill too long. Step 6: Serve Once your cobia is cooked to perfection, remove it from the grill and let it rest for a couple of minutes; this allows the juices to redistribute, ensuring a moist and flavorful dish. Garnish your grilled cobia with fresh lemon wedges to enhance its delicate taste. Step 7: Prepare a Side Dish The light taste of cobia pairs wonderfully with the smokiness of grilled vegetables. On the same grill, you can cook asparagus, zucchini, and bell peppers. This combination of your favorite veggies, drizzled with olive oil and seasoned with salt, pepper, and herbs, becomes tender and complements the main course perfectly. Additional Information For those looking to explore more cobia recipes or buy high-quality fillets, check out the website Open Blue. They offer cobia fillets for sale, perfect for incorporating this healthy whitefish into your everyday dishes. For a complete range of their products or contact information, visit Open Blue Cobia. What Makes This Recipe So Yummy This super fast to prepare, simple recipe for Grilled Cobia is light enough to be served for lunch or supper and is delicious due to its firm texture. Recipe Variations and Substitute Ideas Experiment with different flavors, like substituting Lime Juice for lemon juice, adding Brown Sugar for sweetness, or Balsamic Vinegar for a touch of umami. Mango Salsa pairs perfectly with fish steaks, and using Chicken Broth instead of melted butter offers a healthier option. For those who prefer a bit of spice, add Cayenne Pepper and Garlic Powder or Sesame Seeds can enhance the texture. Soy Sauce brings additional umami flavor, and Vegetable Oil can be a substitute for olive oil if desired. Conclusion: Grilling cobia to perfection combines proper heat management and timing to enhance its naturally mild and buttery flavor. Start by preheating your grill to medium-high heat, brushing the cobia fillets with olive oil, and seasoning them to taste. Place the fillets skin-side down on the grill grates, cooking each side for about 3-4 minutes until the fish flakes easily with a fork, ensuring it is cooked through yet remains moist and flavorful. For those seeking a different culinary approach, pan roasting is an excellent alternative that emphasizes cobia’s delicate texture. Regardless of the method, achieving the ideal doneness involves monitoring the fish for an opaque appearance and a texture that yields gently to pressure, guaranteeing a delicious and satisfying meal. FAQ’s How Long to Cook Cobia on the Grill? To perfectly grill cobia, preheat your grill to medium-high heat. Brush the cobia fillets with olive oil and season them with salt and pepper. Place the fillets on the preheated grill grates and grill for approximately 3-4 minutes per side or until the fish flakes easily with a fork. This method ensures the cobia is cooked thoroughly while retaining its moisture. What Is the Best Way to Eat Cobia? While grilling is popular, pan roasting is one of the best ways to fully experience the amazing buttery and mild flavor of cobia. This technique highlights the fish in its purest form, allowing the subtle textures and
Grill Orange Roughy in Foil – Easy & Flavorful Recipe!
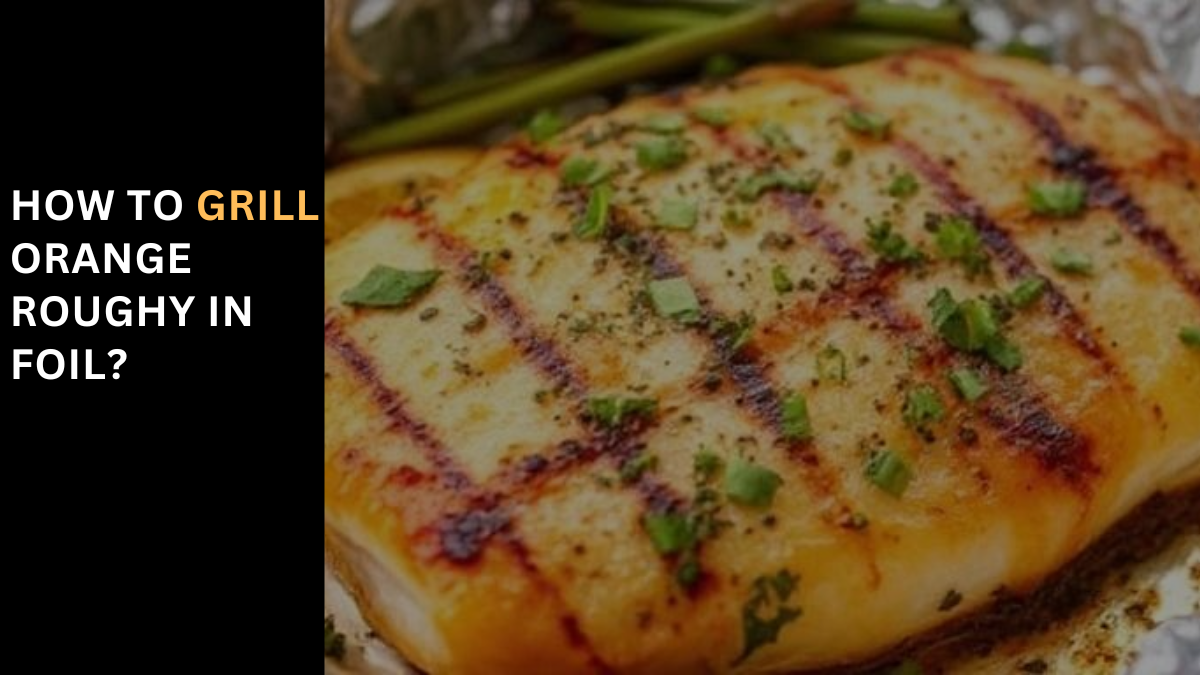
How to Grill Orange Roughy in Foil? Grilled Orange Roughy Growing up in the Midwest, where choices for fresh seafood were limited, my family developed a deep appreciation for fishing trips that led to eating what we caught. These early experiences formed not only memories but also a favorite culinary tradition. Orange roughy was introduced to us on a trip to San Diego, where my great-uncle took us to an establishment named Anthony’s. It was the first time we had eaten this type of fish, and its white, flaky texture that wasn’t too fishy in taste made it an instant hit. After several experiments back home, I’ve refined my method to prepare orange roughy that serves the dual purpose of evoking nostalgia and delighting the palate. Grilling it in foil is my go-to technique, ensuring that the fish remains moist and absorbs the aromas of whatever seasonings you choose to add. This method of cooking not only preserves the delicate flavor but also simplifies the cleaning process, making it an ideal choice for both novice cooks and seasoned chefs alike. How to Grill Orange Roughy in Foil? Ingredients Preparation Steps By following these steps, you can enjoy a perfectly grilled piece of orange roughy, packed with flavor and cooked just right. Citrusy Baked Orange Roughy The Citrusy Baked Orange Roughy recipe is an easy and healthy dinner choice that leverages foil packets to steam the fish, achieving flavorful and moist results within minutes. This cooking method, ingenious in its simplicity, supports a versatile kitchen experience. Whether it’s replacing orange roughy with other lean proteins or experimenting with herbs like cilantro and jalapeno peppers or vegetables, the dish adapts to your palate. The foil packet seals in flavors, making it a fundamental technique, particularly effective during the cold months when baking in the oven or over the grill in summer. Personalizing the recipe often involves a freestyle approach where I don’t measure but wing it, adding seasonings based on what’s available. This adaptability makes it a fan-favorite, especially when paired with a side of steamed broccoli or white rice. Citrusy Orange Baked Roughy — What You Need to Know Orange roughy’s mild flavor and firm texture make it an ideal candidate for this recipe, especially when using fresh or preserved lemons. Preserved lemons, enriched with concentrated lemon flavor, can be homemade using Himalayan salt blocks or ordered to enhance the dish, though care must be taken not to over-salt the fish. If opting for preserved lemons, remember to taste the fish before adding additional salt to prevent it from becoming overly salty. The recipe shines when cooking frozen orange roughy fillets; just add a few minutes to the cooking time. The dish pairs wonderfully with a green vegetable or a comforting scoop of rice, providing a balanced meal that is as nutritious as it is delicious. Whether baked in the oven or grilled alongside other meats, it’s a versatile method that enhances food memories under any season. How Long to Grill Fish in Aluminum Foil? When grilling fish in aluminum foil, place the fillet with lemon slices on the foil, double fold the top and ends to tightly seal the packet, and grill the packets over medium-high heat. It typically takes about 10-12 minutes for the fish to flake easily with a fork, ensuring to turn them halfway through cooking for even doneness. How to Grill Fish in Foil on Gas Grill? To grill fish in foil on a gas grill, start by preparing the fish with your chosen seasonings and ingredients, then place it on a large piece of aluminum foil. Seal the foil tightly and grill over medium-high heat for about 10-12 minutes or until the fish flakes easily. How to Cook Fish in the Oven in Foil? Cooking fish in the oven in foil involves folding the sides of the foil inwards around the fish, then folding in the top and bottom of the foil and pinching them closed to create a package. Set them on a baking sheet and bake for 18 to 22 minutes until the fish is opaque. Open the packets carefully to avoid spilling the juices. How Long to Cook Fish in Oven in Foil? To cook fish in the oven using foil, first drizzle the fish with olive oil, sprinkle it with salt and pepper, and place it skin side down on a rimmed baking sheet if the skin is left on. Roast for about 10 minutes per inch of thickness until the fish is opaque and tender when pierced with a fork but before it starts to flake. What Temp to Cook Fish in Oven in Foil? The ideal temperature to bake fish in the oven using foil is 350 degrees Fahrenheit to ensure the fish is cooked through and doesn’t burn on the outside before the inside is perfect. Conclusion: Grilling orange roughy in foil is an effective way to ensure that this delicate fish cooks evenly without falling apart or sticking to the grill. By wrapping the fish in foil—optionally seasoned with lemon slices and other preferred herbs and spices—and cooking it over medium-high heat, you can achieve a tender, flaky texture in just 10 to 12 minutes. This method not only simplifies the grilling process but also enhances the flavor, keeping the fish moist and succulent. Whether baked in the oven or grilled outdoors, using foil to cook orange roughy is a reliable technique that yields delicious results every time. FAQ’s Is it Better to Grill Fish in Foil or on the Grill? Grilling fish can be a challenge as it is more delicate than chicken or steak, often falling apart as it cooks or getting stuck to the grate. The uneven heat of a grill can make some parts tough and dry while others are barely cooked. Using foil is the best solution for ensuring even cooking and retaining moisture, making it preferable for grilling delicate fish like orange roughy. How Long Does it Take to Grill

Winter Grill Cover for Duramax – Expert Installation!
How to Install A Winter Grill Cover on Duramax? Introduction As the colder months roll in, protecting your vehicle’s engine becomes paramount, especially for robust models like the Duramax. A winter grill cover is crucial as it aids in maintaining the optimal engine temperature, thereby reducing the risk of engine fluids freezing and ensuring smoother starts and operation in freezing temperatures. For Duramax owners, using a winter grill cover not only enhances engine protection but also prolongs the life of engine components by shielding them from extreme cold and debris. Tools and Materials Needed Before beginning the installation of your winter grill cover on your Duramax, gather all necessary tools and materials to ensure a smooth and efficient process. You will need a winter grill cover specifically designed for your Duramax model, which can typically be purchased from automotive stores or online. Additionally, gather cleaning supplies, such as soap and water or a dedicated automotive cleaner to prepare the grill surface. A soft cloth or sponge will be useful for applying the cleaner, and optional rubber gloves can protect your hands from dirt and chemicals during the cleaning and installation process. Step-by-Step Installation Guide Preparing Your Duramax Start by thoroughly cleaning the front grill of your Duramax. It’s essential to remove any dirt, road salt, or debris that could hinder the proper fitting of the grill cover or cause premature wear. Use a gentle cleanser and a soft cloth or sponge to clean the area, making sure to dry it completely afterward. Inspect the grill for any damage, such as cracks or loose parts, that may need to be addressed before cover installation. Attaching the Grill Cover Align the winter grill cover with the front grill of your Duramax, starting from the top. Most covers will have clips or Velcro straps that should be attached securely to the edges of the grill. Carefully work your way down, ensuring that each section is tightly fitted and the cover’s edges align neatly with the grill’s contours. The cover should not obstruct any part of the vehicle’s headlights or impede airflow beyond what is necessary to retain engine heat. Final Adjustments After attaching the grill cover, go over each section to make sure everything is secure. Pay special attention to the bottom edges and corners, where the cover can easily come loose. Adjust the straps or clips as needed to ensure the cover is snug against the grill without any sagging or puckering. This final check is crucial to prevent the cover from flapping or detaching, which could lead to damage both to the cover and the vehicle’s grill. Common Mistakes to Avoid One common mistake in installing a winter grill cover is not ensuring that the grill area is completely clean and dry before installation. Any moisture trapped between the cover and the grill can freeze, potentially causing damage. Additionally, rushing through the installation process can result in a loose fit, which might not only look unsightly but also reduce the cover’s effectiveness. Make sure to follow the installation steps carefully and double-check your work. Benefits of Using a Winter Grill Cover on a Duramax Using a winter grill cover on your Duramax offers several benefits. Primarily, it helps maintain the engine at a warmer operational temperature during cold starts, which can significantly reduce wear and tear on the engine over time. Additionally, the cover protects the engine from being exposed to excessive cold and moisture, which can degrade its performance and lead to costly repairs. Overall, the winter grill cover is an inexpensive way to protect your investment and ensure your Duramax runs efficiently during the winter months. FAQs Can I install the grill cover on a wet grill? It is best to install the grill cover on a completely dry grill. Moisture trapped under the cover can freeze and cause damage. How often should I remove the grill cover? Regularly check and remove the grill cover to clean both the cover and the grill, ensuring no debris or moisture is trapped that could lead to rust or other damage. Will the grill cover affect engine performance? Properly used, the grill cover helps maintain a stable engine temperature, which can enhance performance by ensuring the engine runs at an optimal heat level. Is it necessary to use a grill cover in mild winter conditions? Even in milder conditions, a grill cover can prevent sudden temperature drops at night, which can affect the engine start-up in the morning. Can the cover be left on all year? The cover should be removed as the weather warms up to prevent overheating in the engine, which could lead to performance issues or damage. Conclusion Installing a winter grill cover on your Duramax is a straightforward but important task that can significantly impact the performance and longevity of your truck during the winter months. By following these detailed steps, you can ensure that your Duramax is well-protected against harsh winter conditions, maintaining optimal engine health and performance.
Build Asado Grill – Create Your Authentic Barbecue!
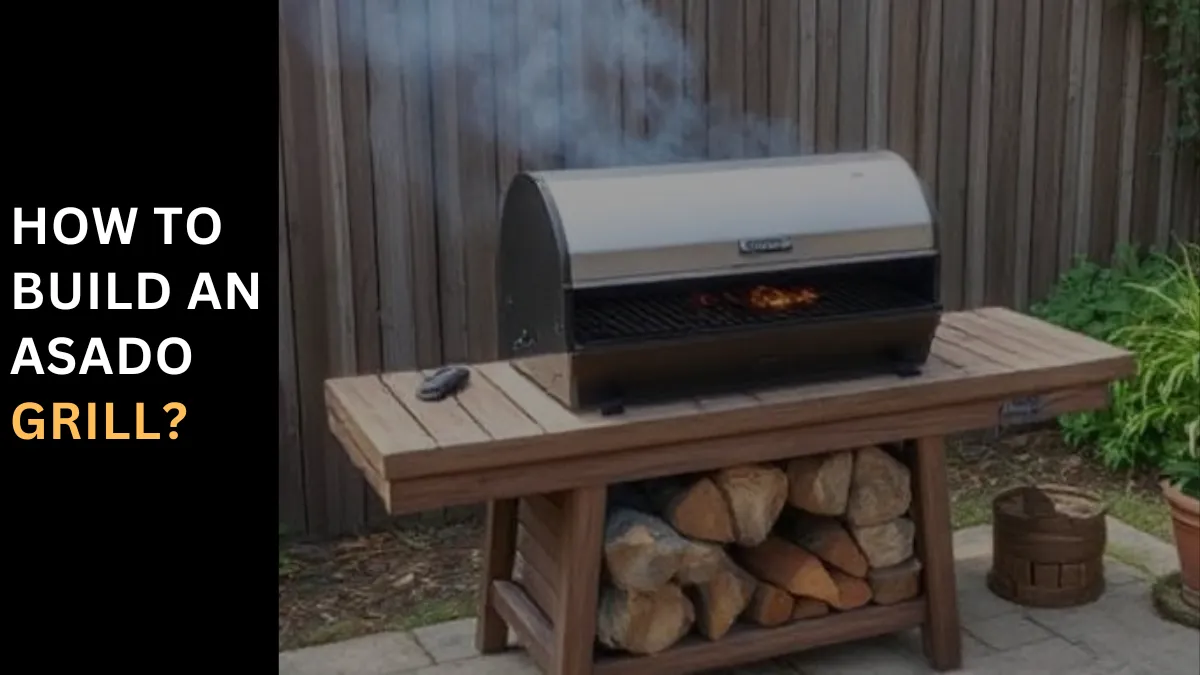
How to Build an Asado Grill? What is an Argentinian Asado grill, and why should we all have one? Imagine the heart of your backyard transformed by a traditional Argentine Grill, a unique structure where meat and vegetables are cooked over coals produced by a predominantly wood fire. This grilling method is distinguished by its ability to impart an intense smoky flavor and a consistent, dry heat, thanks to its C-shaped design, usually made of brick, mortar, and steel. The grill consists of a small, rectangular space on the side to contain the wood fire, with a stainless steel grilling grate and a coal box inside to hold the coals. This cooking technique separates the Argentine Parilla from other methods, ensuring that every meal is a testament to the Asado’s heritage. DIY Projects for Grilling Lovers As a grilling lover myself, I was delighted when the question came through our channel: “How can I build my Argentine grill?” This article aims to cover the fundamentals of building an Argentine Asado grill, a simple yet sophisticated project that promises to produce memorable experiences that stand the test of time. With a budget of less than $500, you can build your Argentine grill and enjoy the unique opportunity to understand the Argentine grilling tradition deeply. How to build your own Argentine grill? Decide the Size of Your Argentine Asado Grill When planning to build your own Argentine Asado grill, the first step is deciding the size. It’s crucial to consider the range of grill sizes available based on the measurements in centimeters. An ideal grill size can be determined using a table that shows various dimensions — height, width, and depth — tailored to the number of servings you expect to prepare. For instance, a height of 70-90 cm is ideally considered, matching the height of a standard table to ensure comfort and ease in maneuvering food at the back of the grill. Remember, these measurements are approximate and should be based on the actual context of where you locate your Asado Grill. Ensure the grill aligns with these dimensions to enhance your grilling experience. Factors to Consider for Location Locating your grill involves several factors that condition the overall cooking experience. The key elements to consider include protection from the wind, which could directly hit the grill, potentially extinguishing the fire or causing the coal’s heat to deviate. Finding the right location can be tough, but an ideal solution is to locate the grill in a part of your garden or backyard where it fits seamlessly into the design and offers functionality while also being far enough from any combustive materials and trees. This placement reduces the impact of gusts and winds and keeps sparks from falling onto combustive materials or the ground in front of the grill. It’s also important to maintain a safe distance — a few meters or feet — between the grill and where people might eat to prevent any accidents. Additionally, consider the height of the grill; it should not be too high or too low, allowing you to comfortably maneuver the food. Photos linked in resources can provide visual examples of well-placed grills. Step-by-Step Guide To Building Your Argentine Parilla Step 1: Prepare the Foundation Begin by finding an ideal location for your grill—clear and level the ground to ensure stability. Locate the grill in a position that is accessible to your facilities and far enough from any combustive materials. Once the spot is chosen, prepare the foundations by lowering the land about 10 cm for the base, then compact the soil and add a light layer of small rubble. Place steel mesh and cover it with cement to form a solid slab. Step 2: Build the Main Structure After the foundation has cured, start building the walls of the grill with brick and mortar laid with a mixture of cement, lime, and sand. These walls should reach 70 cm in height, as indicated in the graphic below. Ensure the H section of the walls effectively divides the fire area from the grill section. Step 3: Construct the Countertop Prepare the base of the countertop by setting up shuttering and laying a metal mesh across the sections of the countertop. The countertop should be about 8-10 cm thick. Mix and prepare your concrete to fill the countertop. Once set, build the second line of walls on this countertop slab. Step 4: Install Functional Components Now that the structure is in place, lay Refractory Bricks on all internal facing walls to contain the heat and protect the brick-and-mortar structure. Then, install a steel grill grate, sized to fit the dimensions of your grill; typically, 60 centimeters wide by 90 centimeters long, but this will depend on your final measurements. Make sure the grill is equipped with self-standing legs, ideally 10-12 cm high from the countertop. Step 5: Add Finishing Touches For better management of your fire, install a fire cradle—this is optional but recommended to help manage the coals and fire effectively. A simple V-shape design for the cradle will hold the wood and allow the coals to fall directly into the cooking pit. If desired, install a chimney on top of the asado to ensure the smoke can leave the grill through a good draft, which is crucial for effective airflow. The chimney should be long enough to pull oxygen through, have a bell with a flue, and the crown shouldn’t be too big. Now, with your Argentine asado grill finished, you’re ready to start enjoying your grill and cooking the most delicious meats the true Argentine way. How To Prepare The Fire For An Argentine Asado? Choosing the Right Wood or Charcoal for Your Asado Fire Selecting the correct wood or charcoal to use for an Argentine Asado fire is a key decision that influences the flavor and quality of your cooking. Traditionally, fire is lit with wood, which is the authentic way to embrace the traditional aspect of Argentine grilling. Charcoal can
Keep Grilled Hot Dogs Warm for a Crowd – Genius Tips!
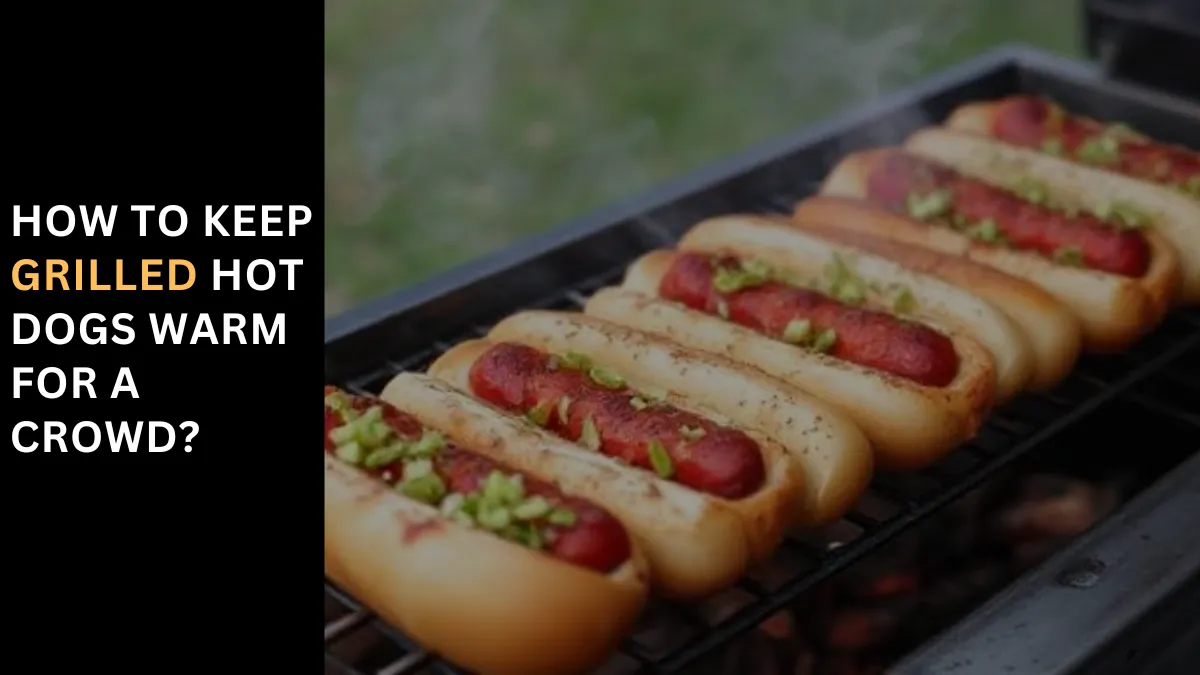
How to Keep Grilled Hot Dogs Warm for a Crowd? Introduction Hosting a big event often means serving food that needs to remain appetizing over several hours, and few items are as quintessentially festive as hot dogs. Keeping grilled hot dogs warm and delicious for a crowd poses a challenge, especially in maintaining their just-off-the-grill taste and texture. This comprehensive guide will delve into various techniques to keep your grilled hot dogs not just warm, but also moist and ready to enjoy, no matter when your guests choose to eat. Understanding the Basics Why Keep Hot Dogs Warm? Keeping hot dogs warm is crucial not only for taste and texture but also for food safety. Serving hot dogs at the right temperature ensures they are safe from bacterial growth, which tends to occur between 40°F and 140°F. Warm hot dogs also retain their juicy flavor, which can enhance the overall dining experience at your event. Challenges in Keeping Hot Dogs Warm One major challenge in keeping hot dogs warm is avoiding the extremes of drying them out or letting them become soggy. Hot dogs left on an open grill can shrivel and lose their appealing texture, while those kept in a humid environment may become waterlogged. Striking the right balance is key to serving perfect hot dogs. Preparation: Before You Grill Estimating Quantity Calculating how many hot dogs to grill involves considering the size of your crowd and the likelihood of guests wanting seconds. A good rule of thumb is to plan for 1.5 hot dogs per person. This ensures you have enough without excessive leftovers. Choosing the Right Equipment Selecting the appropriate equipment to cook and keep your hot dogs warm is vital. A large enough grill to accommodate your estimated quantity, plus warming trays or chafing dishes, will be needed to manage the workflow efficiently without reducing quality. Cooking Your Hot Dogs Grilling Techniques Achieve the perfect grill marks and flavor by setting your grill to medium-high heat and turning the hot dogs frequently to avoid burning. Cooking them close to the time guests will eat ensures they are fresh and delicious. Timing Your Cooking Coordinate your grilling with guest arrival and eating times. Start grilling hot dogs about 30 minutes before the event starts, and continue in batches to maintain supply and warmth. Keeping Hot Dogs Warm Using a Slow Cooker A slow cooker can serve as an excellent heat reservoir for hot dogs. Place grilled hot dogs into a preheated slow cooker on the ‘keep warm’ setting. Adding a steam layer by pouring a cup of water or broth at the bottom will help keep the hot dogs moist for hours. Utilizing Chafing Dishes Chafing dishes are ideal for outdoor events. Fill the bottom with hot water to create a steamy environment that keeps the hot dogs warm without drying out. Ensure the lid is closed to keep the steam contained. Employing Warming Trays and Hot Plates Electric warming trays and hot plates provide a flat surface where hot dogs can be laid out and covered with foil to retain heat. These devices are perfect for indoor events or where electricity is readily available. Alternative Methods Insulated Food Carriers For transporting hot dogs or keeping them warm without power, insulated food carriers are effective. These carriers are designed to maintain the temperature for several hours, perfect for off-site events. Oven Warming Set your oven to low heat, around 200°F, and place the cooked hot dogs in an oven-safe dish covered with foil. This method is ideal for keeping a large number of hot dogs warm without sacrificing their moisture. Serving Your Hot Dogs Setup for Serving Organize a serving station with condiments and buns nearby so guests can easily assemble their hot dogs. This setup helps in maintaining the flow and enjoyment of the event. Maintaining Quality While Serving Regularly check on the temperature and condition of the hot dogs throughout the event. Replace any that look less than appetizing, and adjust the heat source as necessary to keep them warm and inviting. DIY Solutions Homemade Insulation Techniques If professional equipment is not an option, wrap hot dogs in aluminum foil and place them in a cooler that has been warmed with hot water (emptied before adding the hot dogs). This makeshift warmer will keep them ready for a couple of hours. Safety Tips Always prioritize food safety by keeping hot dogs at or above 140°F and using thermometers to check their temperature periodically. Advanced Tips Using Professional Catering Equipment For very large events, consider renting professional-grade warmers and hot-holding equipment. These can offer more precise temperature control and capacity for bigger crowds. Feedback and Adjustments Be prepared to adjust your warming methods based on the duration of the event and the feedback from early guests to ensure the hot dogs remain at their best throughout. Conclusion Successfully keeping grilled hot dogs warm for a crowd requires careful planning, the right equipment, and diligent maintenance. By following these guidelines, you can ensure that your hot dogs will be a hit at any event, satisfying both the taste and safety expectations of your guests. FAQs Can I prepare hot dogs in advance and still keep them warm? Yes, by using methods like slow cookers or chafing dishes, you can grill in advance and keep hot dogs warm without losing quality. How long can I safely keep hot dogs warm before they become a health risk? Generally, hot dogs can be kept warm for up to 4 hours at a temperature above 140°F, which inhibits bacterial growth. What is the best way to serve a large crowd without waiting times? Pre-grill and use a combination of slow cookers and chafing dishes to keep hot dogs warm as guests serve themselves. Do I need special equipment to keep hot dogs warm outdoors? Insulated food carriers and portable chafing dishes with fuel can be very effective for outdoor events. How can I prevent hot dogs from drying out while
Grill Mat Cleaning – Simple Steps for Spotless Mats
How To Clean Grill Mats? Introduction Grill mats are a fantastic addition to any barbecue enthusiast’s toolkit, offering a smooth surface that makes grilling delicate foods like fish, vegetables, and even eggs possible without sticking or falling through the grates. However, to keep these handy tools in top condition and extend their lifespan, proper cleaning and maintenance are essential. This detailed guide will walk you through the best methods to clean your grill mats, ensuring they remain non-stick and free from harmful bacteria. Understanding Grill Mats Preparing to Clean Your Grill Mats Materials Needed for Cleaning Grill Mats Step-by-Step Cleaning Process Regular Cleaning Dealing with Tough Stains Drying and Storing Grill Mats Tips for Maintaining Grill Mats Common Mistakes to Avoid Safety Considerations Conclusion Cleaning your grill mats properly not only extends their life but also ensures they remain safe and effective for cooking. By following these simple steps, you can maintain the quality and functionality of your grill mats, making every grilling experience enjoyable and hassle-free. FAQs Can I put my grill mats in the dishwasher? Yes, most grill mats are dishwasher safe, but hand washing is recommended to extend their life. How often should I replace my grill mats? Typically, with regular use and proper care, grill mats should be replaced every season or when noticeable wear and tear occur. Are there any health concerns associated with using grill mats? As long as the mats are used within the recommended temperature limits and are free from PFOA and other harmful chemicals, they are safe to use. Can grill mats be used on any type of grill? Yes, grill mats are versatile and can be used on gas, charcoal, and electric grills. How can I remove a burnt smell from my grill mat? Soak the mat in a mixture of vinegar and water, then wash with soapy water and rinse thoroughly to remove any lingering odors.
Electric Grill Care – Maintain Your Grill Like New
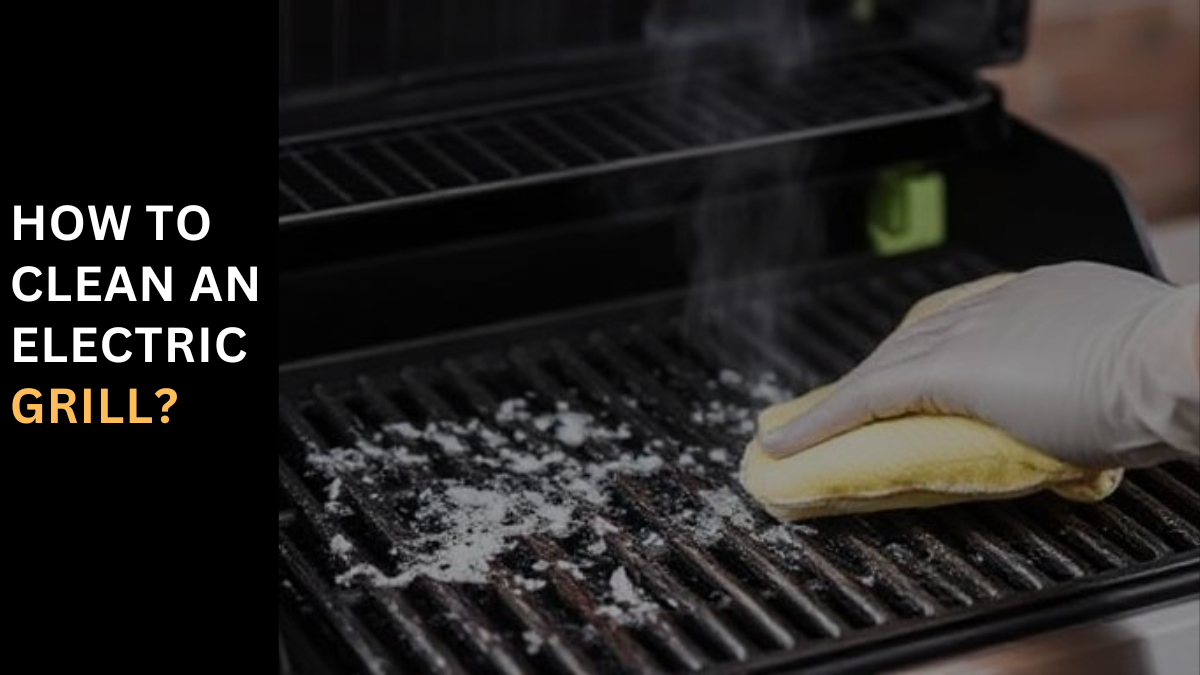
How To Clean an Electric Grill? Introduction Electric grills are a popular choice for those who enjoy grilled foods but may not have the space or ability to use a traditional gas or charcoal grill. They offer the convenience of grilling indoors with minimal smoke and hassle. However, like any kitchen appliance, an electric grill requires proper maintenance to keep it functioning efficiently and to ensure the health and safety of its users. In this guide, we’ll cover everything you need to know about keeping your electric grill clean and ready for your next barbecue. Understanding Your Electric Grill Components of an Electric Grill Benefits of Keeping Your Electric Grill Clean Preparation for Cleaning Cleaning Supplies Needed Step-by-Step Cleaning Guide Cleaning the Grill Plates Cleaning the Drip Tray Cleaning the Heating Elements Cleaning the Exterior and Control Panel Frequency of Cleaning Troubleshooting Common Problems Preventative Maintenance Reassembling After Cleaning Using Your Clean Electric Grill Conclusion Keeping your electric grill clean is crucial not only for the taste of your food but also for the longevity and efficiency of your appliance. By following these detailed steps, you ensure that your grill remains a safe, clean, and enjoyable part of your cooking arsenal. FAQs How often should I clean my electric grill? Clean the grill plates and drip tray after each use. Perform a deeper clean of the entire grill at least once every month or more frequently depending on usage. Can I wash my electric grill plates in the dishwasher? Check the manufacturer’s instructions. Some removable plates are dishwasher-safe, but others may require hand washing to prevent damage to non-stick surfaces. What should I do if the non-stick surface on my grill plates starts to peel off? Stop using the plates immediately to avoid contaminating your food. Consider replacing the plates if they are removable, or consult with the manufacturer for repair options. Can I use metal utensils on my electric grill? It’s best to use wooden or silicone utensils to avoid scratching the non-stick surface of the grill plates. How can I remove tough burnt-on food from my grill plates? Soak the plates in warm soapy water for a few hours, then gently scrub them with a non-abrasive sponge. For tougher residues, apply a paste of baking soda and water, let it sit for 15-20 minutes, then scrub and rinse.

Clean Hibachi Grill – Expert Maintenance Tips!
How To Clean A Hibachi Grill? Introduction Owning a Hibachi grill brings a unique charm to outdoor and even indoor cooking, offering a delightful way to prepare food that is both fun and flavorful. This guide aims to provide comprehensive instructions on how to clean your Hibachi grill thoroughly, ensuring it performs at its best and lasts for years to come. Understanding Your Hibachi Grill Types of Hibachi Grills Materials Used in Hibachi Grills Benefits of Regular Cleaning Keeping your Hibachi grill clean isn’t just about aesthetics; it’s crucial for several reasons: Tools and Materials Needed Pre-Cleaning Preparation Cleaning Techniques for Different Materials Cast Iron Care Aluminum and Stainless Steel Maintenance Step-by-Step Cleaning Guide Charcoal Hibachi Grills Electric Hibachi Grills Post-Cleaning Care Regular Maintenance Tips Troubleshooting Common Cleaning Issues Conclusion Proper maintenance and regular cleaning of your Hibachi grill are key to ensuring that it continues to provide delicious meals and safe operation. By following these detailed steps, you can enjoy your grill for many years, making the most out of your investment. FAQs How often should I clean my Hibachi grill? Clean lightly after every use and perform a deep clean at least twice a year. What is the best way to remove rust from a cast iron Hibachi grill? Use a paste of baking soda and vinegar, apply to the rust, let it sit for an hour, then scrub off. Can I use oven cleaner on my Hibachi grill? It is not recommended as it may be too harsh, especially for cast iron. Stick to grill-specific cleaners or natural solutions like vinegar. How do I maintain the seasoning on my cast iron grill? After cleaning, apply a light coat of vegetable oil and heat the grill until it smokes to reinforce the seasoning. What should I do if my grill gets wet and I’m worried about rust? Dry it thoroughly, then heat it to remove any remaining moisture. Apply oil to the surface to protect it.
Clean Your Coleman RoadTrip Grill – Effortless Steps
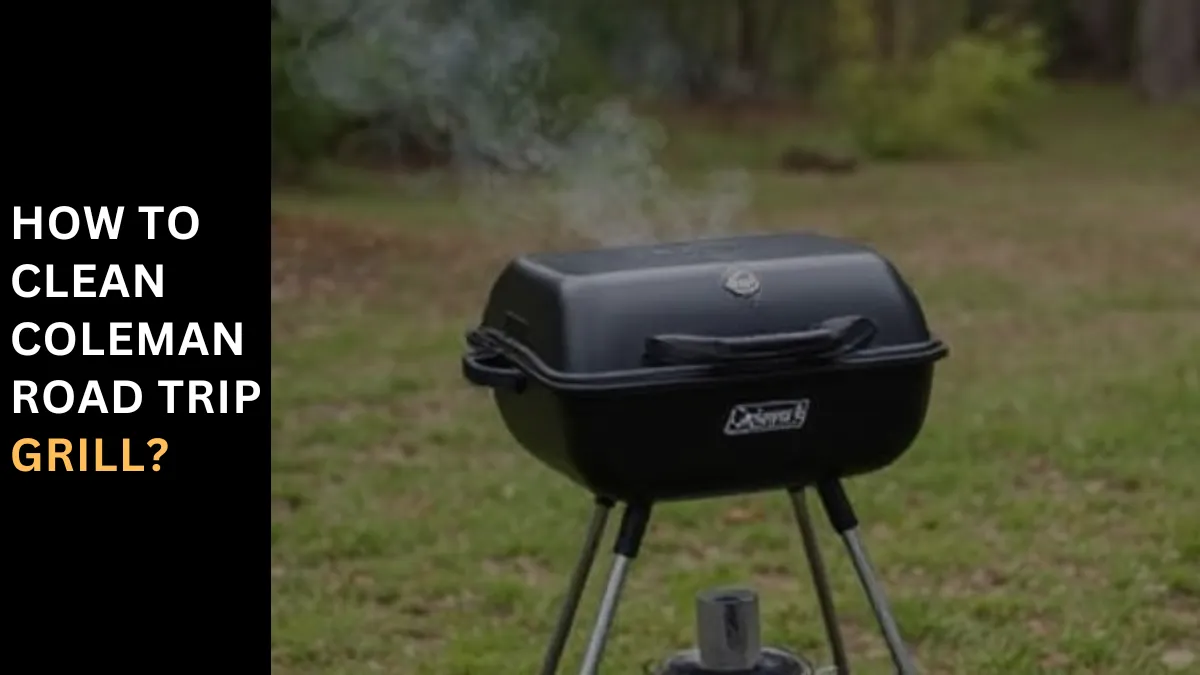
How to Clean Coleman Road Trip Grill? Introduction A Coleman Road Trip Grill is a must-have for outdoor enthusiasts and barbecue lovers. However, like any cooking appliance, it requires proper care and maintenance to perform its best. Regular cleaning not only extends the life of your grill but also ensures that it remains safe and ready for your next road trip or family gathering. This comprehensive guide provides you with detailed steps on how to maintain, clean, and keep your grill in pristine condition. Why Clean Your Coleman Road Trip Grill? Regular cleaning of your Coleman Road Trip Grill is crucial for several reasons: Preparing to Clean Your Grill Before you dive into scrubbing your grill, preparation is key: Step-by-Step Cleaning Process Disassembling the Grill Cleaning the Grill’s Interior Cleaning the Grill’s Exterior Cleaning the Grates Reassembling and Storing Your Grill Once every part is clean and dry: Regular Maintenance Tips Conclusion Maintaining your Coleman Road Trip Grill through regular cleaning and care ensures that it will last for many seasons. Not only does it improve the lifespan of your grill, but it also enhances your cooking experience, making each barbecue session enjoyable and safe. Follow these steps to keep your grill looking and performing like new. FAQs What is the best cleaner for the exterior of a Coleman Road Trip Grill? For stainless steel exteriors, use a cleaner designed specifically for stainless steel to avoid damage and streaks. How often should I deep clean my Coleman grill? It’s best to deep clean your grill at least once a season or more often if it sees frequent use. Can I use a hose to rinse off my Coleman grill? Yes, you can use a hose to rinse off the grill, but make sure all parts are completely dry before reassembling and lighting. What’s the safest way to clean the burners on my grill? Use a dry wire brush to gently clean the burners, ensuring all ports are clear of blockages to maintain proper function. How can I prevent rust on my Coleman Road Trip Grill? Keep the grill clean and dry, apply a light coat of cooking oil on cast iron grates, and use a cover to protect it from the elements when not in use.