

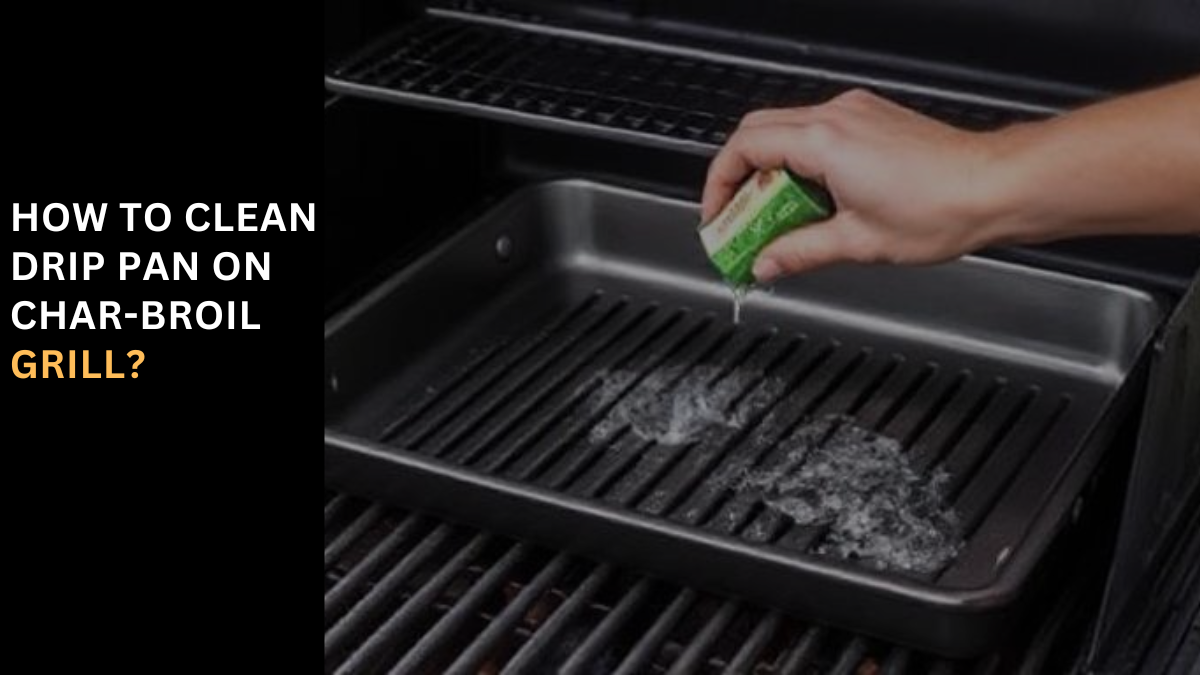
How to Clean Drip Pan on Char-Broil Grill? Barbecue Essentials: The Art of Maintaining Your GrillBarbecue is as much about the art of the flames as it is about the maintenance of your grill. One of the most vital components in this regard is the drip pan, which collects grease and debris during the grilling process. Keeping this component clean is crucial for the grill’s efficiency and your overall grilling success. A well-maintained drip pan supports the longevity of your grill, ensuring that it remains a centerpiece of your outdoor art for years to come. Why is Cleaning the Drip Pan Important? Cleaning the drip pan of your Char-Broil grill is an essential part of grill maintenance. This task helps to avoid dangerous flare-ups and maintains the quality of your food. Over time, accumulated grease and food particles can create a breeding ground for bacteria, resulting in unpleasant odors and potential health hazards. Ensuring the drip pan is clean not only impacts the longevity and efficiency of your grill but also enhances the overall grilling experience. When Should You Clean Your Drip Pan? The frequency with which you should clean your drip pan depends on how often you grill. For those who grill frequently, it’s a good idea to clean the drip pan after each use. This prevents residue build-up that could affect the grill’s performance. Occasional grillers might find cleaning every few uses suffices to keep their grill in prime condition. Regular cleaning is a simple yet effective way to ensure every barbecue is a success. Step-by-Step Guide Pro Tips for Drip Pan Maintenance Additional Cleaning Techniques Common Mistakes to Avoid When cleaning the drip pan of your Char-Broil grill, always wear gloves to prevent grease from getting on your hands. Avoid using abrasive cleaners, which can damage the pan’s surface. Also, make sure not to reinstall the drip pan while it’s still wet; doing so can lead to rusting. Conclusion: Cleaning the drip pan of your Char-Broil grill is crucial for optimal performance and longevity of your grill. Start by safely removing and disposing of accumulated grease and debris, then thoroughly wash the pan with soapy water, and ensure it’s completely dry before reinstalling it to prevent rusting. Regular maintenance, including using non-abrasive cleaning tools and protective gloves, will prevent damage and keep your grill functioning efficiently. Remember, taking the time to properly clean your drip pan after each use can greatly enhance your grilling experience by reducing flare-ups and unwanted odors. FAQ’s How do you clean a grill drip pan? For grills with a disposal drip pan or cup, clean the surface of the drip pan holder and replace the liner with a fresh aluminum pie plate or tin can. If the drip pan is not disposable, wipe the grease with paper towels. After removing as much grease as possible, rinse the drip pan with soapy water. How to clean a sticky grill pan? Place the grill pan in your sink and rinse away any large pieces of food. Next, fill the pan with about half an inch of water and a few drops of mild dish soap. Use a non-abrasive sponge or brush, like the Le Creuset Grill Pan Brush, to gently scrub the pan to remove any sticky or greasy residue. How do you clean grill drippings? To clean grill drippings, use a stiff wire brush dipped in water. Do not lean over the grill while cleaning, as this will create plenty of steam. For tough grease spots, add dish soap to the water or use a grill cleaner. Once the surface has cooled, wipe the grate with a damp cloth to remove any residue or brush bristles.
DIY Grilled Cheese Burrito – Easy Guide for Food Lovers
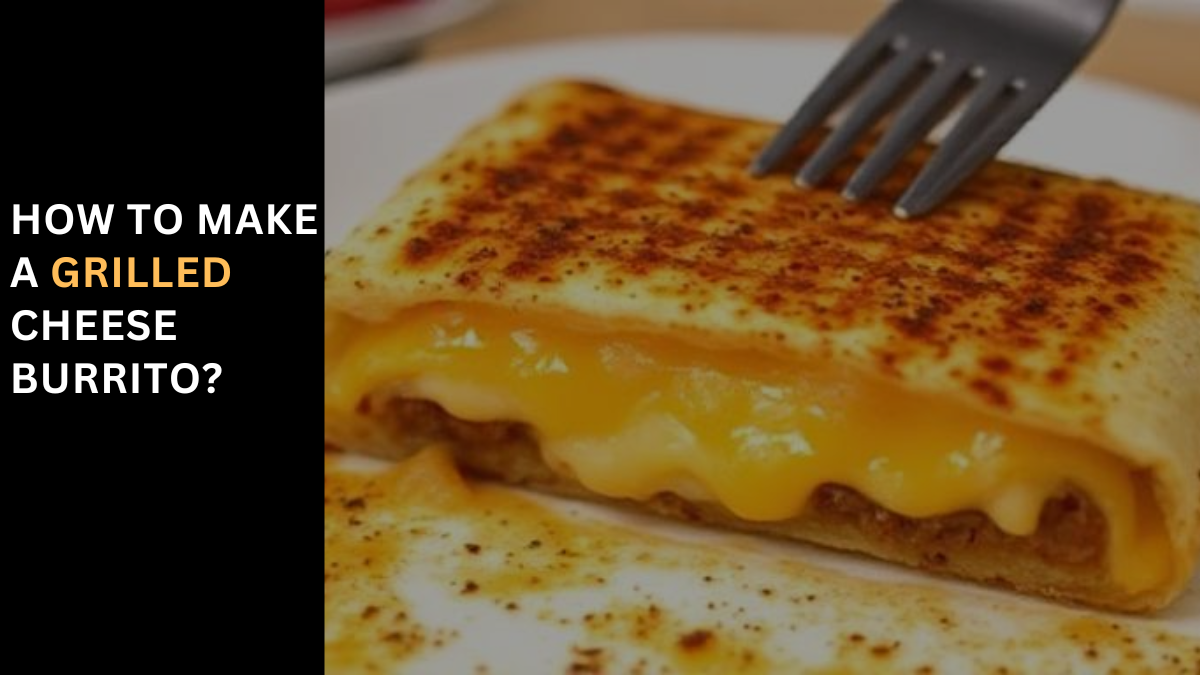
How To Make A Grilled Cheese Burrito? Grilled Cheese Burrito Starting with the copycat version of Taco Bell’s Grilled Cheese Burrito, the secret lies in its melty, ooey-gooey texture and richly flavored layers. Begin by grilling your burrito on the stovetop; this technique transforms the cheese into a crispy, toasted outer shell while keeping the inside juicy and delicious. For the filling, seasoned ground beef and zesty Spanish rice provide a robust base, enhanced by a creamy chipotle sauce and a fully loaded assortment of fixings. This homemade version brings all the Taco Bell magic into your kitchen, ensuring each bite is cheesy, beefy, and flavorful. Why You’ll Love This Grilled Cheese Burrito (Taco Bell Copycat!) Creating this burrito at home is more than just a meal; it’s an experience. Forget the drive-thru and embrace the joy of crafting something truly special with simple, easy-to-assemble ingredients. This recipe captures the essence of Tex-Mex cuisine, incorporating crunchy tortilla strips and a spicy layering of chipotle sauce that melds perfectly with the toasty, pan-fried tortilla. Whether you’re a fan of fast food classics like KFC bowls or Big Mac wraps, making this grilled cheese burrito lets you tweak the ingredients to suit your taste, turning a classic snack into a fun, quick, and satisfying meal. Grilled Cheese Burrito – Taco Bell Copycat Embrace the TikTok craze and satisfy your cravings with this delicious copycat recipe of the Taco Bell Grilled Cheese Burrito. Starting with high-quality ingredients and simple steps, you can recreate this mouthwatering dish at home. The secret to its melty, cheesy goodness is in the blend of bold flavors that you prepare with a sense of home-cooked passion. GROUND BEEF Ground beef is the star of this show. In a large skillet, heat a splash of olive oil over medium heat. Add the beef and break it apart with a spoon as it cooks and browns. Stir in a magical mix of spices—minced garlic, chili powder, coriander, smoked paprika, cumin, oregano, black pepper, and onion powder. Pour in some beef broth and tomato sauce, then reduce the heat to let it all simmer. The flavors will meld together, filling your kitchen with an amazing smell. SPANISH RICE While the beef cooks, start on the Spanish rice. In another medium saucepan, melt some unsalted butter (or substitute with avocado or olive oil for a different flavor). Add rinsed jasmine rice and toast it until lightly golden, which infuses it with a nutty flavor. Next, stir in chicken broth, tomato sauce, salt, cumin, garlic powder, and onion powder. Bring it to a boil, then reduce the heat and let it simmer. After the liquid is absorbed and the rice is tender, let it steam covered off the heat for a final fluff with a fork. By mastering these components—cheesy burrito, ground beef, and Spanish rice—you create more than a meal; it’s an epicurean delight that transcends the typical fast food experience. This trio of bold, fresh, and quality components ensures each bite is packed with flavor. CHIPOTLE SAUCE In the pursuit of crafting the perfect Chipotle Sauce for your grilled cheese burrito, start by grabbing a small bowl. Here, combine rich mayonnaise with velvety sour cream, tangy lime juice, a touch of honey, a dash of black pepper, fiery chili powder, and adobo paste for that quintessential smoky heat. Whisk everything until it’s smooth and creamy, ensuring to adjust the spice preference to suit your palate. This sauce isn’t just a filler; it’s the secret to a rich taste that’s downright addictive, elevating the burrito from good to unforgettable. Whether used as a dip for fries, a spread for sandwiches, or the star flavor in your burrito, make sure to store any extra in an air-tight container in the fridge. Properly kept, it can enhance your meals for up to two weeks. What You’ll Need Crafting the perfect Grilled Cheese Burrito begins with gathering all the right ingredients: This ensemble of ingredients ensures each bite of your burrito is bursting with flavor and texture, making for a truly cheesy, satisfying experience. How To Make A Grilled Cheese Burrito? Step-by-Step Instructions Cook the Ground Meat: Heat your skillet over medium-high and add ground beef, breaking it up as it cooks. Once browned, season with your favorite taco seasoning. Make the Chipotle Sauce: In a separate bowl, whisk together the ingredients for a creamy chipotle sauce—this will add a rich, smoky flavor to your burrito. Assemble the Burritos: Lay out your flour tortillas and begin to top each one with Spanish rice, cooked ground beef, and a drizzle of chipotle sauce. Don’t forget to add any additional toppings you love. Fold and Roll the Burrito: Carefully fold the sides of the tortilla over the filling, ensuring they are tucked in tight, then roll the burrito to secure all the delicious contents inside. Grill the Burrito: Place your burrito in a clean skillet over a strip of shredded cheese. Use a second heavy skillet to press down on the burrito, helping it cook evenly. Grill for about 4-5 minutes on each side until the cheese is melted and the tortilla is toasty brown. Serve: Enjoy your grilled cheese burritos hot, paired with salsa or hot sauce for dipping. Creating a Grilled Cheese Burrito at home is a delightful way to crush cravings with a Taco Bell flair. Follow these simple steps to assemble your very own cheesy masterpiece: These printable instructions can also be found on the recipe card, ensuring you can recreate this tasty treat anytime the urge strikes! Tips for Making a Grilled Cheese Burrito When crafting the perfect Grilled Cheese Burrito, consider these expert tips. First, Don’t overfill; it’s easy to get carried away with delicious fillings, but too much can cause the burritos to spill or the tortillas to tear. Roll the tortilla tightly, embracing the snug-like burrito method to ensure your contents hold together. Place the burrito in the pan seam side down, allowing the shredded cheese to melt,
Crunchy Grillo’s Pickles DIY – Click for Secret Recipe!
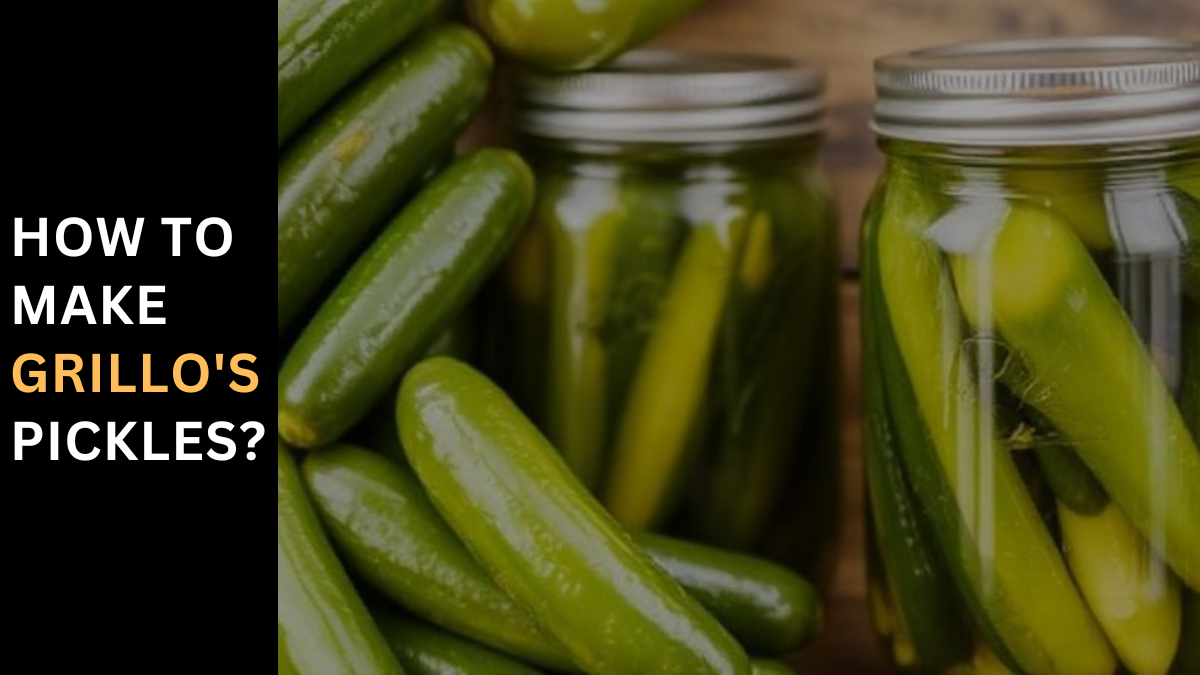
How to Make Grillo’s Pickles? Pickles are a beloved snack for many, and Grillo’s pickles, in particular, are famous for their fresh, tangy, and crunchy bite. But what if you could make them at home? Whether you’re a pickle enthusiast or just curious about the pickling process, learning how to make Grillo’s pickles is a fun and rewarding kitchen project. Ingredients for Making Grillo’s Pickles To recreate the signature flavor of Grillo’s pickles, you’ll need a few key ingredients. These items will make your pickles taste fresh and full of flavor: Why Homemade Pickles Are Better? Why go through the trouble of making your own pickles when you can easily buy them at the store? There are a few compelling reasons: Tools You Will Need Before you dive into making your pickles, gather the following tools to ensure a smooth pickling process: Step-by-Step Guide: How to Make Grillo’s Pickles 1. Choosing the Right Cucumbers When making pickles, it’s crucial to select the right cucumbers. For the best texture and flavor, opt for small, firm pickling cucumbers. These cucumbers are designed for pickling, as they stay crunchy and absorb flavors better than regular cucumbers. You can also use Persian cucumbers if pickling cucumbers aren’t available. 2. Preparing the Brine The brine is the heart of the pickling process, and getting it right is essential. To make the perfect brine: 3. Packing the Jars Now, it’s time to pack your cucumbers and seasonings into the jars: The Best Cucumbers for Pickling Pickling cucumbers are small and have a bumpy texture, which makes them ideal for brining. They absorb flavors quickly and maintain their crunch during the pickling process. If you can’t find pickling cucumbers, Persian cucumbers are a good alternative. Avoid using large cucumbers, as they tend to become mushy. How to Make the Perfect Pickling Brine The key to a great pickle is a balanced brine. The combination of vinegar, water, and salt is crucial. Vinegar adds tang, while salt helps preserve and ferment the cucumbers. A good ratio is 2 parts water to 1 part vinegar, and 2 tablespoons of salt per quart of water. Adding Fresh Herbs and Spices To get that Grillo’s signature taste, you’ll need plenty of fresh dill. Dill gives the pickles their characteristic flavor, and garlic adds a robust punch. Don’t forget to add mustard seeds and peppercorns, which provide subtle spice. The Fermentation Process Fermentation is where the magic happens. While some pickles are made quickly (known as quick pickling), Grillo’s pickles get their depth of flavor from fermentation. Let the jars sit in a cool, dark place for at least 2-3 days to allow the cucumbers to ferment. You can taste them after a few days and let them ferment longer if you prefer a stronger flavor. Storage Tips for Homemade Pickles Once your pickles have reached the desired flavor, move them to the fridge. Homemade pickles can last up to two months in the refrigerator. Always ensure that your pickles are submerged in brine to prevent spoilage. Common Mistakes to Avoid When Making Pickles How to Customize Grillo’s Pickles to Your Taste One of the best things about making pickles at home is the ability to customize them. You can add extra garlic, increase the dill, or even throw in some spicy chili flakes for a kick. Experimenting with different spices like coriander seeds or bay leaves can also give your pickles a unique twist. The Health Benefits of Fermented Pickles Fermented pickles are not only tasty but also packed with health benefits. They are rich in probiotics, which help support gut health and digestion. Plus, they are low in calories, making them a great snack for those watching their waistline. Cost Comparison: Homemade Pickles vs. Store-Bought While Grillo’s pickles are delicious, they can be a bit pricey. By making your own at home, you can cut costs significantly. The price of cucumbers, vinegar, and spices adds up to far less than buying jars of premium pickles from the store. Conclusion Making Grillo’s pickles at home is a fun and rewarding project that anyone can do with a few simple ingredients and tools. By following these steps, you’ll be enjoying fresh, crunchy, and flavorful pickles in no time. Plus, with
How to Make a Heat Shield for A Grill?
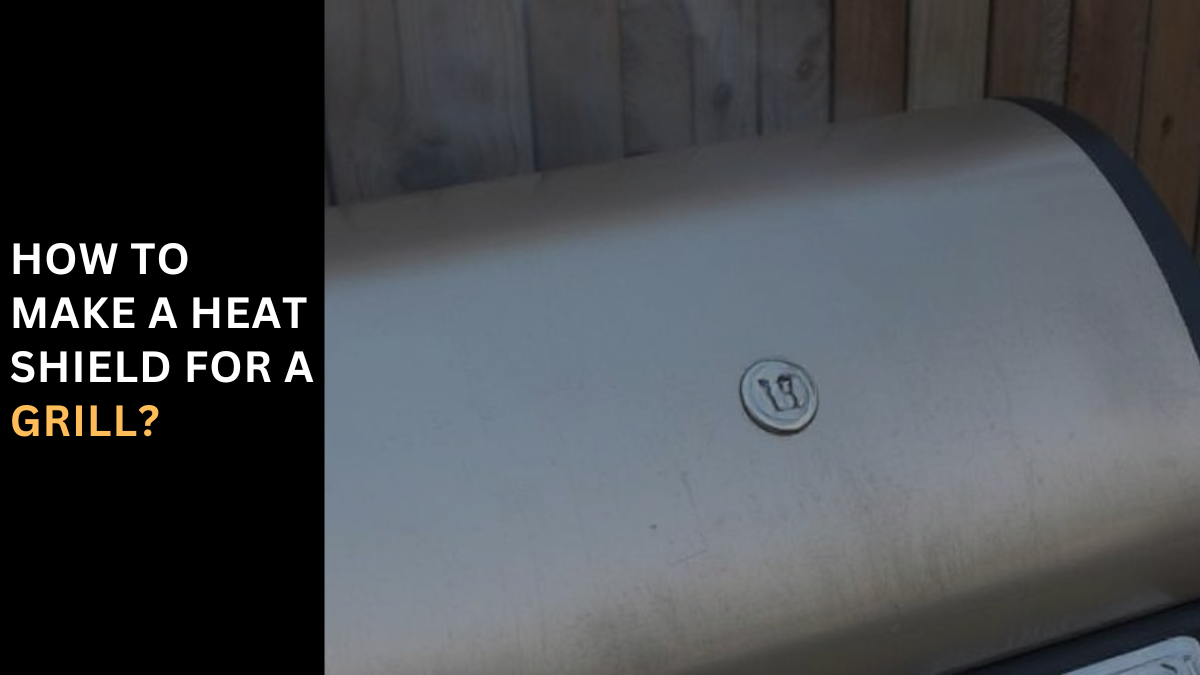
Grilling is a great way to cook delicious meals, but if you’ve ever dealt with flare-ups or uneven cooking, you know how frustrating it can be. That’s where a heat shield comes into play. A DIY heat shield can save you money, prolong the life of your grill, and help you achieve better cooking results. What is a Heat Shield for a Grill? A heat shield, also known as a heat deflector or heat plate, is a barrier that sits between the flame and your food. Its primary function is to distribute heat more evenly and prevent flare-ups caused by grease dripping onto the flames. Heat shields are commonly found in gas grills but can be beneficial for any type of grill. Why You Need a Heat Shield for Your Grill? Adding a heat shield to your grill offers numerous advantages. For one, it protects the grill’s internal components from excessive heat, prolonging the life of your equipment. It also creates a more even cooking surface by distributing heat across the grill, which helps avoid hotspots that can burn your food. Lastly, heat shields reduce flare-ups, which is especially important when cooking fatty meats. Materials Needed to Make a Heat Shield Before getting started, you’ll need to gather the right materials. Here are a few options depending on your preference and grill type: Step-by-Step Guide: How to Make a Heat Shield for a Grill 1. Measure Your Grill First, measure the surface area where you want to place the heat shield. You want it to cover the entire cooking surface for maximum effectiveness. Make sure to leave space for proper air circulation. 2. Cut Your Materials Using your measurements, cut your selected material (aluminum, stainless steel, or bricks) to fit. If using stainless steel, you may need tin snips for cutting, and bricks should be arranged to cover the bottom of the grill. 3. Assemble the Heat Shield If you’re using sheets of material, you may need to fasten them together. For stainless steel, you can use screws to hold the pieces in place. With aluminum foil, simply fold it over multiple times to create layers. DIY Aluminum Foil Heat Shield Aluminum foil is one of the easiest materials to work with for a heat shield. Although it’s not as durable as stainless steel or brick, it’s an effective and affordable solution. DIY Stainless Steel Heat Shield Stainless steel is the most durable option and is often used in professional-grade grills. Here’s how to make one: DIY Fireproof Brick Heat Shield Fireproof bricks are great for grills that handle a lot of heat, like charcoal or wood-fired grills. Maintaining Your Grill Heat Shield To keep your heat shield functioning properly, clean it after every use. Stainless steel shields may develop rust, which can be scrubbed off with a grill brush. Replace aluminum foil shields after a few uses, and check brick shields for cracks regularly. Safety Tips While Making a Heat Shield Always wear protective gloves when cutting or handling metal materials. Use the appropriate tools, and never attempt to create a heat shield while the grill is hot. How a Heat Shield Improves Grilling Performance? A well-made heat shield improves your grilling performance by reducing flare-ups, distributing heat evenly, and giving you better control over cooking temperatures. Cost Comparison: DIY Heat Shield vs. Store-Bought Options Creating a DIY heat shield can cost anywhere from $5 to $30 depending on the materials. Store-bought heat shields, on the other hand, can range from $30 to $100. By making your own, you can save a significant amount of money. Additional Tips for Better Grilling Experience Common Mistakes to Avoid When Making a Heat Shield Conclusion Making your own heat shield for a grill is a simple project that can significantly improve your grilling experience. Not only will it provide more even cooking, but it will also help protect your grill and reduce flare-ups. FAQs Can I use any type of metal for my heat shield?No, it’s important to use heat-resistant metals like stainless steel or aluminum. Other metals may warp or rust. How thick should my heat shield be?The thickness depends on the material. For stainless steel, 1/8-inch thickness works well, while aluminum foil can be layered for strength. Will a heat shield make my grill cook slower?Not necessarily. A heat shield helps distribute heat evenly, which may actually improve cooking efficiency. Can I buy a pre-made heat shield for my grill?Yes, there are plenty of pre-made options available, but making your own can save money and allow customization. How do I know when my heat shield needs replacing?If your heat shield starts to warp, rust, or crack, it’s time to replace it.
Sizzle & Serve: Delicata Squash Grilling Guide – Click Now!
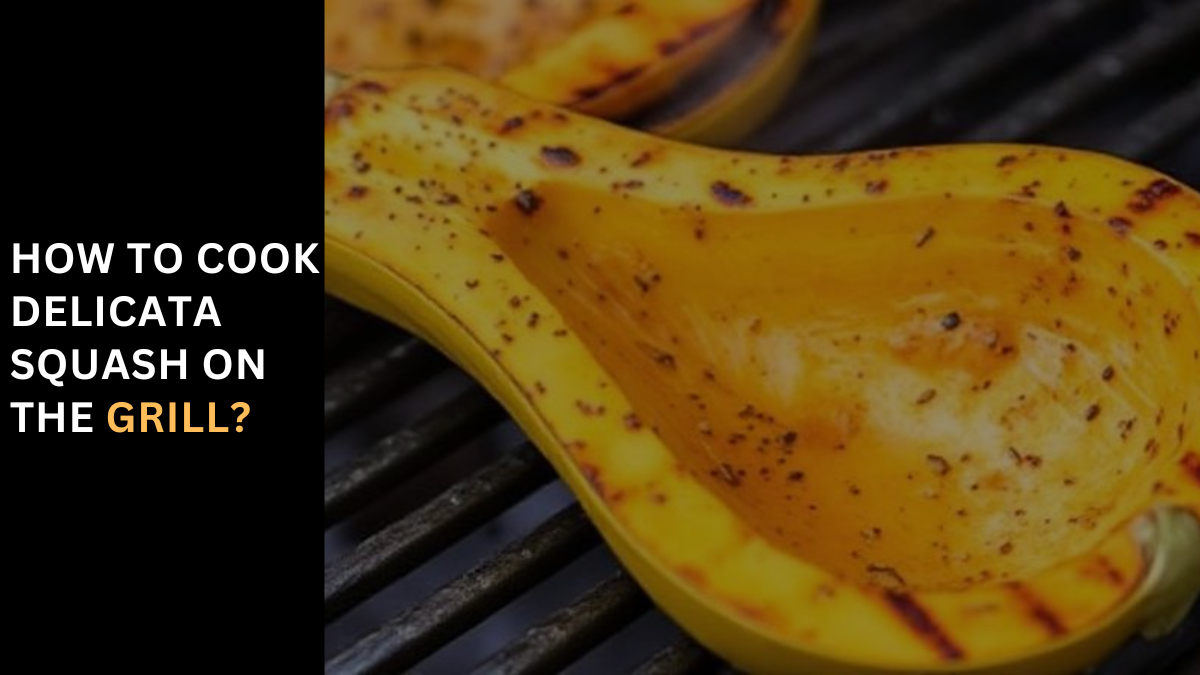
How to Cook Delicata Squash on the Grill? Delicata squash is a seasonal favorite with its sweet, nutty flavor and tender texture. Unlike other winter squash, its skin is thin and edible, making it perfect for grilling. But how do you make sure your grilled delicata squash turns out perfectly every time? In this article, we’ll walk through each step, from preparing the squash to achieving those perfect char marks, so you can enjoy this delicious side dish at your next barbecue. Ingredients Needed for Grilled Delicata Squash To make grilled delicata squash, you’ll only need a few simple ingredients: If you want to add a sweet twist, you can also drizzle the squash with honey or balsamic glaze after grilling. Choosing the Right Delicata Squash When selecting delicata squash, look for squash that are firm with smooth, creamy skin. Avoid any that have soft spots or bruises. The squash should feel heavy for its size, which indicates it’s fresh and full of moisture. Store your squash in a cool, dry place until you’re ready to grill—delicata squash can last for a few weeks when stored properly. Preparing the Delicata Squash for the Grill Start by washing the squash thoroughly since you’ll be eating the skin. Next, cut the squash in half lengthwise, exposing the seeds inside. Scoop out the seeds using a spoon. Once the seeds are removed, slice the squash into ½-inch thick rings or half-moons. This thickness ensures the squash cooks evenly without becoming too soft. Seasoning the Squash To enhance the natural sweetness of delicata squash, toss the slices with a bit of olive oil, salt, and pepper. If you’re feeling adventurous, add garlic powder, smoked paprika, or cumin for a savory twist. For those who enjoy a touch of sweetness, a sprinkle of brown sugar or a drizzle of honey before grilling can caramelize beautifully. Grill Setup: Direct vs. Indirect Heat Grilling delicata squash requires a delicate balance of heat. Using direct heat will give you beautiful grill marks and a slightly crisp texture, but you don’t want to burn the squash. The ideal setup is to preheat your grill to medium heat (about 350-400°F) and use both direct and indirect heat zones. This way, you can start the squash on direct heat for the char marks and then move it to indirect heat to finish cooking without burning. How to Oil the Grill and Squash? Before placing the squash on the grill, brush the grill grates lightly with oil to prevent sticking. You can also lightly brush each piece of squash with oil before placing it on the grill. Olive oil or avocado oil are great choices because they can withstand high heat and impart a subtle flavor. Grill Temperature and Cooking Time Set your grill to medium heat—around 375°F is ideal. Place the delicata squash directly on the grill grates and cook for 3-4 minutes per side. Keep an eye on the squash, as the sugar in it can cause it to caramelize quickly. You want the squash to be tender but still slightly firm to the bite. Flipping the Squash: Timing and Technique When grilling, timing is everything. Flip the squash after 3-4 minutes or once grill marks appear. Use tongs to carefully flip each piece, ensuring even cooking on both sides. If you notice the squash cooking too fast or charring too much, move it to the indirect heat zone to finish. Char Marks: How to Achieve the Perfect Grill Look Achieving perfect grill marks is all about keeping the squash in place until it’s ready to flip. Avoid the temptation to move or press down on the squash while it grills. The more you leave it undisturbed, the more defined your char marks will be. If you want crosshatch grill marks, rotate the squash 45 degrees halfway through cooking on each side. Pairing Grilled Delicata Squash with Other Dishes Grilled delicata squash is a versatile side dish. It pairs wonderfully with grilled meats like chicken, pork chops, or steak, but it also complements vegetarian dishes like quinoa salad or roasted vegetables. The natural sweetness of the squash pairs especially well with savory or acidic flavors, so consider serving it with a tangy dipping sauce or alongside a zesty salad. Adding a Glaze or Finishing Touch Once your delicata squash is off the grill, you can add a finishing touch by drizzling it with honey, balsamic reduction, or even a dash of lemon juice. For added crunch, sprinkle the squash with toasted nuts like almonds or pumpkin seeds. How to Serve Grilled Delicata Squash? For the best presentation, arrange the grilled delicata squash slices on a serving platter and garnish with fresh herbs like thyme or parsley. This dish can be served either hot or at room temperature, making it a flexible side for any meal. Storing Leftover Grilled Squash If you have leftovers, store them in an airtight container in the fridge for up to 3 days. To reheat, avoid the microwave as it can make the squash soggy. Instead, reheat it in a skillet over medium heat or pop it back on the grill for a few minutes. Conclusion Grilled delicata squash is a simple yet flavorful side dish that can elevate any meal. With its tender texture, sweet flavor, and beautiful grill marks, it’s sure to be a hit at your next barbecue or family dinner. Whether you’re serving it with a savory protein or enjoying it on its own, this squash is a delicious way to celebrate the flavors of the season. FAQs Can I grill delicata squash with the skin on? Yes! The skin of delicata squash is thin and edible, so there’s no need to peel it before grilling. How do I prevent the squash from burning on the grill? Grill the squash over medium heat and keep an eye on it. If the squash is cooking too
Grill & Chill: Starbucks-Inspired Grilled Cheese – Click & Enjoy!
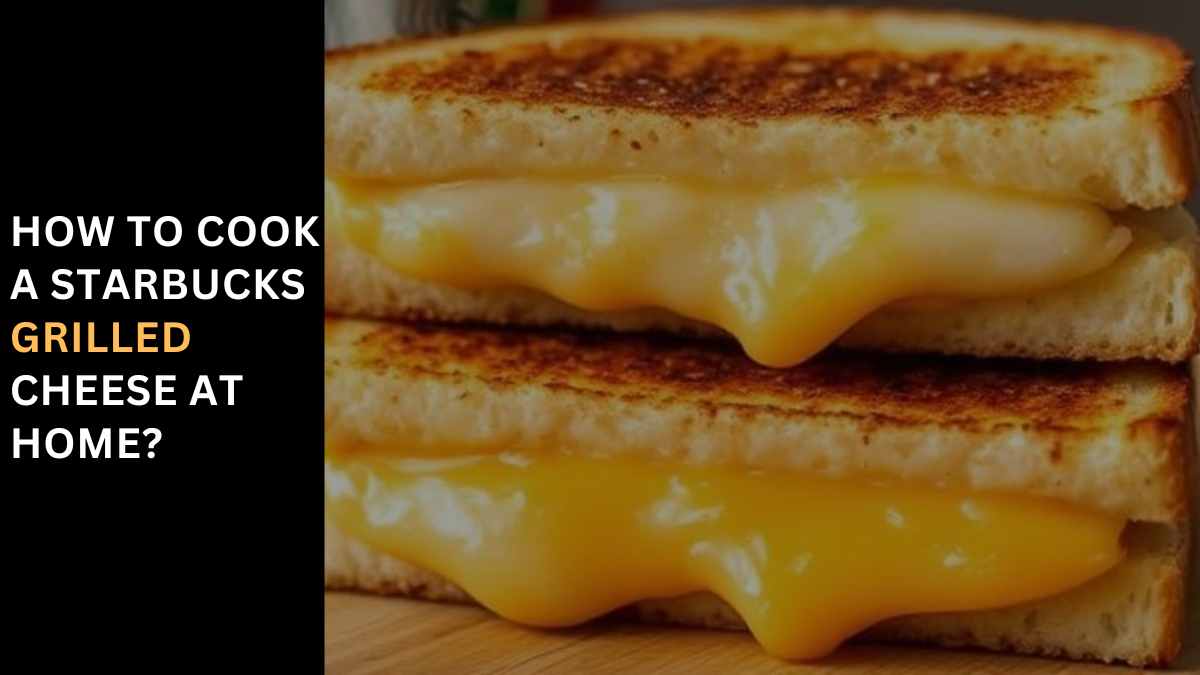
How to Cook a Starbucks Grilled Cheese at Home? The Starbucks grilled cheese sandwich has gained a bit of a cult following. With its crispy sourdough and gooey blend of cheeses, it’s no wonder people crave it regularly. But what if you could make that same delicious grilled cheese right in your kitchen? In this guide, I’ll show you how to replicate the famous Starbucks grilled cheese at home with simple ingredients and techniques. Ingredients You’ll Need To make a grilled cheese that rivals Starbucks, you need just a few basic ingredients: These ingredients can be found at most grocery stores, but be sure to get high-quality bread and cheese for the best results. Choosing the Right Bread The bread you use can make or break your grilled cheese. For the Starbucks version, sourdough is the go-to choice. Why? Because sourdough has a slightly tangy flavor and a sturdy texture that crisps up beautifully without getting soggy. If you can’t find sourdough, ciabatta or a hearty artisan loaf will work well, but sourdough really is the best match. The Cheese Blend Starbucks uses a combination of mozzarella and white cheddar in their grilled cheese. This duo creates the perfect balance of gooeyness and sharp flavor. Mozzarella melts easily and gives that stretchy, gooey texture we all love, while the white cheddar adds a rich, tangy taste. If you want to experiment, you can try adding gruyère or fontina to the mix for an extra layer of flavor. Butter vs. Mayonnaise: Which is Best? One of the biggest grilled cheese debates is whether to use butter or mayonnaise on the bread. Both work well, but they serve slightly different purposes: For a Starbucks-style grilled cheese, either option works great, but if you’re new to grilled cheese making, try using mayonnaise for that perfect crisp. Preparing Your Sandwich Start by assembling your sandwich. Lay one slice of bread down and layer it with mozzarella and white cheddar cheese. If you’re using shredded cheese, be sure to spread it out evenly across the bread to ensure every bite is full of cheesy goodness. Next, top the cheese with the second slice of bread. Lightly spread butter or mayonnaise on the outside of both bread slices. The Ideal Cooking Temperature To achieve the perfect grilled cheese, patience is key. You want to cook your sandwich on medium-low heat. Too high, and you risk burning the bread before the cheese has a chance to melt. A lower temperature allows the bread to crisp up slowly, giving the cheese plenty of time to get gooey without overcooking the exterior. Cooking Time for Each Side Once your pan or griddle is preheated to medium-low, place the sandwich on the heat. Let it cook for 3-4 minutes on each side. You’re looking for a golden-brown crust, so resist the temptation to press down on the sandwich too hard, as this can squeeze out the cheese. Using a Panini Press for Starbucks-Style Grilled Cheese Starbucks uses a panini press to grill their sandwiches, and this helps achieve an even heat distribution. If you have a panini press at home, it’s a great tool to use. Simply preheat the press to medium heat and place the sandwich inside. Cook for about 3-5 minutes, or until both sides are golden and the cheese is fully melted. The Secret to Gooey Cheese To get that perfectly gooey cheese, use shredded cheese instead of slices. Shredded cheese melts more evenly and fills the sandwich better, ensuring every bite is packed with flavor. Another trick? Cover the pan with a lid while the sandwich cooks. This traps heat inside and helps the cheese melt faster without overcooking the bread. Adding a Twist to Your Grilled Cheese If you want to put a unique spin on your grilled cheese, consider adding extra ingredients. Tomato slices, bacon, or even a sprinkle of garlic powder can elevate the flavor. Just be sure not to overstuff the sandwich, as this can make it harder for the cheese to melt evenly. How to Serve Your Grilled Cheese? Once your grilled cheese is done, slice it diagonally for that classic look. Serve it alongside tomato soup, potato chips, or a fresh salad. The contrast between the crispy, cheesy sandwich and a cool or creamy side dish makes for the ultimate comfort meal. Storage and Reheating Tips If you have leftovers (though I doubt you will!), store the grilled cheese in an airtight container in the fridge for up to 2 days. To reheat, avoid using the microwave as it will make the bread soggy. Instead, reheat it in a pan on low heat or pop it in a toaster oven until the cheese is melted and the bread is crispy again. Healthier Alternatives to the Classic Recipe Looking for a lighter version? You can swap out the traditional sourdough for whole wheat bread or even use gluten-free bread if needed. For a vegan option, use plant-based cheeses like Daiya or Violife, and spread the bread with vegan butter or olive oil. Conclusion Making a Starbucks-style grilled cheese at home is easy, and with the right ingredients and techniques, you can enjoy this delicious sandwich anytime. From choosing the best bread to perfecting the melt, these simple steps will have you serving up a restaurant-quality grilled cheese in no time! FAQs What kind of bread does Starbucks use for grilled cheese? Starbucks uses sourdough bread for its grilled cheese, which gives it a crispy texture and tangy flavor. Can I use non-dairy cheese for this recipe? Yes! Non-dairy cheeses like Daiya or Violife melt well and make a great vegan alternative. How can I make the grilled cheese crispier? Use mayonnaise on the outside of the bread instead of butter for a crisper crust, and cook it slowly over medium-low heat. What’s the best way to prevent burning the grilled cheese? Keep the heat low and be patient. Cooking over medium-low heat allows the bread to crisp up without burning
Grill & Chill: 400 – Degree Steak Magic – Click to Cook Now!
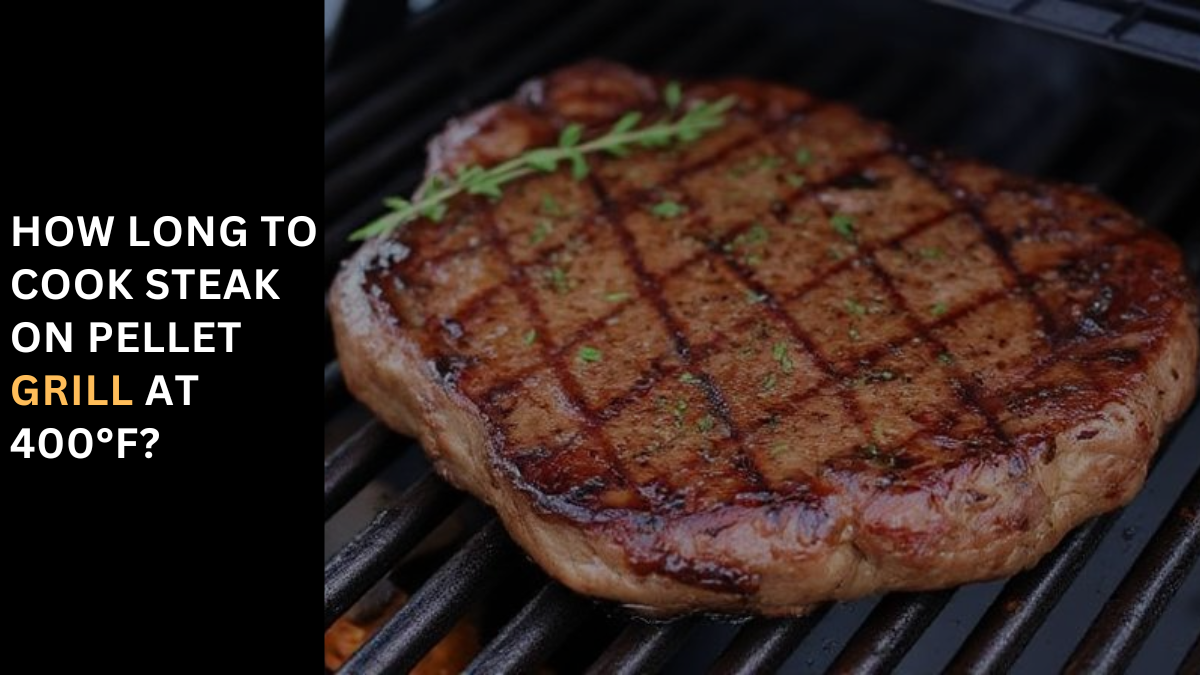
How Long to Cook Steak on Pellet Grill at 400°F? Cooking steak on a pellet grill is a fantastic way to combine convenience with the delicious, smoky flavors only this type of grill can provide. Whether you’re an experienced grill master or new to pellet grilling, knowing how long to cook steak at 400°F is crucial for achieving the perfect balance between a crispy crust and a juicy, tender interior. Let’s dive into everything you need to know to cook a mouth-watering steak at 400°F on a pellet grill. What is a Pellet Grill? A pellet grill operates by burning small, compressed wood pellets as fuel. These grills are known for their versatility and ability to maintain a steady temperature, making them ideal for both grilling and smoking. Pellet grills allow for even heat distribution, which helps in cooking steak evenly from edge to center. Advantages of Using a Pellet Grill for Steak Understanding Steak Doneness Levels Before you start cooking, it’s essential to understand the different levels of doneness for steak: Why Cook Steak at 400°F? Cooking steak at 400°F provides the ideal balance between a well-seared exterior and a tender interior. The high heat creates a crispy crust while locking in the steak’s juices. This temperature is perfect for achieving steak doneness in a relatively short time without drying it out. Preparing Your Steak for the Pellet Grill To get the best results, start by selecting the right cut of steak. Ribeye, filet mignon, and New York strip are all excellent choices. Once you’ve chosen your steak, season it generously with salt, pepper, and other preferred spices. Some prefer to marinate their steak, but simple seasoning often works best on a pellet grill. How to Preheat Your Pellet Grill to 400°F? Preheat your pellet grill by setting the temperature to 400°F. It’s essential to let the grill come up to temperature before placing the steak on the grill. Depending on your grill, it might take 10-15 minutes to reach this temperature. How Long to Cook Steak on a Pellet Grill at 400°F? The cooking time for steak on a pellet grill at 400°F depends on the thickness of the steak and your preferred doneness level. Here’s a general guide: Keep in mind that these times are estimates and can vary based on your grill and the cut of the steak. Using a Meat Thermometer for Perfect Results For the most accurate results, use a meat thermometer to check the internal temperature of your steak. Insert the thermometer into the thickest part of the steak. This ensures you hit the perfect doneness without cutting into the meat and losing precious juices. Cooking Steak on Pellet Grill: Step-by-Step Guide Reverse Searing Your Steak Reverse searing is a method where the steak is cooked at a lower temperature first, then finished with a high-heat sear. This technique is excellent for achieving a uniform doneness and a crispy crust. Tips for Adding Flavor While Cooking Using different wood pellets can enhance the flavor of your steak. For example, hickory pellets give a bold flavor, while fruitwood pellets like apple or cherry provide a sweeter taste. You can also add a pat of butter and herbs like rosemary or thyme during the final minutes of cooking to enhance the flavor. Common Mistakes to Avoid When Cooking Steak on a Pellet Grill How to Rest Your Steak After Cooking? After removing your steak from the grill, allow it to rest for 5-10 minutes. This process lets the juices settle and prevents them from running out when you cut into the steak. How to Serve Your Steak? For the best presentation and tenderness, slice the steak against the grain. Serve with sides like grilled vegetables, baked potatoes, or a fresh salad. Conclusion Cooking steak on a pellet grill at 400°F is a quick and flavorful way to achieve a perfectly cooked steak. By understanding the proper cooking times and techniques, you can enjoy restaurant-quality steak at home. Don’t forget to use a meat thermometer and rest your steak for the best results! FAQs How do I know when my steak is done without a thermometer? You can use the touch test: press your finger against the steak and compare it to the firmness of different parts of your hand (palm for rare, thumb pad for well-done). Can I cook frozen steak on a pellet grill? It’s best to thaw the steak first for even cooking, but you can cook it frozen, adjusting the cooking time. What type of pellets should I use for steak? Hickory and mesquite are popular choices for bold flavors, while applewood and cherrywood offer a sweeter, milder taste. How often should I flip the steak on a pellet grill? Flip the steak once halfway through the cooking time to ensure even searing. Can I use the pellet grill to smoke the steak before grilling? Yes, you can smoke the steak at a lower temperature before searing it at 400°F for extra smoky flavor
Flavor Explosion: Grill Your Dove to Perfection – Taste & Share!
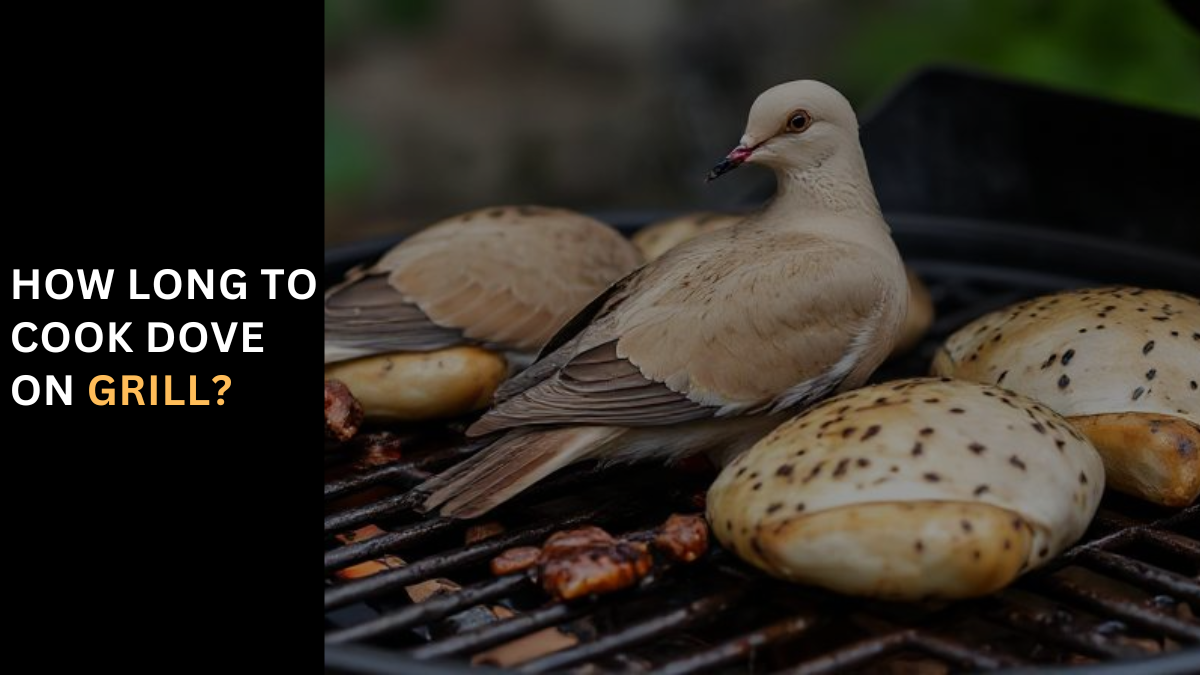
How Long to Cook Dove on Grill? Introduction Dove hunting has a rich tradition in many cultures, particularly in North America, where mourning doves are prevalent. Once you’ve successfully hunted or sourced these birds, the next step is preparing them for a delicious meal. Grilling is one of the best ways to cook dove, as it enhances the natural flavors of the meat while adding a lovely smokiness. In this article, we’ll explore how to grill dove perfectly, focusing on cooking times, preparation methods, and tips to elevate your dish. Understanding Dove Meat Nutritional Benefits of Dove Dove meat is not just flavorful; it’s also a healthy choice. It’s low in fat and high in protein, making it a great option for those looking to maintain a balanced diet. A 3-ounce serving of dove meat contains approximately 23 grams of protein and only 2 grams of fat, which is significantly lower than many other meats. Additionally, the dove is rich in essential nutrients like B vitamins and iron, contributing to overall health and well-being. Flavor Profile of Dove Dove meat has a unique taste that can be described as mild and gamey. Its flavor is often compared to dark meat chicken but with a richer, slightly nuttier profile. The tender texture of the dove makes it perfect for grilling, allowing the natural flavors to shine through without overpowering seasonings. This versatility means the dove can be paired with various marinades and spices, enhancing its delicious taste. Preparing Dove for the Grill Cleaning and Plucking Before grilling dove, it’s essential to clean and prepare the birds properly. Start by plucking the feathers, which can be done by hand or with the help of plucking equipment if you have access to it. Once the feathers are removed, rinse the birds under cold water and remove any remaining innards. Make sure to pat them dry with paper towels to ensure a good sear on the grill. Clean and disinfect any surfaces and tools used during this process to maintain food safety. Marinating Dove Marinating dove not only infuses it with flavor but also helps to tenderize the meat. You can marinate dove in various mixtures, such as olive oil, balsamic vinegar, garlic, and herbs like rosemary or thyme. A simple marinade could consist of: Let the dove marinate for at least 30 minutes to an hour before grilling, but for best results, consider marinating them overnight in the refrigerator. This not only enhances flavor but also contributes to the moistness of the meat. Setting Up the Grill Choosing the Right Grill You can use various types of grills to cook dove, including gas, charcoal, or even electric grills like a George Foreman. Charcoal grills add a unique smoky flavor, while gas grills offer convenience and ease of use. Whichever type you choose, ensure that it can reach a high enough temperature to sear the meat and cook it evenly. Preheating the Grill Before you start grilling, preheating the grill is vital for achieving the best results. Preheat your grill to medium-high heat (around 375°F to 400°F). This temperature allows for a quick sear on the outside while keeping the inside juicy. A properly preheated grill reduces sticking and ensures even cooking. Cooking Dove on the Grill Cooking Times for Dove The cooking time for dove varies based on its size and whether you’re cooking it whole or in parts. As a general guideline: Because dove is lean, you want to avoid overcooking it. The goal is to achieve a slightly pink center while ensuring that the meat is fully cooked through. How to Check for Doneness? The best way to ensure your dove is cooked perfectly is by checking its internal temperature. Use a meat thermometer to check the thickest part of the breast; it should read 160°F for safe consumption. If you don’t have a thermometer, you can also check for doneness by slicing into the meat; it should be opaque and juices should run clear. Tips for Perfectly Grilled Dove Avoiding Common Mistakes One common mistake when grilling dove is cooking it too quickly over high heat. While you want a nice sear, grilling too fast can cause the outside to char while leaving the inside undercooked. Instead, opt for medium-high heat and allow the meat to cook evenly. Another mistake is forgetting to let the dove rest after grilling. Resting allows the juices to redistribute throughout the meat, ensuring each bite is moist and flavorful. Aim to let the dove rest for about 5 minutes after removing it from the grill. Flavor Enhancements Experiment with various seasonings and sauces to elevate your dove dishes. Consider adding a sweet glaze or a spicy rub to enhance the flavor profile. A popular choice is a honey and mustard glaze, which can add a nice contrast to the gamey taste of the dove. Simply mix together equal parts honey and Dijon mustard and brush it on during the last few minutes of cooking for a delightful caramelized finish. Serving Suggestions Pairing Dove with Side Dishes When it comes to serving grilled dove, consider pairing it with light and fresh sides. Options like roasted vegetables, a simple green salad, or wild rice complement the rich flavors of the dove beautifully. If you’re feeling adventurous, try serving it with a fruit salsa, such as mango or pineapple, to add a refreshing twist. Presentation Ideas The presentation can elevate your dove dish from simple to spectacular. Consider serving dove on a wooden cutting board, garnished with fresh herbs or citrus slices. Drizzling a flavorful sauce over the meat or serving it with a colorful side can also enhance visual appeal. Remember, we eat with our eyes first! Conclusion Grilling dove can be a rewarding experience, allowing you to savor the unique flavors of this game bird. With proper preparation, attention to cooking times, and a little creativity with flavors, you can create a delicious meal that’s sure to impress your guests. So, fire up that
Juicy Turkey Burgers – George Foreman Grill Tips
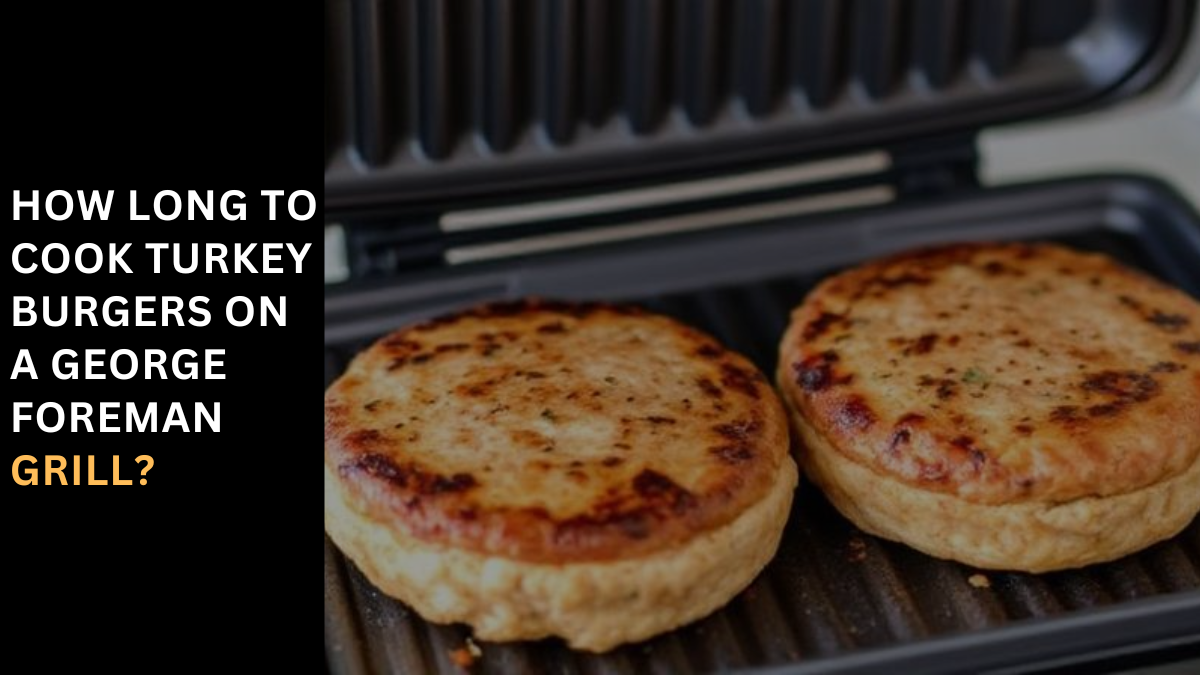
How Long to Cook Turkey Burgers on a George Foreman Grill? Introduction Turkey burgers have become a popular alternative to beef burgers for those looking to enjoy a healthier meal without sacrificing flavor. They’re lean, packed with protein, and provide a lighter option compared to their beef counterparts. However, the challenge with turkey burgers is getting the cooking time just right so they stay juicy and tender. This is where the George Foreman Grill comes in handy. The George Foreman Grill, famous for its ability to cook both sides of the burger simultaneously, significantly reduces cooking time and helps retain moisture. But how long do you need to cook turkey burgers on a George Foreman Grill? And what are the essential tips for making sure they turn out perfect every time? In this guide, we’ll explore these questions and much more! What You Need to Know About Turkey Burgers? Nutritional Benefits of Turkey Burgers Turkey burgers offer a variety of health benefits. They are generally lower in fat and calories than traditional beef burgers, making them a great choice for anyone watching their intake. A 4-ounce turkey burger patty contains approximately 150 calories, 7 grams of fat, and 22 grams of protein. It’s also rich in vitamins and minerals, such as vitamin B6, niacin, and selenium, all of which contribute to a healthy diet. How do Turkey Burgers Differ from Beef Burgers? Unlike beef, turkey has a lower fat content, which means it’s easier to overcook and dry out. Beef burgers are more forgiving because the fat helps keep the meat moist. Turkey burgers require careful cooking to avoid becoming too dry or rubbery. However, with the right preparation and cooking techniques, turkey burgers can be just as juicy and flavorful as any beef burger. Common Mistakes When Cooking Turkey Burgers One common mistake when cooking turkey burgers is not seasoning them enough. Turkey has a mild flavor that benefits from bold seasonings, so don’t be afraid to get creative with your spice mix. Another mistake is cooking the burgers at too high of a temperature, which can cause them to dry out. Turkey burgers need to be cooked through to a safe internal temperature without burning the outside. Preparing Your Turkey Burgers for the Grill Choosing the Right Ground Turkey When buying ground turkey, you’ll usually have the option of choosing between lean and extra-lean varieties. Lean ground turkey, which typically contains around 85% lean meat and 15% fat, is the best choice for burgers because the extra fat helps keep the patty moist during cooking. Extra-lean ground turkey, which is 99% fat-free, can lead to drier burgers unless additional ingredients are added to improve moisture. Forming the Perfect Patty When forming turkey burger patties, aim for about a 1/2-inch thickness. This ensures that the patty will cook through without drying out. Be sure to make a slight indentation in the center of each patty. This helps prevent the burger from puffing up in the middle as it cooks, leading to more even cooking throughout the patty. Seasoning Ideas for Turkey Burgers Turkey burgers benefit from bold seasoning, so feel free to experiment with different spice blends. Classic seasonings like salt, pepper, garlic powder, and onion powder work well, but you can also add in some herbs like parsley or thyme for extra flavor. If you want to take it up a notch, try mixing in Worcestershire sauce, Dijon mustard, or even chopped vegetables like onions or peppers for added texture and flavor. Preheating and Setting Up the George Foreman Grill Why Preheating Is Essential Just like any other grill, preheating your George Foreman Grill is crucial. A well-preheated grill ensures that your turkey burgers cook evenly and develop a nice sear on the outside. It also reduces the chances of sticking. Preheat your grill for at least 5 minutes before placing your burgers on the grill plates. Cleaning and Oiling the Grill Plates To prevent the turkey burgers from sticking, it’s a good idea to lightly oil the grill plates before placing the patties on them. You can use a paper towel dipped in oil or a non-stick spray. This will also make cleaning up afterward much easier. Be sure to give your grill a quick wipe-down before heating if you’ve used it for other types of food previously. How Long to Cook Turkey Burgers on a George Foreman Grill? Factors That Affect Cooking Time Several factors influence the cooking time of turkey burgers on a George Foreman Grill. These include the thickness of your patties, whether you’re cooking from fresh or frozen, and the temperature of your grill. On average, turkey burgers should take around 4 to 6 minutes to cook on a George Foreman Grill, but this can vary based on your specific setup. Conclusion: Cooking turkey burgers on a George Foreman grill typically takes about 4 to 6 minutes, depending on the thickness of the patties. Since the grill cooks from both sides simultaneously, turkey burgers cook faster than on a traditional grill. Ensure the internal temperature of the patties reaches 165°F to guarantee they’re fully cooked and safe to eat. For best results, preheat the grill for 5 minutes, then place the turkey burgers on the grill plates. Close the lid and allow them to cook evenly. Avoid pressing the burgers to retain their moisture, and check for doneness by using a meat thermometer before serving. This method ensures quick, juicy, and perfectly grilled turkey burgers.
Grill & Chill – Riblets Ready in Record Time!
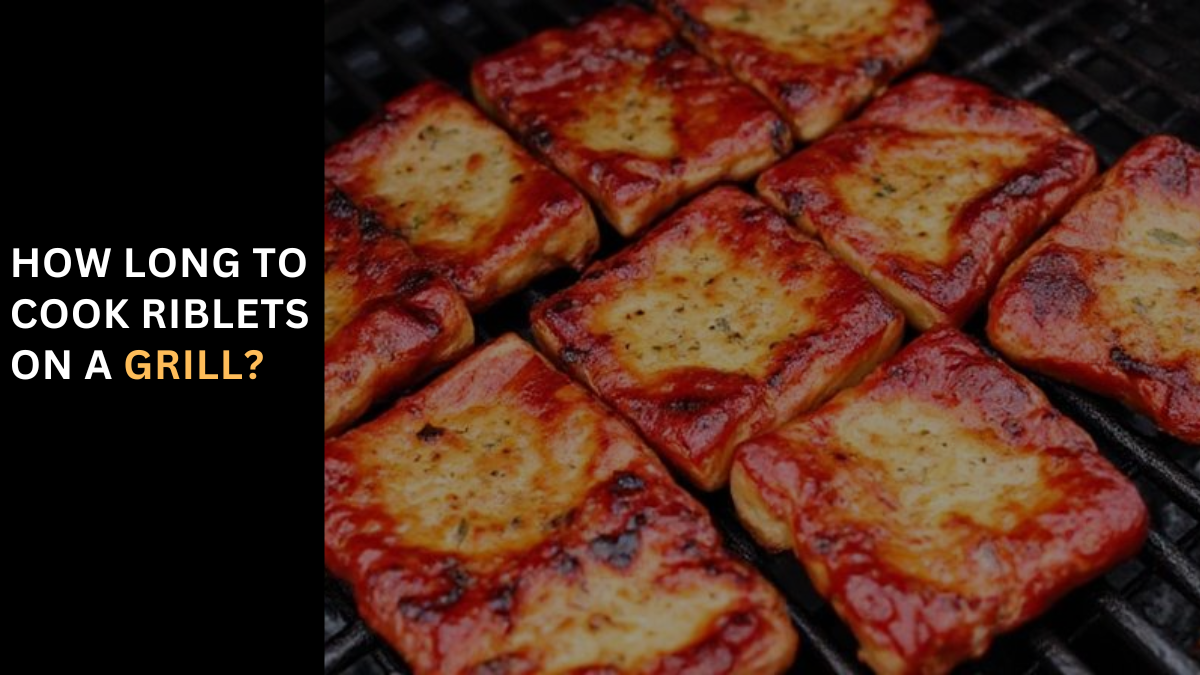
How Long to Cook Riblets on a Grill? Introduction Grilling riblets is a fantastic way to enjoy the rich, smoky flavors of BBQ without the lengthy cook times associated with full racks of ribs. Riblets are a smaller, more manageable cut that cooks faster while still delivering that tender, fall-off-the-bone texture that BBQ lovers crave. However, the key to perfect riblets lies in understanding how long to cook them on the grill. Whether you’re cooking pork or beef riblets, grilling them to perfection requires a balance of time, temperature, and technique. This guide will provide everything you need to know to master grilling riblets, from preparation to serving. What Are Riblets? The Definition of Riblets Riblets are essentially a trimmed-down version of ribs. They’re typically smaller pieces of pork or beef rib sections that have been cut down for easier handling and quicker cooking. Riblets are often sold as individual pieces, unlike full racks of ribs, making them a convenient and fast option for grilling. Difference Between Riblets and Traditional Ribs While traditional ribs come from larger, intact sections of the rib cage, riblets are cut into smaller, more bite-sized pieces. This makes them quicker to cook, which is ideal for grilling. Riblets also have a higher ratio of meat to bone, making them more tender when cooked properly. Why Grill Riblets? Flavor Benefits of Grilling Riblets Riblets absorb smoke and seasonings beautifully, allowing them to develop deep, robust flavors when grilled. The high surface area to meat ratio makes riblets perfect for caramelization and for soaking up delicious sauces and rubs. Riblets vs. Ribs: Why Riblets Are Faster to Grill One of the main advantages of grilling riblets is that they cook faster than traditional ribs due to their smaller size. This makes them an excellent choice for weeknight dinners or impromptu BBQs when you don’t have the time to spend hours smoking ribs. Preparing Riblets for the Grill Choosing the Right Riblets When grilling riblets, choosing the right cut is crucial to achieving the best results. You can choose between pork and beef riblets, depending on your preference. Trimming and Prepping Riblets Before grilling, it’s important to trim any excess fat or silver skin from the riblets. While some fat is good for flavor, too much can lead to flare-ups on the grill. Removing the silver skin (a tough membrane on the underside) will also allow the riblets to cook more evenly and absorb seasoning better. Marinating or Dry-Rubbing for Flavor Once your riblets are trimmed, you can either marinate them or apply a dry rub for added flavor. Marinating the riblets for a few hours (or overnight) will infuse them with moisture and seasonings, while a dry rub will help create a flavorful crust when grilled. The Best Grilling Methods for Riblets Direct vs. Indirect Grilling When grilling riblets, you can choose between direct grilling and indirect grilling, depending on the texture and flavor you want to achieve. Low and Slow Cooking For the best results, riblets should be cooked low and slow. This means using a lower temperature and allowing the riblets to cook for a longer period. The low heat breaks down the connective tissues, making the riblets tender while the slow cooking ensures that the flavors develop fully. How Long to Cook Riblets on the Grill? Cooking Time for Beef Riblets Beef riblets, being denser, require a slightly longer cooking time. You can expect beef riblets to take around 2 to 2.5 hours at the same low temperature of 250°F to 275°F. Beef riblets should be monitored closely for doneness as overcooking can cause them to dry out. Grilling Temperature Guide for Riblets Ideal Grill Temperature for Riblets For riblets, the ideal grilling temperature is between 250°F to 275°F. Cooking at this low temperature allows the meat to become tender without drying out. If you’re looking for a crispier exterior, you can increase the temperature slightly towards the end of cooking for a final sear. Conclusion: Cooking riblets on the grill typically takes about 1.5 to 2 hours, depending on the heat and method used. For best results, use indirect heat by placing the riblets away from direct flames. Start by grilling them at a low temperature of around 250-275°F to ensure they cook slowly and evenly, allowing the meat to become tender. During this process, flip the riblets occasionally and bake them with sauce or marinade to enhance flavor and moisture. For a final sear, move the riblets directly over high heat for the last 5-10 minutes, creating a nice char and caramelization. Check for doneness by ensuring the internal temperature reaches 190-200°F, or when the meat pulls easily from the bone. Let the riblets rest for a few minutes before serving to lock in the juices. This method results in tender, flavorful riblets perfect for a barbecue.