

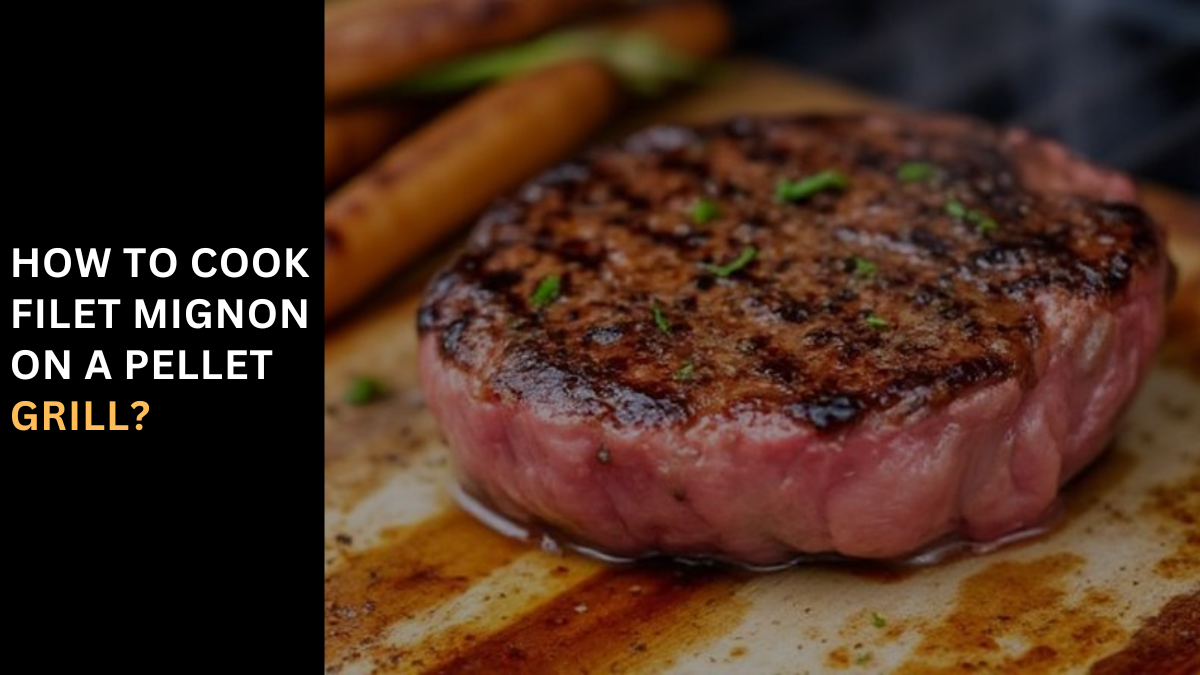
How to Cook Filet Mignon on a Pellet Grill? Introduction Cooking filet mignon on a pellet grill is one of the best ways to achieve a mouth-watering steak that melts in your mouth. The smoky flavor from the pellets combined with the tender, buttery texture of filet mignon makes for an unforgettable dining experience. In this guide, we’ll walk you through every step to make sure your filet mignon turns out perfectly cooked, juicy, and full of flavor. Let’s dive into why the combination of a filet mignon and a pellet grill is a match made in grilling heaven and how to achieve restaurant-quality results at home! What is Filet Mignon? Definition and Cut of Filet Mignon Filet mignon comes from the smaller end of the tenderloin, which is located near the spine of the cow. This cut is renowned for its tenderness since it’s a muscle that does very little work. Filet mignon is usually lean, with very little fat or connective tissue, resulting in a soft, melt-in-your-mouth texture when cooked correctly. Why It’s Considered One of the Best Cuts of Beef Thanks to its unparalleled tenderness, filet mignon is often considered the “king of steaks.” While it may lack some of the marbling found in cuts like ribeye, the buttery softness more than makes up for it, especially when paired with a pellet grill’s smoky flavor infusion. Why Use a Pellet Grill for Filet Mignon? How a Pellet Grill Works? Pellet grills use small, compressed wood pellets made from hardwood to create heat and smoke. The grill uses an auger to feed pellets into a firebox, where they burn and produce both heat and smoke. The fan circulates the smoke and heat evenly around the grill, creating a perfect convection environment for cooking meat. Benefits of Grilling Filet Mignon on a Pellet Grill Preparing Filet Mignon for the Pellet Grill Choosing the Right Filet Mignon Look for filet mignon cuts that are bright red with little to no discoloration. The best cuts will have some marbling (thin streaks of fat) which adds to the flavor. Opt for USDA Prime or Choice grade for the highest quality. Trimming and Seasoning the Filet Before grilling, trim any excess fat from the edges of the filet. Although filet mignon is naturally lean, some cuts may have a fat cap that you’ll want to remove for even cooking. Season the meat generously with salt and pepper or add your preferred steak rub for extra flavor. Setting Up Your Pellet Grill Choosing the Right Pellets When grilling filet mignon, the type of wood pellets you choose matters. Some of the best flavors include: Preheating the Pellet Grill Set your pellet grill to around 225°F and allow it to preheat for about 10-15 minutes. Proper preheating ensures your grill reaches an even temperature, which is crucial for cooking filet mignon evenly. Cooking Filet Mignon on a Pellet Gril Reverse Searing Method The reverse sear method is ideal for cooking filet mignon on a pellet grill. Here’s how it works: Direct Grilling Method If you’re short on time, you can grill the filet directly at a higher temperature (around 375°F). Cook for about 5-7 minutes on each side, depending on thickness. However, this method may not provide the same depth of flavor as reverse searing. Cooking Time and Temperature for Filet Mignon Understanding Internal Temperatures To get the perfect filet mignon, you need to focus on internal temperature rather than just time. Here’s a quick guide: Recommended Cooking Times For a 1.5-inch thick filet mignon, follow these general time guidelines: Achieving the Perfect Sear Searing on a Pellet Grill To get a great crust on your filet mignon, ensure your grill is hot (at least 450°F) when you start searing. For extra flavor, you can also use cast iron grates or place a cast iron skillet directly on the grill. Resting the Filet Mignon Resting your filet mignon is essential to lock in the juices. When you cook steak, the juices are pushed towards the center. Resting allows the juices to redistribute throughout the meat, ensuring a tender and juicy bite. Conclusion: Cooking filet mignon on a pellet grill combines the precision of wood-fired smoking with a rich, tender cut of beef. By preheating the grill to a moderate temperature and using a reverse-sear method, you can achieve a perfect balance of smoky flavor and a juicy, tender interior. Start by seasoning the filet mignon with your favorite spices, then slowly cook it at a lower temperature (around 225°F) until the internal temperature reaches about 10-15°F below your desired doneness. Afterward, increase the heat to 450°F or higher to quickly sear both sides, creating a flavorful crust. For the best results, always use a meat thermometer to ensure accuracy in reaching your desired level of doneness, whether it’s medium-rare or well-done. Let the filet mignon rest for a few minutes before serving, which allows the juices to redistribute, enhancing the flavor and tenderness. With this method, the pellet grill delivers a consistently flavorful, restaurant-quality filet mignon every time.
Grill & Thrill – Hotdogs Ready on Foreman in No Time!
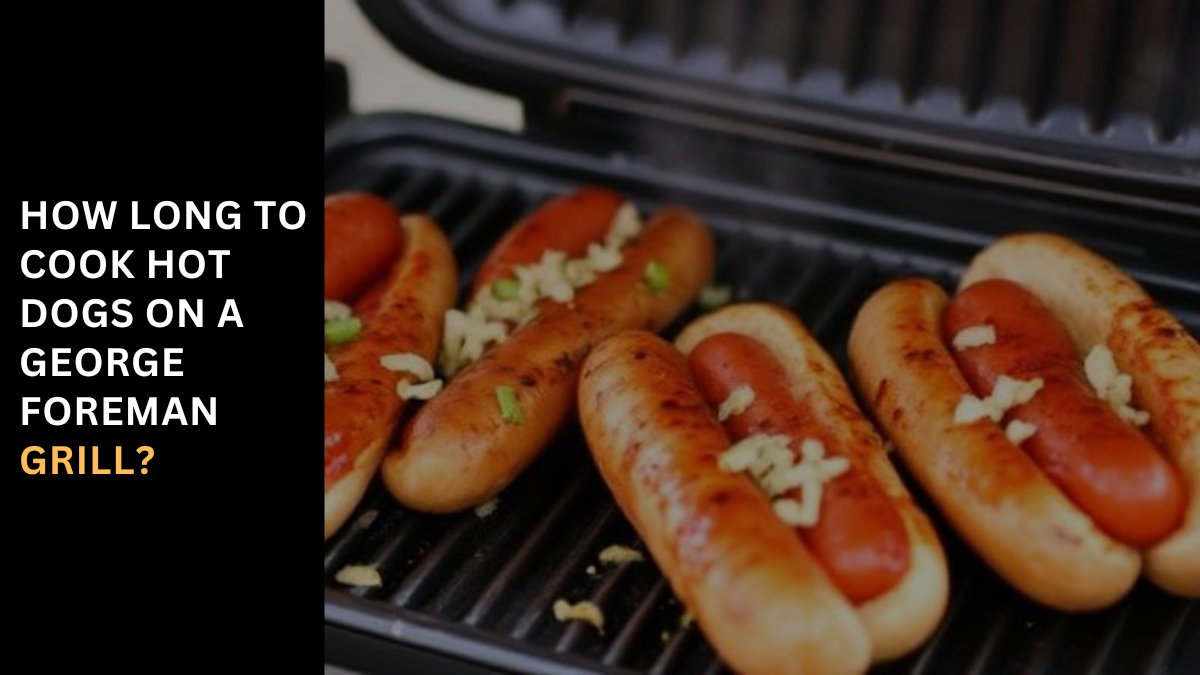
How Long to Cook Hot Dogs on a George Foreman Grill? Cooking hot dogs on a George Foreman grill is a quick and efficient way to prepare a delicious meal or snack. This popular indoor grill allows you to achieve that perfect char and smoky flavor associated with grilling without the hassle of traditional outdoor grills. If you’re new to using a George Foreman grill or simply want to know the best way to cook hot dogs, this comprehensive guide will walk you through everything you need to know, including cooking times, techniques, and tips for the best results. Understanding the George Foreman Grill Before we delve into the specifics of cooking hot dogs, it’s essential to understand the George Foreman grill’s design and functionality. The George Foreman grill is an electric grill featuring two non-stick grilling surfaces that cook food from both the top and bottom simultaneously. This design not only cooks food faster but also helps reduce fat by allowing grease to drip away during cooking. The grill comes in various sizes and styles, from compact models perfect for single servings to larger versions suitable for families. Regardless of the model you have, the basic principles for cooking hot dogs remain the same. Preparing Hot Dogs for Grilling Before you start cooking, it’s essential to prepare your hot dogs properly. Here are some steps to ensure the best results: 1. Choosing the Right Hot Dogs Start by selecting the type of hot dogs you want to grill. There are many varieties available, including: Choosing high-quality hot dogs can significantly impact the final taste of your dish. 2. Thawing Frozen Hot Dogs If your hot dogs are frozen, it’s essential to thaw them before grilling. The best way to thaw hot dogs is to place them in the refrigerator for several hours or overnight. If you’re in a hurry, you can also run them under cold water for about 30 minutes. 3. Prepping the Grill Before grilling, it’s a good idea to preheat your George Foreman grill for about 5 minutes. This ensures that the grill is hot enough to create a good sear on your hot dogs. If your grill has a light indicating when it’s ready, wait for that light to turn off. 4. Optional: Preparing the Hot Dogs While hot dogs can be cooked straight from the package, consider the following optional preparation steps for enhanced flavor: Cooking Time for Hot Dogs The cooking time for hot dogs on a George Foreman grill can vary based on several factors, including the type of hot dog, the size, and how many you’re cooking at once. However, the general cooking time for standard-sized hot dogs is as follows: 1. Standard Cooking Time 2. Factors Influencing Cooking Time 3. Cooking Multiple Hot Dogs If you’re cooking multiple hot dogs, the cooking time will generally remain the same, but you may need to check for doneness a minute or two earlier, especially if they’re packed closely together. Avoid overcrowding the grill, as this can lead to uneven cooking. Checking for Doneness To ensure your hot dogs are cooked to perfection, it’s important to check for doneness. The USDA recommends cooking hot dogs to an internal temperature of 165°F (74°C). You can check the temperature by inserting a meat thermometer into the thickest part of the hot dog. If you don’t have a thermometer, you can also look for visual cues: Serving Hot Dogs Once your hot dogs are cooked to perfection, it’s time to serve them! Here are some popular serving ideas and toppings: 1. Classic Toppings 2. Gourmet Toppings For a more adventurous take, consider these gourmet toppings: 3. Unique Serving Ideas Cleaning and Maintaining Your George Foreman Grill After enjoying your delicious hot dogs, it’s important to clean and maintain your George Foreman grill for future use. Here are some tips: 1. Allow the Grill to Cool Before cleaning, allow the grill to cool down for a few minutes. This will make handling it safer and prevent burns. 2. Wipe Down the Grill Plates Using a damp cloth or sponge, wipe down the non-stick grill plates to remove any food residue. If there are stubborn bits stuck on, consider using a soft brush or non-abrasive sponge. 3. Cleaning the Drip Tray Remove the drip tray and wash it with warm, soapy water. Make sure to rinse and dry it thoroughly before reassembling. 4. Regular Maintenance To keep your grill in good condition, consider the following maintenance tips: Tips for Cooking Hot Dogs on a George Foreman Grill Here are some additional tips to ensure your hot dogs turn out perfectly every time: Conclusion Cooking hot dogs on a George Foreman grill is straightforward and enjoyable. With the right preparation and cooking techniques, you can create delicious, perfectly cooked hot dogs in just a few minutes. Whether preparing a quick snack for yourself or hosting a gathering with friends, this method ensures that everyone can enjoy a tasty treat. Experiment with different hot dogs and toppings to make each grilling experience unique and delicious. With these tips and guidelines, you’ll become a hot dog grilling pro in no time! Enjoy your grilling and happy eating!
Get the Smoky Edge – Master Meat at 175 Today
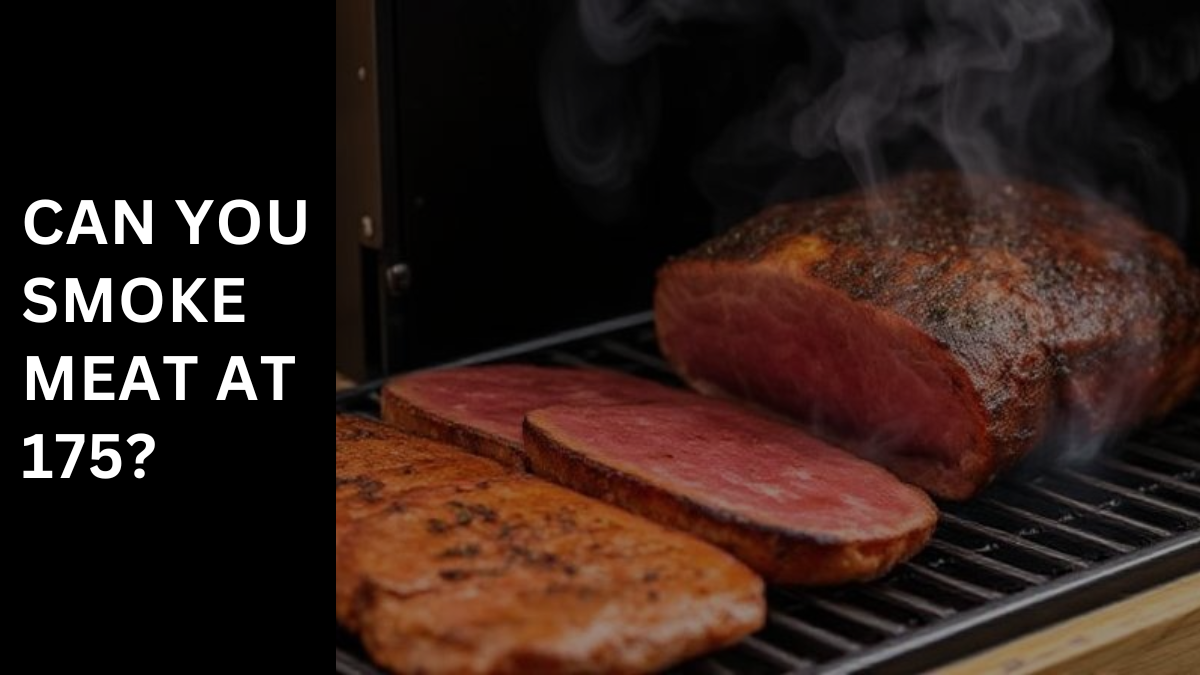
Can You Smoke Meat at 175? Why Is the Smoking Temperature Important? Embarking on the timeless journey of open-fire cooking, the temperature of your smoker acts as a compass, guiding the flavors and textures of your meat to perfection. When smoking at 175 degrees, it is crucial to maintain a meticulous balance to awaken the potential of the meat without sacrificing its intrinsic juiciness or flavor. Temperature not only transcends basic cooking metrics; it is an essential element in revealing the essence of the meat, ensuring each cut is cooked to perfection. This approach minimizes health concerns, maintaining a subdued yet effective heat to bring out the best in each meal. Smoking Times & Temperature Chart Navigating through the smoking times and temperatures for various types of meat can feel like diving deeper into a culinary alchemy. For instance, achieving that tender, fall-off-the-bone texture at 175 degrees can be challenging yet rewarding. It requires not just the right duration but also the choice of firewood—a missing link in many smoking recipes that can elevate a simple dish to a culinary masterpiece. Each meat, whether it’s robust red meats or delicate poultry, has its ideal smoking time and temperature that when meticulously cared for, results in an enticing, aromatic, and delectable dish. What Are the Ideal Smoking Temperatures for Different Types of Meat? In mastering the nuanced art of smoking meats, understanding the ideal temperature is critical. This knowledge is rooted in ancestral traditions of open-fire cooking, where each type of meat has its own temperature range that best enhances its flavors and ensures a succulent finish. Turkey For turkey, a bird with a rich and distinct flavor profile, the perfect smoking temperature falls between 225°F and 250°F. Maintaining this range is crucial for maximizing the inherent flavors and preserving juiciness. The whole turkey, due to its mass, requires a uniform cooking approach to unlock its full aromatic potential. Both breasts and thighs should reach an internal temperature that ensures safety and maintains texture. Chicken Chicken, versatile and universally loved, demands slightly elevated temperatures for optimal flavor infusion. A whole chicken should ideally be smoked between 250°F and 275°F. This ensures the internal finish meets USDA safety levels, while the longer cooking periods at lower temperatures help to preserve moisture, making the chicken juicy and enhancing its deeper flavors. Beef In the realm of smoking meat, the artistry involved in handling beef, meat revered for its robust character and versatility, shines particularly brightly. For cuts like brisket, achieving the perfect internal finish—a medium-rare juicy texture—demands precise temperature settings. Smoking this cut at around 225°F to 250°F allows the meat to slowly assimilate the smoky essence, deepening its natural richness. The prime rib and tri-tip, known for their marbling and unique textures, follow suit, with temperatures that may elevate slightly higher to capture their finest flavors. Each steak, from rare to well-done, must be treated as a culinary masterpiece, requiring meticulous attention to temperature to respect the transformative quality of smoke and the intricate dance of aromas that brings us closer to our deep-rooted culinary traditions. This smoking process not only preserves ancestral art but enhances the glowing warmth and flavorful zenith that make beef a staple at any fire-lit gathering. Smoking Chart Meat Type Cut Temperature Smoking Time Target Internal Temp Turkey Whole 225°F 3-4 hours 165°F Leg 225°F 3-3.5 hours 165°F Breast 225°F 1.5-2 hours 165°F Chicken Whole 225°F 4-5 hours 165°F Thighs 225°F 1.5-2 hours 165°F Beef Brisket 225°F 10-12 hours 190°F-203°F Prime Rib 250°F-275°F 4-5 hours 130°F (medium-rare) Tri-tip 225°F 2-3 hours (then sear) 135°F (medium-rare) Tips for Getting the Perfect Flavor Use the Right Type of Smoker The quest for the perfect smoked dish begins with choosing the right smoker, a decision that can be overwhelming for beginners. While electric smokers offer convenience, they often lack the deep, smoky essence that defines a true smoking experience. On the other hand, pellet smokers, despite their hint of authenticity, are limited by their reliance on electricity and fail to provide the depth of flavor achieved by charcoal smokers. Charcoal smokers epitomize authenticity, releasing intoxicating aromas that have been revered by pit masters for centuries. These smokers not only fuel the cooking process with immersive, primal energy but also allow for expert heat control and wood chunk management, key tools in mastering the harmony of time and temperature necessary to create culinary magic. Season Your Meat To create a smoky masterpiece, view your meat as a canvas where every seasoning acts like masterful strokes on the finest paintings. Achieving grandeur with simplicity involves using the classic trio of olive oil, salt, and pepper. A drizzle of quality olive oil not only preserves moisture but adds a layer of rich elegance. Salt works to bring forth the inherent flavors of the meat, while freshly ground pepper introduces a subtle heat that dances on the palate. Never underestimate the power of these basic elements to elevate your dish in the smokehouse. Use a Meat Thermometer In the world of smoking, precision is the key to perfection. A digital meat thermometer serves as a trusted confidante, ensuring that your meat reaches the desired internal temperature, a testament to safety and culinary expertise. Whether you’re striving for tender, fall-off-the-bone texture or the perfect medium-rare, using a thermometer can alter the texture and juiciness of your prize, making it the guiding star in your smoking process. Use the Right Wood Selecting the right wood is essential in smoking, as it is not just fuel but the very soul of the smoke that imbues your meat with distinct flavors and aromas. Each type of wood contributes a unique profile to the dish: Hickory, with its longevity and robust flavor, is ideal for red meats; Pecan offers a classic smoky taste, harmonizing well with various kinds of meats; Oak is often recommended for beginners due to its subtle wood-fired taste and versatility across meat types including brisket and poultry. Cherry wood enhances dishes with its sweet

Grilled Cheese Without Stove – No Stove? No Problem!
How to make grilled cheese without a stove? What Makes This Recipe So Good When you need a hot and gooey treat but want to avoid dirtying a stove or skillet, a grilled cheese sandwich is the perfectly easy option. For those who think the process involves complicated ingredients, think again. You only need your basic, ridiculously simple ingredients: bread and cheese. One way to achieve that toasted perfection is by using a toaster. Lay the toaster on its side, and insert the sandwich so the cheese doesn’t drip as it melts. Alternatively, a microwave can come in handy. Wrap the sandwich in a damp paper towel and microwave for about 30 seconds, turning once to get even heating. This method ensures crispy, deliciously melted cheese throughout. If you’re looking to dress up your meal, options abound. Add extras like slices of tomato, deli meat, or crispy bacon only after the cheese has melted. Make sure to open up the sandwich quickly, add your extras, close, and enjoy. These great results are the best way to make a grilled cheese without ever turning on the stove. Chef’s Tips For a perfect, hot, melty, gooey, crispy, toasted, grilled cheese without a stovetop, try these different methods. The air fryer version is a customizable option; just use your favorite bread and a blend of cheeses. For a crunch and crispness that’s truly enjoyable, toasting the bread first is a crucial step. Depending on the texture difference you prefer, consider giving the bread time in the toaster or oven to reach your desired doneness. If you barely want the bread toasted, hand toasting offers control over how much it toasts. For the microwave method, I recommend starting with 30 seconds if you need to microwave the sandwich until the cheese is just melted. If it’s not melty enough for your liking, microwave additional seconds, check, and repeat as needed. Always be careful when taking the sandwich out of the microwave, as it can be very hot. Toasted Grilled Cheese (No Stove Needed) To make the crispiest, grilled cheese without a stove, you only need a few simple items: bread, cheese, and some basic equipment. Choose your bread—whether it’s potato, buttermilk, or whole wheat—and pair it with your favorite cheese such as Swiss, cheddar, muenster, or Havarti. For a little extra flavor, add a pinch of garlic powder, though this is optional. To assemble, butter the outside of the bread slices with salted, softened butter. If using a toaster, place the sandwich directly on the slots and watch closely to avoid burning. For a soft, melty center with a less crispy exterior, use a microwave. Place the sandwich on a microwave-safe plate, cover it with a paper towel slightly dampened with water, and microwave for a short time—usually about 30 seconds, checking halfway through. This method melds the cheese beautifully without scorching the bread. Toasted Grilled Cheese (No Stove Needed) Ingredients Equipment Method Create the crispiest, grilled cheese with no stove in no time by choosing either a toaster or a microwave method. First, butter the outside of your selected bread and layer your chosen cheese slices inside. Optionally sprinkle some garlic powder for extra flavor. If using the toaster, place the sandwich directly into it, monitoring closely to ensure the cheese becomes melty without burning the bread. For those preferring a softer texture, the microwave method works wonders. Simply place the sandwich on a microwave-safe plate, cover it with a damp paper towel, and heat until the cheese is soft and melty. Either method delivers a delicious grilled cheese sandwich with minimal effort and no need for a stove. Instructions Notes For a toast that brings out the best in your grilled cheese sandwich, typically, people prefer their bread to be barely toasted. This allows the bread to give enough time in the toaster to achieve a light crispness without becoming too hard, which makes it ideal to pair with soft cheeses like mild cheddar, Swiss, provolone, muenster, havarti, or mozzarella that melt better and more easily than hard cheeses. If you make a gluten-free version, use gluten-free bread and make sure the cheese doesn’t contain hidden gluten ingredients. For those aiming for a low-carb diet, use low-carb bread. And if you need to make it dairy-free, use plant-based butter and dairy-free cheese to ensure everyone can enjoy this classic comfort food. Nutrition Information A typical serving of grilled cheese contains approximately 300 calories (kcal), with 15 g of protein, 18 g of fat (including 7 g of saturated fat and 0.5 g of trans fat), 28 g of total carbs, 2 g of fiber, and 4 g of sugar. This leads to 26 g of net carbs. Additionally, it contains about 40 mg of cholesterol, 720 mg of sodium, 200 mg of potassium, 500 mg of calcium, and 2 mg of iron. The servings shown are approximate, as actual servings depend on your preferred portion sizes. The nutritional values shown are general guidelines and reflect the information for a serving with the ingredients listed, excluding any optional ingredients. The actual macros may vary slightly depending on the specific brands and types of ingredients used. To determine the weight of each serving, prepare the recipe as instructed, weigh the finished recipe, and divide the weight of the finished recipe by the desired number of servings. The result will be the weight per serving. Easiest Way to Make Grilled Cheese Ever | Kids Can Make Recipe With No Stove Celebrate National Grilled Cheese Day with the easiest way to make grilled cheese ever, a method so simple that kids can make their own grilled cheese without needing to turn on the stove. As summer approached, I purchased a package of toaster bags from Amazon to try this perfect kitchen hack. Initially, I approached the product cautiously and questioned whether the toaster could really deliver the crunch factor of the traditional stovetop method. However, the small investment felt like a good gamble and I

How to Make Gas Grill Hotter – Proven Tricks & Hacks
How to Make Gas Grill Hotter? Expanding Your Grill’s Heat with Lava Rocks and Other Tips To significantly boost the heat of your gas grill, incorporating lava rocks can be a game-changer. This hack not only elevates the temperature but also enhances the smoke and flavor profile of your food. By arranging a bag of these rocks around the burners, you create a hot, high-temperature environment that mimics the effect of a charcoal grill, complete with those sought-after grill marks on your meats. Another effective strategy is to keep the lid closed as much as possible. This simple yet often overlooked step helps to maintain a steady, ambient temperature of around 500°F(260°C), which is ideal for achieving a browned, deliciously crusty exterior on juicy cuts of meat. Repeated lid liftings can cause significant heat loss, which is an imperfect substitute for managing grill temperature. From personal experience during a sunny afternoon demo in my Oakland backyard, these techniques have yielded fantastic results. A piece of grilled hanger steak, seasoned with chaat spices, was especially memorable. This process doesn’t create a finished product identical to one cooked over a full charcoal setup, but it managed to improve the performance of a Weber propane barbecue substantially. This advice is especially handy and worth bringing back during the summer grilling season, whether you’re a Top Chef veteran like Preeti Mistry, the former owner of Juhu Beach Club and Navi Kitchen, or just someone looking to throw a better barbecue in their backyard. Embracing these steps ensures that your grill acts not just as a glorified cart of butane burners but as a true powerhouse capable of expanding its capabilities. How to Hack Your Gas Grill to Burn Hotter? Steps to Enhance Your Grill’s Temperature with Lava Rocks This method not only increases your grill’s heat capacity but also enhances the overall flavor of the food, making it a valuable trick for any barbecue enthusiast. How to Fix a Grill that Only Heats Up to 200-300 Degrees? Summer should be about enjoying lazy afternoons with friends and loved ones around a sizzling gas grill, but the joy of a smoky barbecue picnic can quickly evaporate if your food remains uncooked due to a defective or broken grill. If your grill is not getting hot enough to cook the foods placed on it, this could be more common a problem than you might realize. Any drastic variation from your usual cooking temperature most likely signals an issue that needs to be addressed. Most grills should be able to heat to 500-550 Fahrenheit in about 10-15 minutes. When they don’t, it’s crucial to troubleshoot the common reasons for this anomaly. Some potential causes might include a faulty temperature gauge, gas leaks from the regulator or hose, an empty or near-empty propane tank, or low flames produced by burners. By identifying these issues, you can take steps to restore your grill’s performance and ensure it runs hot enough for your grilling needs. Grill Not Hot Enough? Check That Your Temperature Gauge Is Working Properly When your grill isn’t reaching the correct temperature, it could be that your temperature gauge is giving an incorrect reading. This tool—which monitors the changes in internal pressure and is redirected by a pointer—indicates whether your grill is running hot enough. If the reading isn’t correctly calibrated, it’s not uncommon for even newer models to run about 50-75 degrees cooler than needed. This discrepancy is especially true for old-school dial gauges where positioning—places too far from the food being cooked or too close to air from outside—can make the heat appear cooler than it is, which affects how the gauge reads. Ensuring your gauge is accurate is crucial for optimal grill performance. Checking that Your Grill Temperature Is Working as It Should Be Fixing or replacing your grill’s temperature gauge can help you set cooking temperatures more precisely. If you know the gauge is inaccurate, consider using a thermometer probe placed an inch above the grill grate, as close to the food cooking as possible. This is a more reliable, albeit more expensive, method to ensure accuracy. For those who seek precision, use a thermocouple sensor for measuring temperature. Tests that indicate a faulty gauge mean it’s time to replace this part. If you need parts for replacement, search online for replacement parts. Also, keep in mind that many grilling fanatics love to use thermometer probes and thermocouple accessories, even if their own grills have great built-in thermometers. Probes and thermocouples are incredibly accurate and work well with no matter what grill they’re used with. Find the perfect temperature-reading accessory to enhance your grilling accuracy and enjoyment. Grill Not Hot Enough? Check Your Grill’s Regulator Hose When your grill’s flame is weak and it’s not getting hot enough, the problem often lies in the hose and regulator that connect the gas cylinder to the grill. A leak in these parts can result in gas escaping, leading to reduced flow and a lack of heat. To check for leaks, turn off the burner control knobs and connect your tank. Prepare a soapy solution with liquid dish soap and water, then apply it to the valve, hose, and other connections. Look out for bubbles forming; if you see them, it’s an indication of a leak. In such a case, immediately close the tank, don’t use the grill, and either contact a professional to carry out necessary repairs or replace the faulty components with new ones. This simple test can save you from wasted gas and ensure your culinary endeavors are not only successful but also safe. Grill Not Hot Enough? It Might Be Time to Replace Your Propane Tank If your grill’s flames are insufficient and you’re struggling to cook food, it may be because your propane tank is low on gas. Many grill owners don’t realize they are low on fuel until their tank can no longer supply enough gas to maintain high temperatures. A simple way to check the gas level is

Perfect Panera Grilled Cheese – Master the Recipe Now!
How To Make Panera Grilled Cheese? What Cheese and Bread To Use? To recreate the Panera grilled cheese sandwich that has won rave reviews, start by selecting the right bread and cheese. According to a team lead at Panera, named Aedwins from the r/Panera subreddit, they typically use White miche, a type of white sandwich bread, which keeps the sandwich soft rather than crunchy. This bread pairs wonderfully with American cheese—a simple answer to achieving that gooey, soft texture similar to what you would find in a Panera store. For the cheese, aim for a good melt without making the bread toasted or too crispy. How To Cook It? The cooking method is crucial. Aedwins suggests heating the oven to 550 F and letting the sandwich cook just long enough for the cheese to melt perfectly—about 2:30 minutes. If your home oven doesn’t have a convection mode, achieving that even cooking might be challenging. In that case, an air fryer could be a great alternative to mimic convection ovens, ensuring that every bite is just as satisfying as those made in a Panera kitchen. During my own experiments, following these tips from Panera employees I found on Reddit—courtesy of cocoa bean and another Reddit user, Steve1808—helped me make lunches that my picky kids loved, without the sandwiches getting too crispy or losing their appealing texture. Remember, the goal is to have grilled cheese sandwiches that are soft and gooey, a stark contrast to those made in a toaster oven where they might turn out undesirably crispy. Crafting the Ultimate Comfort Meal Creating the perfect grilled cheese sandwich is an art that takes you back to childhood, where simplicity meets sophistication. Start with hearty bread like sourdough, which provides a crisp, toasty foundation that’s essential for housing a melted medley of cheeses. For those who cherish the classic appeal, combining cheddar, provolone, and a touch of gruyere offers a gooey richness that makes each bite a cheesy delicacy. This recipe isn’t just an easy answer to “what’s for dinner?”; it’s about recreating those golden, toasty moments that feel like a match made in heaven when paired with a bowl of tomato soup. Whether you’re feeding little ones or looking to indulge in an adult version of this timeless meal, a well-crafted grilled cheese promises to leave everyone drooling, elevating a simple sandwich into an extraordinary experience. What’s The Best Cheese To Use For A Grilled Cheese Sandwich? Elevating Your Grilled Cheese Game When crafting a grilled cheese that elevates from good to great, the secret lies not just in the type of cheese but significantly in the amount of cheese used. Avoid skimping on the cheese or overflowing the bread to achieve that perfect melt. A classic recipe might call for American cheese, known for its smooth melt and simple appeal. However, mixing cheddar, provolone, gouda, and a bit of parmesan can transform your sandwich into a gourmet experience without much effort. For those looking to get a bit fancy, Brie adds a creamy texture, and Mozzarella is a hit for white cheese fans. Each recipe tweak brings a unique profile to this beloved grilled cheese, making it a versatile dish that caters to all tastes, whether you’re seeking a comforting snack or a cheese-laden delicacy to drool over. Can I Add More Toppings To My Grilled Cheese? Elevating Your Grilled Cheese with Toppings Absolutely! Adding toppings to your grilled cheese can transform it from a simple recipe into a truly interesting meal. For Proteins, consider grilled or shredded chicken, bacon, or ham to add a savory punch. Veggies like spinach, sliced bell peppers, and cucumber provide a fresh crunch, while Fruits such as apple slices, tomatoes, and avocado offer a sweet or creamy contrast that complements the melt of the cheese. Each addition makes your grilled cheese a canvas for your culinary creativity, turning it into one of your go-to’s. And if you discover other toppings you love, share your discoveries in the comments! What To Serve With A Toasted Cheese Sandwich Pairing a toasted cheese with the right side can enhance your dining experience, especially during winter. A steaming bowl of roasted tomato soup is a classic choice, akin to combining spaghetti and meatballs—they just belong together. Alternatively, an Italian salad or a side of sauteed green beans with bacon can add a light, balanced touch to your cozy meal. Don’t Miss Out On Easier To Make Sandwich Recipes For more delightful sandwich ideas, Roasted Turkey, Apple & Cheddar Sandwich offers a flavor-packed, quick, easy, and delicious meal. Remaking this favorite Panera restaurant sandwich at home makes it even healthier. Or, for a lighter fare, try the Greek Chicken Wrap, stuffed with garbanzo beans, shredded chicken, feta cheese, tomatoes, and cucumbers rolled in tortillas for a quick, Greek-inspired lunch. Conclusion: Crafting the perfect Panera-style grilled cheese at home is about nailing the blend of bread and cheese, just as you’d find in the restaurant. By using ingredients like White Miche bread and a combination of American, cheddar, gruyere, and fontina cheeses, you can mimic the gooey, creamy texture that makes Panera’s grilled cheese so beloved. Additionally, mastering the cooking technique—whether using a conventional oven set to a high temperature or an air fryer to replicate a convection oven—ensures that every sandwich has that just-right golden crispness without being overly crunchy. For those looking to elevate their homemade grilled cheese, consider experimenting with additional toppings like crispy bacon or a variety of vegetables, making the sandwich a more comprehensive meal. Thus, whether for a quick lunch or a comforting dinner, the secrets to a perfect Panera grilled cheese lie in the quality of the ingredients and the care in the cooking method. People also ask What type of cheese does Panera use on their grilled cheese? Panera uses a blend of cheddar, gruyere, and fontina cheeses on their grilled cheese sandwiches, making them extra special with their gooey and creamy texture. These cheeses are layered between slices of Country

Perfect Grilled Onions Like In-N-Out – Quick & Easy
How To Make Grilled Onions Like In n Out? If you love In-N-Out’s burgers, you know their caramelized onions are key to the irresistible, flavorful taste. Here’s how you can recreate that delicious, homemade version of their onions at home in just a few minutes. Start by thinly slicing onions and cook them slowly over low heat in a bit of oil, stirring occasionally until golden and caramelized to perfection. This process fills the onions with deep flavor, making them the perfect topping for your burger, or even for an onion-wrapped low-carb, gluten-free option. Whether you’re building an epic flying Dutchman or just want to skip the buns, these onions will serve up that signature In-N-Out taste at home. What Ingredients You Need to Make the Onion-Wrapped Flying Dutchman? To make a delicious Onion-Wrapped Flying Dutchman at home, you’ll start with ground beef, aiming for a balanced mix ratio of fat to keep it juicy, and season with your favorite mustard—whether it’s classic yellow mustard or a sharp dijon. For the perfect onion wrap, use thinly sliced yellow onions or sweet white onions, as they caramelize beautifully and bring out that signature sweet caramelized flavor. Fry them in avocado oil, or any frying oil, until they’re soft and golden. Next, layer cheddar cheese or American cheese slices on the cooked beef, allowing them to melt into the patty. To elevate the experience, craft a homemade sauce with a blend of mayonnaise, pickle relish, a touch of unsweetened ketchup, and a dash of both white vinegar and apple cider vinegar. This combination mimics that In-N-Out style flavor that everyone loves. How to Make the Onion-Wrapped Flying Dutchman? To recreate the Onion-Wrapped Flying Dutchman, begin by preparing your sauce. In a small bowl, combine the classic spread ingredients like mayonnaise, mustard, and relish, then set aside. For the caramelized onions, heat oil in a large skillet until hot, and add sliced onions with a pinch of salt. Cook on medium heat, allowing the edges to turn gold before flipping them to caramelize the other side, which should take just a few minutes. While the onions cook, prepare the patties by dividing your ground beef into equal portions and forming burger patties. Season with salt and pepper before adding them to the skillet. Sear the patties, then spread some mustard on them before flipping after a few minutes. Add cheese to the patties, letting it melt until you have a cheese-covered patty. For a double burger, stack the patties with the grilled onions between them. Serve without a bun, topped with the sauce, and enjoy warm. What Makes This Recipe Great? The secret to In-N-Out’s famous grilled onions lies in transforming a strong-tasting vegetable like onions into a tender, sweet caramelized flavor. When cooked just right, these onions become soft and delicious, perfect for adding to burgers, pizzas, or even sandwiches. Sauteed onions are incredibly versatile, and they bring depth to any dish, whether it’s for breakfast or salads. But cooking them can be tricky at first—many end up with a disaster of smoke alarms and charred remnants. For success, use a cast iron pan over low heat, and let the onions cook slowly, ensuring that they don’t burn, but develop that sought-after caramelized texture. This recipe guarantees those perfectly grilled onions every time. Ingredient Notes When making grilled onions like In-N-Out, the type of onion you choose can greatly influence the flavor. Vidalia onions or sweet yellow onions are ideal for their mild, sugary taste, while red onions offer a sharper bite if that’s your preference. Regardless of which onion you use, add a pinch of salt to enhance the sweetness, and a bit of butter to add richness. If you want to speed up the caramelization process, a little water is a handy hack to keep them moist while they soften into perfect caramelized goodness. My Amazing Grilled Onion Hack One trick to keep your onions from becoming too dry while grilling is adding a few tablespoons of water during cooking. This not only helps prevent drying out but also ensures the onions stay juicy and cook at an even temperature. As the water evaporates, it leaves the onions tender and grilled to perfection. The natural sugars in the onions will slowly release, creating a deeply caramelized and sweet flavor that enhances any dish. Which Onions Are Best for Grilling? When it comes to grilling onions, the best options are yellow onions, white onions, and sweet onions. Each onion offers a unique flavor profile: yellow onions are balanced with a mix of sweet and savory notes, making them a great all-around choice. White onions have a sharper, more pungent taste, while sweet onions like Vidalia are perfect for those who prefer a milder, sugary grill flavor. Red onions, though more intense raw, develop a rich, slightly sweet taste when grilled. Ways to Serve Grilled Onions Grilled onions are incredibly versatile, elevating dishes like burgers, patty melts, sandwiches, and even salads. Add them to casseroles, and dips, or use them in fajitas, stir-fry, and tacos for extra depth. For a bolder taste, season your sauteed onions with salt, pepper, and a drizzle of balsamic vinegar to complement chicken, pizza, or steak dishes. They also work wonderfully in pasta, soups, and hearty sauces. Expert Tips For a dairy-free or Vegan version, use olive oil, coconut oil, or ghee instead of butter when grilling onions. This method is also Whole30-compliant. To store leftovers, place them in an airtight container in the refrigerator for up to five days or freeze for up to three months. To reheat, use a microwave or gently warm them in a skillet. About Caramelized Onions Caramelized onions are all about achieving the perfect balance of sweetness and texture. As they cook, the browned onions develop a deep flavor that enhances many dishes. The texture is key, with the onions becoming tender yet retaining a slight light crunch. The process requires some effort and a close eye to ensure the

Grilled Cheese in Microwave – Fast & Tasty Method
How To Make A Grilled Cheese in The Microwave? For the Best Grilled Cheese, Start in the Microwave My Ammu Helped Me Discover This Smart Trick Why do I Always Microwave My Grilled Cheese Sandwich? My Secret to the Perfectly Melted Grilled Cheese As someone who has experimented with countless Grilled cheese recipes over the years, I’ve learned that cooking the grilled cheese in a microwave before finishing it off on the skillet is not just a hack; it’s a game changer. This method ensures the cheese is 100% melted, and it does so uniformly, preventing those unwanted burns that often happen when the bread toasts too quickly on high heat. Starting low and slow in the microwave allows the heat to pass through the bread, softening it up so the cheese starts to melt perfectly without any resistance. Then, a quick sear on the skillet gives that desirable crispy exterior. Not only does this reduce the cooking time to less than five minutes, but it also keeps this simple dish from becoming a burnt disappointment. This reform in technique makes all the difference in achieving a sandwich that’s both toasted to perfection and gloriously gooey inside. Ingredient Notes Crafting the Perfect Microwaved Grilled Cheese Why This Recipe Works The Beauty of a Simple Sandwich Recipe One of the reasons this simple sandwich recipe for grilled cheeses stands out is its undeniable low cost and accessibility. Unlike Sandwich meat or fancy condiments, which can be pricey, you only need a slice of cheese and some butter—ingredients that are likely already in your fridge. Swapping the cheese for your favorite variety allows for easy customization, turning it into one of your favorite sandwich recipes. This method skips the stovetop, making it a million times faster than traditional cooking methods, and still delivers a delicious meal that can satisfy the entire family. Whether it’s alongside Grilled Fluffernutters, Spicy Tuna Sandwiches, or Frozen Peanut Butter and Jelly Sandwiches, this grilled cheese proves that great taste doesn’t require complexity or high costs, making it quick to make and perfect for any meal. 🧾 Substitutions 🍴 Recipe Tips For an Enhanced Texture in your grilled cheese, consider wrapping the sandwich in a paper towel before microwaving. This technique helps to absorb any excess moisture, ensuring that your sandwich maintains a firmer texture and helps to retain its crispness. This small step makes a big difference, especially when you’re aiming for that perfect microwaved grilled cheese. 🥗 Side Dishes When serving your grilled cheese sandwich, pairing it with the right side dishes can elevate this simple lunch to a more satisfying meal. Consider easy options like potato chips, fresh fruits, or cut vegetables that you might have on hand. Strawberries and grapes make for a delightful contrast with the warm, melty cheese, adding a burst of freshness to your meal. Using a Toaster Conclusion: Creating a grilled cheese in the microwave is a quick and easy way to enjoy this classic comfort food with minimal effort. Begin by toasting the bread slightly to enhance its texture and prevent sogginess. Apply a thin layer of butter on the outside to achieve a crispy exterior. Layer your choice of cheese between the bread, ensuring it’s evenly distributed. For best results, wrap the sandwich in a paper towel to absorb excess moisture, then microwave it briefly until the cheese is perfectly melted. This method not only simplifies the cooking process but also delivers a deliciously warm and gooey grilled cheese sandwich in just minutes, making it an ideal solution for a quick lunch or snack. People also ask Can You Microwave a Grilled Cheese? Microwaving a grilled cheese can be a quick alternative to the traditional skillet method, especially when time is short. The key is to ensure the cheese is 100% melted within the sandwich, achieving that gooey consistency we all love. Although you won’t get the same toasted texture as from a skillet, you can reduce the cooking time to less than five minutes. For best results, briefly heat the sandwich in the microwave to melt the cheese, then transfer it to a hot skillet for a minute or two to crisp up the bread. Can You Toast a Sandwich in the Microwave? Toasting a sandwich in the microwave is not ideal due to the trapped steam which can make the sandwich wet and sticky. However, a workaround is to microwave the sandwich just until the cheese begins to melt, then quickly cook it on a skillet for one to two minutes per side to achieve a toasted finish. This method helps to evade the soggy texture typical of a purely microwaved sandwich. After skillet toasting, cut the sandwich diagonally for that visually appealing, perfect grilled cheese sandwich. How Do You Melt Sandwich Cheese in the Microwave? To properly melt cheese in a sandwich using a microwave, first assemble your sandwich with your choice of fillings between two slices of standard sandwich bread. Place it on a microwave-safe plate. The timing and power setting are crucial: set your microwave to high and heat for 40 seconds to one minute, depending on the thickness of the bread and the amount of cheese. Check to ensure the cheese is melted around the sides for an evenly cooked result. How to Heat a Sandwich in the Microwave? Heating a sandwich that’s gone cold, especially if it’s been in the refrigerator, requires a gentler approach. Place the sandwich in a foil bag if possible, to retain moisture and prevent it from drying out. Heat on 50% power for about 90 seconds. If it’s just slightly cool and needs a quick warm-up, 30 seconds on high should suffice. Microwave times will vary, so use common sense to adjust the time based on how warm you want your sandwich.

Grilled Cheese in Toaster Oven – Fast & Delicious!
How To Make A Grilled Cheese in A Toaster Oven? Cheesiest Grilled Cheese Ever! To make the perfect grilled cheese sandwiches every time without ever firing up your stovetop, simply swap out your skillet for the trusty toaster oven. This nearly hands-off experience allows you to enjoy an enviably gooey, melty center with a crispy, golden exterior—achieving that diner classic you know and love. The simplicity of this simple, foolproof recipe will not only blow your mind but also deliver those Instagrammable cheese pulls we all crave. Stand back, relax, and let your countertop appliance take the time to cook all, while you’re getting that gorgeous, golden crust every time. Why You Will Love This Recipe When it comes to comfort food, there are very few dishes that garner as much love and affection as grilled cheese sandwiches. Whether you’re a devoted fan of recipes featuring grilled cheese with bacon, avocado, pizza grilled cheese, or mushroom grilled cheese, you’ll find that using a toaster oven can change your culinary life for the better. It’s well known that the toaster oven, while simple to use, can produce results that rival any stovetop or air-fryer method. This tricky little recipe allows for a variety of delicious twists that will make your meal stand out, making your eating experience super easy and enjoyable. Grilled Cheese In Toaster Oven Ingredients & Substitutions Step-by-Step Foolproof Grilled Cheese Delights Tip: Experiment by adding meats or veggies for an endlessly versatile meal. Swap out ingredients based on your preference or what you have on hand. This recipe is simple enough for a 4th grader to pull off solo, making it a foolproof method to make perfect grilled cheese every time.crust with gooey melted cheese every time. For complete instructions, refer to the recipe card at the end of the post. Optional Variations These variations on the traditional grilled cheese allow you to customize your sandwich to suit any taste or dietary preference, making it a versatile option for any meal of the day. Whether you’re aiming for something classic or adventurous, your toaster oven can handle it all with ease. Storage Instructions Store your grilled cheese sandwiches in the refrigerator by wrapping them in parchment paper or foil, and they will keep for up to 3 days. For longer storage, freeze the sandwiches on a baking sheet for an hour before transferring them to an air-tight container; they can be stored for up to 2 months. When ready to reheat, using a toaster is quick and efficient. Alternatively, reusable toaster bags are a great way to reheat both frozen and refrigerated grilled cheese sandwiches. If you prefer the oven, wrap each sandwich loosely in foil, place on a baking sheet, and bake for 10 minutes at 425 degrees to get them warmed through and crisp. What to Serve with Grilled Cheese Sandwiches? There’s no shortage of delicious things to pair with your cozy snacks. For those looking for great ideas on what to serve with the melty, cheesy, toasty goodness of grilled cheese, consider dipping sauces. Try homemade Onion Ketchup or Steak Sauce for a twist, or stick with the classic, Grandma’s Cream Tomato Soup, a great option for dipping. What are your favorite grilled cheese sides? Expert Tips Important Notes: Temperature Rack Placement Pan Color Bread Type Air-fryer style Toaster Oven Conclusion: Making grilled cheese in a toaster oven is a quick, versatile, and easy cooking method that achieves a perfect melt and golden crust every time. By setting your toaster oven to 450°F, using the middle rack, and selecting the right pan and bread type, you can customize your sandwich to suit any taste. Whether using traditional butter and cheese or exploring variations with different oils and fillings, the toaster oven simplifies the process, allowing for a nearly hands-off cooking experience that still delivers that classic, comforting taste. For those with air-fryer-style toaster ovens, utilizing the air-fry setting can further enhance the texture and crispiness of your grilled cheese, making it a foolproof option for a quick meal or snack. People also ask Can You Use a Toaster Oven for Grilled Cheese? Absolutely! Using a toaster oven for making a grilled cheese sandwich is not only perfect and easy but also ideal for any setting, be it an office lunch or a late-night snack. This foolproof method eliminates the struggle of burning grilled cheese sandwiches on the stovetop, offering a gooey, melty cheese experience every time. It’s a straightforward way to satisfy your craving without the hassle, of ensuring your grilled cheese turns out perfect each time you make it. Can You Grill in a Toaster Oven? Yes, a toaster oven is a smaller version of a conventional oven, perfectly capable of performing most of the functions of its larger counterpart, including bake, grilling, toasting, and warming a variety of foods. It is an excellent choice for those with limited space or who need to prepare smaller amounts of food without the need to fire up a conventional stove or oven. Whether you’re looking to grill a piece of fish or a chicken breast, your toaster oven has you covered. How to Heat a Sandwich in a Toaster Oven? To heat a sandwich in a toaster oven, simply place it directly on the rack. Set the toaster oven to a medium toast cycle and let it run one full cycle. Since variation exists among different ovens, you may need to adjust the settings accordingly. Be cautious to try not to over-toast the sandwich to maintain its ideal texture and warmth. Can You Put Butter in a Toaster Oven? Yes, a toaster oven is superior to the old-style pop-up toaster for tasks such as melting butter, honey, or chocolate directly on the bread as it toasts. This method not only enhances the flavor but also changes the texture of the bread. If preferred, you can spread the butter on the bread afterward for a different experience, depending on your taste preference.

Truck Grill Transport: Tie It Down Right!
How to Tie Down A Grill in a Truck? Getting the Grill Ready to Move Before embarking on the journey to your new place, it’s crucial to get your grill ready for transport. The first step involves a thorough cleaning to remove any stuck food, grease, char, or dirt. I typically turn the heat on high for about 15 minutes to burn off the residue, making it easier to scrub the racks with a wire brush dipped in water. It’s a bit steamy, but with protective gloves, it’s manageable and prevents any harm to your hands. Ensure all parts, including the water pan and smoke chamber, are cleaned according to the manufacturer’s manual. This not only prepares your grill for the move but maintains it in good condition, avoiding the need to replace expensive parts. After cooling down, I use a towel to rub off any lingering residue. For the outside, a rag and some soapy water usually do the trick, finished off with a hose down to rinse everything away. How To Move a Grill? Moving a grill requires special care and the right steps to ensure it arrives safely at your backyard oasis without becoming a broken piece. I always take my time to ensure everything is secure in the truck, avoiding any movement that could cause damage. From personal experience, securing the grill with sturdy straps ensures that it doesn’t lean or shift, potentially causing a mess or damage to other stuff in the truck. Ensure your grill is cool, clean, and dry before moving day to make the process smoother. With all parts safely packed and the grill secured, you’re all set for a successful cookout at your new home. Remember, a good grill isn’t cheap, and taking the steps to move it properly will ensure it’s ready to fire up as soon as you’re settled in, making your new place a true oasis for friends and family. How to Tie Down A Grill in a Truck? Cool it Down Before moving your grill, it’s crucial to let it cool down for a few hours to ensure there is no residual heat in the cooking chamber or other components. Once cool, thoroughly clean it and turn off any heat sources. Always check that the heat does not retain in any part to avoid accidents during transit. Remove the Propane Tank, if Applicable For those using a propane grill, remove the propane tank before moving. Ensure it’s completely empty; disconnect any heating elements and natural gas lines safely. Since a propane tank is a hazardous material, you’ll need to move it separately in your own vehicle, away from direct sunlight. Follow the right procedures for disposing of or refilling the tank. Remove and Pack Up All Parts and Utensils Pack all removable parts of the grill—such as racks, utensils, pans, and other accessories—separately. If your grill has a lid, pack it with extra care to avoid getting scratched during transport. Label each box to easily locate and reassemble parts later. Wrap Up the Grill Itself Finally, pad and wrap the main body of the grill using a moving blanket and packing tape to secure it. Make sure the lid is attached and sealed. Keep the base and wheels uncovered to keep the grill steady in the truck and ensure it’s easier to move. If your grill has side handles, leave these uncovered as well to aid in moving. Pro Tips Pro-tip #1: Put the Grill on the Moving Truck Last Loading your grill as one of the last items on the moving truck optimizes space and minimizes the risk of damage. This placement allows for easier handling, especially if your grill has wheels on one side and stabilizing legs on the other. By positioning it last, you have better access and fewer obstacles, making it easier to lift and transport. Pro-tip #2: Lock the Wheels and Strap the Grill Down Once the grill is properly positioned in the truck, secure it by engaging the wheel locks. This prevents any rolling or sliding during transit. To further ensure stability, use utility straps to tie the grill securely to the truck bed or sides. Even though the grill might be wrapped in a moving blanket, using straps is essential for preventing any movement that could lead to scratches or other damage during transport. Adhering to these tips will help ensure that your grill arrives at your new destination in perfect condition, ready for your next cookout. Additionally, remember to handle flammable items, such as a propane tank, with extra care by ensuring they are empty and safely transported separately from the grill. Conclusion: When securing a grill for transport in a truck, it’s essential to ensure it is safely and firmly tied down to prevent any movement that could cause damage. Using tie-down straps, secure the grill by attaching them from the truck’s lower tie-down points over the grill and back, especially if the grill is near the tailgate. For stationary security or in windy conditions, heavier anchoring materials like cement slabs or cinder blocks can be used to stabilize the grill. Whether moving or storing, taking these precautions not only protects the grill but also ensures it remains in prime condition for your next cookout, enhancing safety and maintaining the integrity of both your grill and vehicle during transport. People also ask How to Transport a Grill in a Pickup Truck? To transport a grill in a pickup truck, begin by placing the grill firmly in the bed of the truck. Use tie down straps and rope—which you can rent along with the truck if not already owned—to secure the grill. Position the grill centrally to prevent it from rolling or coming into contact with the truck’s chrome finishes, which could be scratched during transit. Ensure the grill is laid down flat for optimal stability and safety. How to Prepare Your Grill for a Move? Before transporting your grill, especially a heavy one like a Weber grill,