

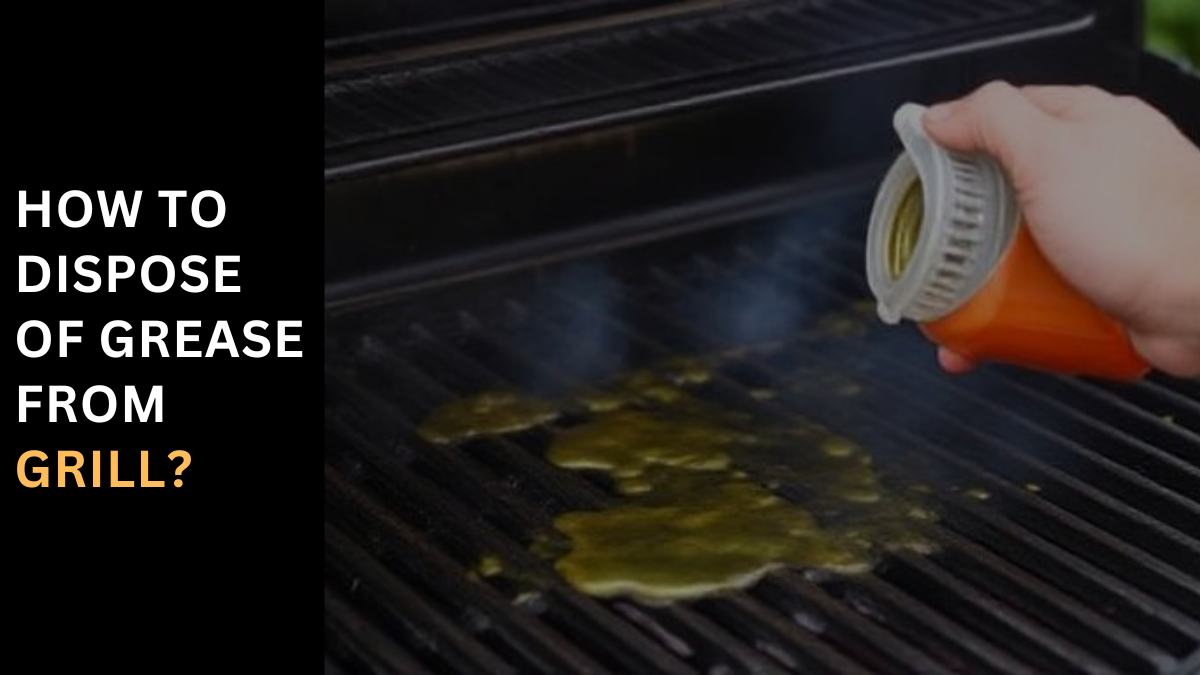
How to Dispose of Grease From Grill? Properly Dispose of Cooking Fat, Oil, and Grease in Mississauga The Challenge with FOG in Our Drains Dealing with Fat, Oil, and Grease (commonly known as FOG) in Mississauga is tricky, especially considering how easily these substances can clog our drainage lines. Many residents aren’t aware of the severe consequences of improper cooking fat disposal on our wastewater lines, often leading them to halt completely. From my own experience working alongside professional Mississauga plumbers at Mr. Rooter Plumbing, I’ve seen firsthand the damage and disruption caused by clogged sewers and drains. It’s crucial to dispose of grease and oil safely to prevent such issues. Safe Disposal Methods One effective strategy is to avoid dumping used cooking fat down the drain. Instead, there are several environmentally friendly methods and alternatives that can be adopted. For example, disposing of grease in a sealed container and tossing it in the trash is a simple yet responsible way to handle waste. Moreover, seeking the help of reliable waste management services or consulting with experienced professionals can offer more sustainable alternatives. These professionals are not just there to help when the damage is already done; they can provide guidance on preventing future issues as well. Re-examine and Readjust As a community, it’s essential to re-examine our existing practices and read up on why these small changes matter. The need to shift to more sustainable practices is crucial for protecting our shared environment. This article aims to explain why and stress the ways we can all contribute to responsible disposal practices. By dealing with FOG responsibly, we help not only to keep our plumbing lines free from blockages but also contribute to the overall health of our city’s infrastructure. What Not to Do With Cooking Fat, Oil, and Grease When it comes to managing kitchen grease, it’s important to know what not to do. Pouring used cooking oil or grease down the drain can lead to significant plumbing issues. Over time, grease solidifies and sticks to drain pipes, creating intractable clogs that are not only costly to clean, but can also damage your home’s plumbing system. Experienced Mississauga plumbers often face difficult, messy, and weakened drainage systems due to the disposal of grease. As a plumber myself, I have seen how corrosive substances used to temporarily fix this problem can further harm the pipes, suggesting why professional drain cleaning is often necessary. The Perils of Dumping Cooking Oil in the Ground Similarly, disposing of oil and grease in your backyard or soil is a terrible habit that is quite toxic to both plants and wildlife. Grease that seeps into the ground can easily find its way into aquatic ecosystems, causing damage. It’s a poor excuse to assume nature will simply absorb such waste without repercussions. Whether it’s oil tossed on snow to melt it or grease used to enrich soil, these practices are irresponsible. Instead, discuss appropriate ways to responsibly and sparingly distribute grease, such as recycling or using bio-friendly products designed for safe disposal. Putting Your Used Fat in Bird Feeders Using used cooking oil and fat in bird feeders might sound a bit left field, but it’s a practice that can happen when people are looking for ways to benefit their fine feathered friends, especially during the winter. However, there’s a problem with this approach: grease, whether in liquid or semi-solid form, can get on bird’s feathers, making it difficult for them to remove it themselves. This can prevent them from being able to fly, leaving them vulnerable to predators and potentially leading to a short life. While birds do need fat to stay warm in winter, they should be fed fat specifically made for them, like suet, which is safe for them to consume and doesn’t pose risks to their health or mobility. As someone who enjoys seeing wildlife in my yard, it’s crucial to ensure that any feeding practice is safe for the animals involved. How Do You Dispose of Cooking Oil and Fat Responsibly? Disposing of cooking oil and fat requires a responsible approach to avoid environmental damage and plumbing disasters. One effective method is to cool the grease until it solidifies, then put it in a disposable container—preferably a milk carton or a similar material that can decompose slowly in a landfill. Glass and metal containers, while recyclable, take eons to disintegrate and are not suitable for this purpose. Paper towels, often used in kitchens, can absorb small quantities of oil and are better recycled when they’re not soaked with grease. If they are too dirty, it’s best to toss them in the trash to prevent contamination in the recycling process. In this section, we discuss the importance of finding the best and most responsible ways to rid ourselves of these waste materials without sending them down the drain, where they can clog pipes and create further issues. An Ounce of Prevention Is Worth a Pound Less Grease To minimize grease use, it’s important to understand the role fats play in both our bodies and our cooking. Fats serve essential functions in the human body, such as storing energy, insulating from elements, and protecting organs. They are essential nutrients that support immune response, growth, and reproduction. However, when it comes to cooking, adopting methods that limit fat usage can significantly reduce the need for disposal. For example, cooking techniques that emphasize the natural flavors of food, like roasting or broiling, use less grease and maintain the taste and nutrients without bathing the food in fat. This approach not only makes meals healthier but also aligns with environmental conservation efforts by reducing grease waste. Use Cooking Techniques That Don’t Take a Lot of Grease In the kitchen, choosing the right techniques can greatly reduce grease usage. Roasting and broiling are excellent methods for cooking meat, as they help preserve the natural juices and flavor without the excess fat required by frying. If you’re a fan of doughnuts, consider baking them instead of using
Mastering Grill Cover Measurements: A Step-by-Step Guide!
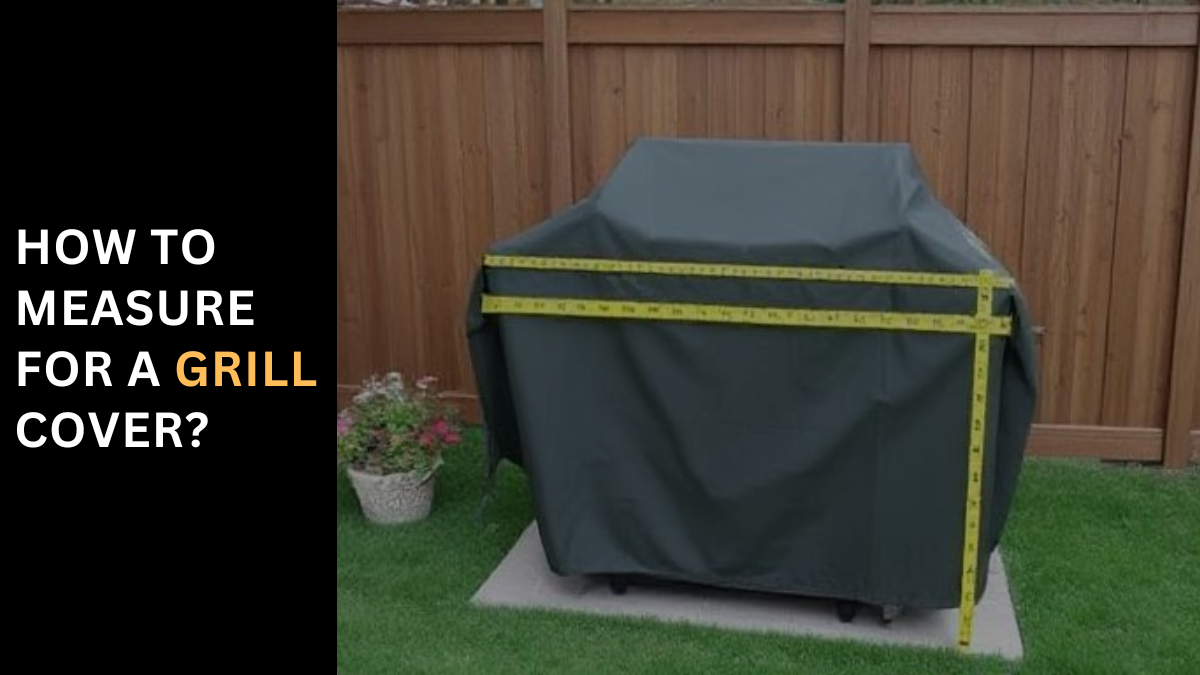
How to Measure For A Grill Cover? What Size Grill Cover Do I Need? Know What Size and Type? In the market for a new grill cover? The first step is to understand what size and type you need. As an expert in grilling, you likely value your setup not just for its function but as a focal point for gathering friends and family around a feast of BBQ, grilled vegetables, or sirloin steak. Your grill becomes even more essential when the nasty weather of winter, including forecasts of snow and sleet, threatens. Choosing the right cover can protect your grill and ensure it lasts through whatever conditions come your way. When asking yourself about the best options, consider not just the size but the type of cover that will best suit your outdoor environment. How to Get the Right Size Grill Cover? When selecting the right size grill cover, precision is key. First, measure the width from the left side to the right side with the lid shut. Then, assess the depth from front to back, ensuring you include any handles. Finally, measure the height from the top of your grill (with the lid closed) to the bottom. Writing down these measurements gives you a reference when you order your cover. The variety of grill covers on the market can be daunting, but manufacturers like Budge Industries have simplified the process. Known for their superhydrophobic NeverWet technology, Budge offers grill covers that not only provide year-round protection but also fit nearly custom to your grill’s dimensions. Whether your grill is small or extra large, there’s a cover for it. Their products are listed with width, length, and height (sometimes termed as drop) directly beneath each product title, making it easier to choose. This technology not only protects against moisture but also makes the covers easier to apply and remove, enhancing the user experience. Additionally, the industry has recognized Budge as a trusted manufacturer and distributor of protective covers, not just for grills but also for cars, patio furniture, and boats. Ensuring your cover is slightly larger—typically by 1 to 2 inches—than your grill can significantly improve air circulation beneath the cover, reducing condensation and preventing issues like mold or rust. This approach offers a secure fit while still being easy to handle. By choosing a waterproof cover, you ensure that your investment in outdoor equipment remains in top condition, ready for whatever the season throws your way. What Type of Grill Cover? When selecting a grill cover, the type you choose is paramount to ensuring your grill withstands temperate climates and harsh elements. Opting for covers made of spun-bond polypropylene or denier polyester enhances durability and ensures a heavy-duty, waterproof barrier against rain, snow, and condensation. The latest technology in superhydrophobic coatings, such as Budge’s Neverwet, offers multi-liquid repellency and stain resistance, allowing the material to breathe and protect against rust and corrosion. Such covers are crucial for outdoor use where condensation can otherwise cause corrosion. It’s vital to avoid materials like PVC, which contain harmful chemicals—SVHCs—that are not environmentally friendly. How Much Does a Grill Cover Cost? The price of a grill cover can range from $30 to $70, depending on the quality and protection it offers. A purchase decision should not be based solely on price, but also on the product details that show its capability to repel both water and dirt, ensuring year-round protection. Investing in a slightly more expensive cover may reduce long-term costs, as cheaper alternatives might need to be replaced more frequently, failing at preventing rust and corrosion effectively. Conclusion: In conclusion, measuring for a grill cover requires precision to ensure a perfect fit that offers optimal protection. Start by measuring the grill’s width, depth, and height, ensuring to include any additional features like handles or shelves. Opt for a cover that is slightly larger than these dimensions for easy application and removal, yet snug enough to provide secure coverage without touching the ground. This gap at the bottom enhances air circulation and prevents moisture accumulation, safeguarding your grill against rust, mold, and mildew. By choosing the right size and type of cover, you protect your investment and extend the life of your grill. what size grill cover for the 54-inch grill? Dimensions: 54″ W x 28″ D x 42″ H Size: Medium This outdoor BBQ grill cover and smoker cover (without stack) will fit grills up to 52″W x 26″D x 42″H. For greater flexibility, the actual product dimensions are 54″W x 28″D x 42″H. Fits most grills with 2 to 3 burners. what size grill cover for a 4 burner grill? Dimensions (L x D x H) SIZE 2-BURNER GAS GRILL MODEL 463622514 44″ x 22″ x 44″ 45″ Grill 4-BURNER W/SIDEBURNER N480 463461614 60″ x 19″ x 46.5″ 67″ Grill People also ask What size cover does my grill need? To determine what size cover your grill needs, start by ensuring the cover is 1-2 inches shorter than the grill itself for optimal breathability. This measurement approach ensures the cover does not impede the airflow, which is crucial for preventing moisture buildup beneath the cover. The cover should fit snugly, but not too tightly, allowing it to be easily applied and removed without straining the material. Be sure to measure in a straight line from the ground to the top of the grill, including any side shelves to achieve the best fit. How do you measure a grill for a new cover? When measuring a grill for a new cover, it’s important to measure the height, width, and depth accurately. Start by measuring the width from the left side to the right side of the grill at its widest point with the lid shut. Next, measure the depth from the front to the back, and include any handles or features that might extend beyond the main body of the grill. Finally, determine the height by measuring from the top of the
Char-Griller Mastery: Smoke Your Way to BBQ Perfection!
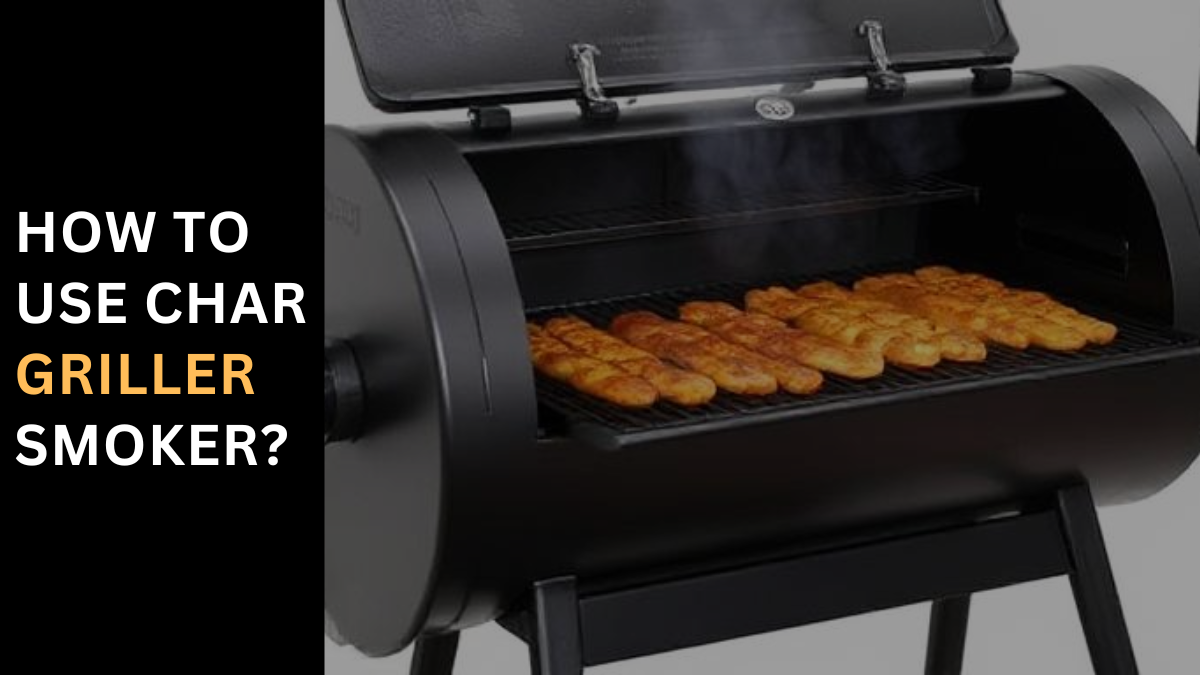
How to Use Char Griller Smoker? Using the Char-Griller Side Fire Box To master your Char-Griller, starting with the Side Fire Box is essential. It fits all Char-Griller charcoal grills, including Dual Fuels, transforming any grill into an offset smoker or even a portable grill by detaching its legs. For newcomers, a quick start guide on utilizing this accessory will boost your smoking game as you acquaint yourself with the art of true pitmaster skills. How to Attach the Side Fire Box to a Grill Attaching the Side Fire Box to your Char-Griller charcoal grill is remarkably simple. Just add the unit as shown in our quick video, and you’re set to explore the versatility of offset smoking. Season Your Grill and Side Fire Box Before diving into smoking, ensure your grill and Side Fire Box are well seasoned. Wipe them down with warm water, dry thoroughly, and coat every nook with vegetable oil using a spray bottle. Then, light a small fire, burn it for a few minutes, let it die out, and your equipment is ready to smoke. Light a Chimney of Charcoal Lastly, to get the heat going, light a Charcoal Chimney filled with either briquettes or lumps and allow them to glow and ash over a few minutes before starting your cook. Dump the Coals into the Side Fire Box After preparing your coals, dump them into the Side Fire Box. Ensure that the vent on the right side and the chimney vent on the left of the barrel are at least halfway open. This is also a good time to add wood chips or chunks to enhance the flavor of your food, ensuring not to overload which could lead to temperature swings. Bring Smoker Up to Temperature Before you begin smoking, it’s crucial to bring your smoker up to the correct smoking temperature. Ensure that the grill and Side Fire Box lids are closed to properly preheat. Aim to maintain a consistent temperature between 225 and 275 degrees Fahrenheit, focusing ideally around 250. Add Food Once the desired temperature is stable, it’s time to add your food to the grill. Position your meats or other items carefully, and use a pit thermometer to continually check the internal temperature of both the smoker and the food. Adjust the vents to keep the temperature within the proper range and avoid having to babysit the grill too frequently. Add More Fuel As Needed It’s a common misconception that you can simply add charcoal to the Side Fire Box at any time to raise or maintain the temperature. Instead, recommend starting a new chimney of charcoal and adding already burning coals for better temperature control rather than using unlit charcoal. Rotate the Food Rotate the food every few hours to ensure everything is cooked and smoked evenly. This involves moving pieces of food from areas closer to the smoke to those farther away, and occasionally turning them in a circle to promote uniform smoking. Keep Your Food Moist If you’re worried about your food drying out, especially during long smoking sessions, strategically placing a pan of water beneath the food or misting with apple juice, water, or beer every hour can keep the food moist and enhance flavors, while also catching any drips and aiding in temperature control. Setting Up the Side Fire Box for Smoking When setting up your Char-Griller for smoking, the Side Fire Box is your ally for achieving delicious results. Begin by filling the Side Fire Box with ashed charcoal, making sure to close the box lid and the main barrel, adjusting the dampers and Smokestack damper to half to manage airflow. Allow it a few minutes for the temperature to stabilize before adding wood chips or chunks for that smoky flavor. Light Charcoal Light your Charcoal Chimney filled to either halfway or three-quarters with charcoal. Use a fire starter or newspaper to ignite it, waiting for the charcoal to ash over completely without visible flames before it’s ready to be moved to the smoker. Add A Water Pan To ensure your smoked meats remain juicy and moist, add a Water Pan directly under the grates or inside a loaf pan on the grates near the Side Fire Box. This setup helps maintain a humid environment which is crucial for even cooking and helps maintain the temperature within the main barrel. Check the Dampers Again Halfway through the smoking process, it’s wise to check the dampers again. This is essential to maintain the ideal temperature for offset smoking, which thrives at 250 F but should not exceed 275 F. Adjust the dampers on the Side Fire Box and the Smokestack as needed to keep the heat suitable for low and slow cooking. Start Your Cook Once you’ve got your Char Griller Smoker heated and ready, it’s time to start your cook. Place your meat on the grill in the main barrel and maintain a steady temperature of about 250 F. This phase is crucial as you monitor both the meat and the grill’s temperature to ensure consistent smoking. Adding More Coals If you notice the temperature in the main barrel starting to dip, prepare to add more coals. Light up a half chimney of charcoal, let it ash over for a few minutes, then carefully add the hot coals to the Side Fire Box. This will help maintain the necessary temperature to continue the cooking process effectively. Conclusion: Mastering the use of a Char-Griller Smoker involves a series of deliberate steps to ensure optimal flavor and cooking conditions. Begin by setting the smoker to maintain temperatures between 200 to 275°F, using temperature probes for accuracy. Properly light the charcoal, maintain steady airflow through the intake and chimney baffles, and add moisture and wood chunks to infuse smoke flavor. Seasoning the grill beforehand enhances performance and longevity, creating a non-stick surface that improves with each use. Whether you’re a beginner or seasoned grill master, understanding how to effectively manage your Char-Griller Smoker can transform your
Patience Pays Off – Get Your 10-Pound Brisket Smoke Time!
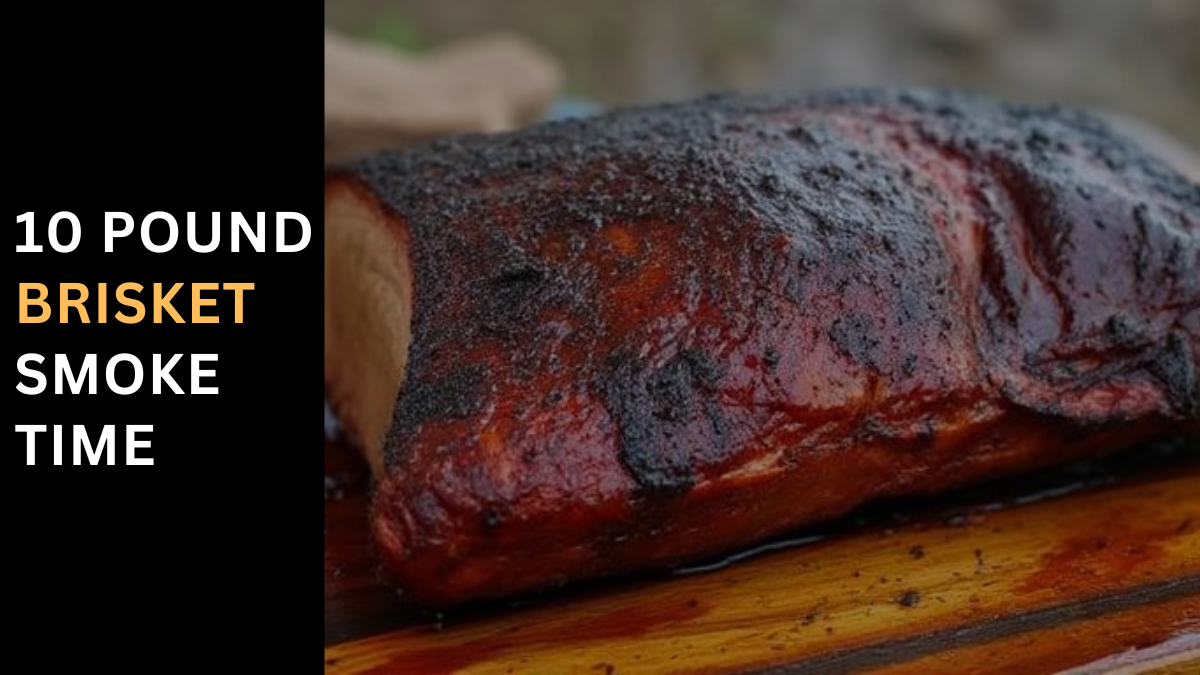
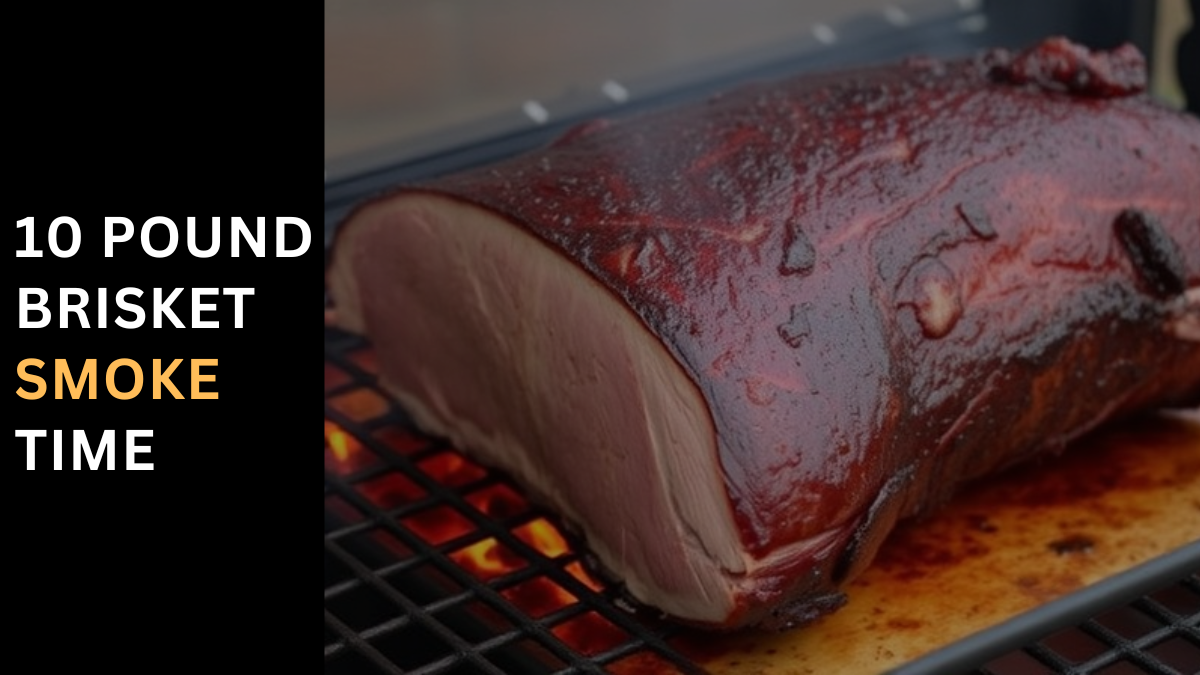
How Long to Smoke a 10 lb. Brisket? Embarking on the journey to smoke a 10 lb. brisket perfectly requires not just time but a deep appreciation for the craft of Texas barbecue. This substantial cut, a staple of good Southern cooking, demands careful planning and consistent management of your smoker. The full method often revolves around maintaining a steady 225 degrees, aiming for an internal temperature between 190-203 degrees—the sweet spot where connective tissues within the brisket melt into juicy, flavorful goodness. On average, expect the smoking process to take around 10 to 15 hours, depending on factors like the thickness of the brisket and how your smoker retains heat. The patience needed here is not trivial; it’s about giving the meat the respect and attention it deserves to achieve that fall-apart tenderness. Remember, every pitmaster may offer tips, but the essential nuances of your particular setup—like how the smoker handles temperature fluctuations—can make all the difference. Preparing to Smoke a Brisket Preparing to smoke a 10lb brisket is as much about the ritual as it is about the technique. This tough cut, revered in barbecue circles, requires a meticulous approach to detail that begins long before the brisket hits the smoker. It starts with selecting a brisket that’s evenly thick and has a good layer of fat. Handling this meat correctly from the outset can dramatically influence the outcome. Before it ever sees heat, your brisket should be at room temperature, trimmed appropriately, and seasoned to enhance its natural flavors. The aim here is to transform what is inherently a tough piece of meat into a show-stopping main course capable of feeding up to 18 people. It’s a culinary challenge, certainly, but also a chance to showcase your prowess over a day-long commitment to low and slow cooking. Each step, from the rub to the rest post-smoke, is crucial, making the difference between a good and a great brisket. How To Select Your Brisket & Where to Buy a Brisket? When embarking on the journey to buy a brisket, whether for a backyard barbecue or a beginner’s cooking tutorial, the choice of where to make your purchase is as crucial as the cut itself. Grocery stores like Costco and Sam’s Club offer whole-packer briskets, which include both the flat and the thicker point. However, exploring a local butcher or an online market might reveal more options, including the leaner brisket flat, typically thinner and less fatty compared to its opposite side. These stores also provide briskets sealed in cryovac, ensuring freshness and extending shelf life. For those serious about their meat, the adventure of purchasing extends beyond simple buying; it’s about acquiring a prime component of culinary experience—ensuring it has just the right amount of intramuscular fat to prevent it from drying out during the slow cook. Grades of a Brisket To Choose From and Why it Matters The world of brisket grading can seem like a magic realm where the amount of intramuscular fat determines the juiciness and overall eating experience. Four grades are typically available: Select, Choice, Prime, and Wagyu—the latter being the equivalent to striking gold in terms of fat content and flavor. Select is the least marbled and therefore the most likely to dry out if not cooked properly. Choice offers a moderate level of marbling, making it a good balance of price and quality. Prime boasts even more marbling, which melts during cooking, essentially basting the beef from the inside and creating lusciously juicy meat. Lastly, Wagyu, known for its whispy lines of fat running throughout, provides an unmatched level of marbling that can make every bite a luxurious experience. When selecting a grade, read about the meat’s characteristics and post-smoking expectations. The right choice can mean the difference between a meal you merely enjoy and one you’ll never forget. Therefore, expect to pay a bit more for higher grades, but the investment is well worth it for the superior flavor and texture they bring. How to Prep A Brisket to Smoke? Chilling Your Brisket For Easy Trimming Before diving into the trimming process, chilling your brisket is a crucial step. Placing the brisket in the freezer for 30 to 45 minutes before you begin helps firm up the fat, making it easier to handle and trim. Once chilled, remove the brisket from its package and pat dry with paper towels to eliminate any excess moisture. Set up your cutting board, ideally with a wet paper towel underneath to prevent it from sliding. A sharp knife is essential for smoothly cutting through the fat and shaping your brisket for the smoke. This preparation ensures that you have a well-shaped piece of meat that’s ready for the barbecue. Trimming Your Brisket (Tips and Process) The trimming of your brisket can make or break the good-tasting quality of your smoked meat. Start by donning a pair of gloves—this keeps your hands dry and prevents the fat from slipping as you trim. With your brisket still cold from the chill, it’s easier to move around and cut through the excess fat that won’t render well in the smoker, avoiding messy deposits on your cooked slices. Position your brisket on the cutting board and, using your favorite knife sharpener if needed, begin to trim the fat down to a uniform 1/4-1/8 inch. This thickness allows the fat to melt effectively during the cooking process, enhancing the flavor and moisture of the brisket. Always keep a sharp knife and paper towels handy to adjust as you go, ensuring your brisket is perfectly prepped for smoking. Fat Cap Side When preparing a brisket for the smoker, special attention must be paid to the fat cap side. This side, often white and covered in a thick layer of fat, should be carefully trimmed to leave about ¼” of fat. This ensures enough fat remains to keep the brisket moist during the long smoking process in your pellet smoker. It’s a common practice to place the brisket fat side down
Easy Making Rotisserie Turkey on a Gas Grill
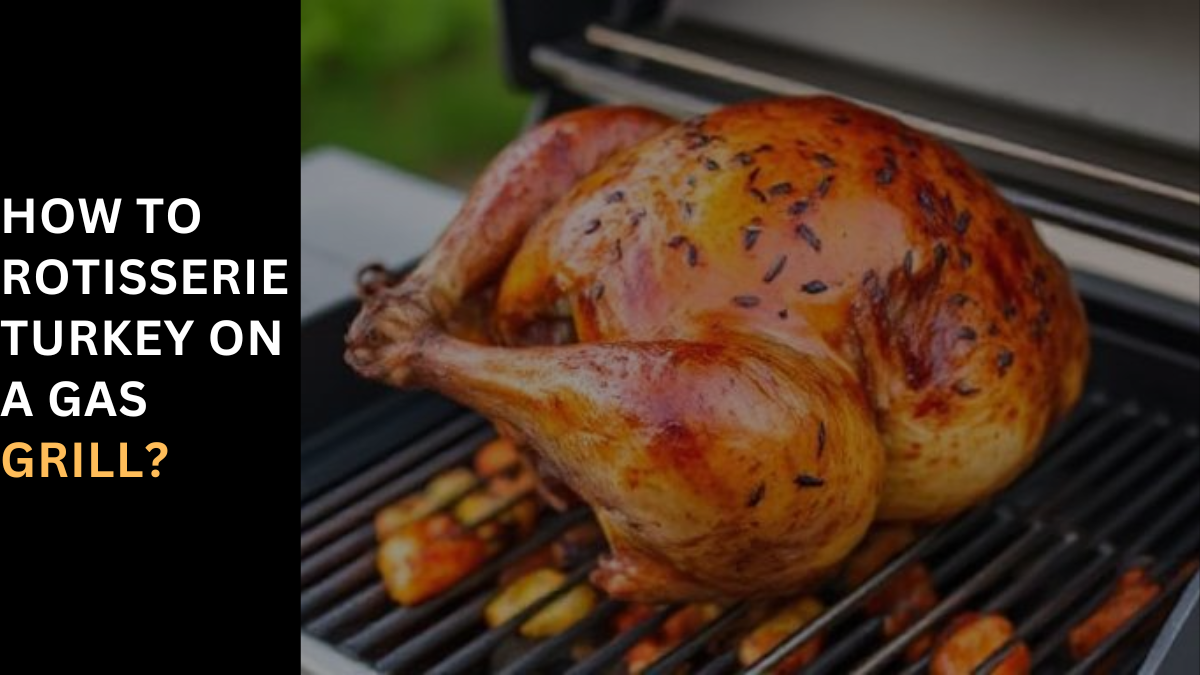
How to Rotisserie Turkey on a Gas Grill? Preparing Your Bird: The Secret to a Succulent Feast Drawing from years of Thanksgiving triumphs and the wisdom of culinary maestro Alton Brown, my journey to mastering the rotisserie turkey on a gas grill began with a simple yet transformative brine. This initial treatment, a potent mixture of salt, vegetable stock, pepper, allspice, and candied ginger, not only flavors the meat but ensures it remains juicy and tender, a stark contrast to the often tough and leathery misfortunes that can shame an oven-roasted bird. The smoke from the grill, subtly infused as the turkey is slowly turned on the spit, elevates the skin to a succulent canvas of flavorful bliss. Achieving the perfect breast meat temperature of 165°F is a testament to the method’s incredibly successful and delicious action, making every effort worthwhile and turning the house into a smoker’s rival. Stuffing the cavity with aromatics further imparts a smoked essence, making traditional turkeys seem inadequate by comparison. This self-basting mechanism, enhanced by the rotisserie’s action, avoids the inedible fate of dryness, instead raising your culinary arsenal to great heights and setting a new challenge for future Thanksgivings. Rotisserie Turkey Ingredients For a natural turkey transformation, begin with a bird weighing about 12 to 14 pounds, ensuring it’s thawed and ready for a flavorful journey. The brine—a crucial step for moisture and taste—combines 1 cup of kosher salt, 1/2 cup of light brown sugar, 1 gallon of vegetable stock, 1 tablespoon of black peppercorns, 1 1/2 teaspoons of allspice berries, and 1/4 cup of chopped candied ginger in a large pot, bringing it to a simmer until the sugar and salt dissolve. Cool this mixture down with 1 gallon of ice-cold water, ensuring the brine is completely cool before introducing the turkey. For the Aromatics To enhance the bird’s inner flavors, a mix of aromatics is prepared to fill its cavity. Combine 1 red apple and 1 onion, both sliced, with 1 cinnamon stick, a cup of water, 4 sprigs of rosemary, and a handful of sage leaves. This combination, once heated in the microwave until the apple and onion are soft, is tucked inside the turkey, releasing fragrant, subtle flavors as the bird cooks, complementing the brine’s deep, rich tones. Mastering Rotisserie Turkey: A Step-by-Step Guide Creating the perfect rotisserie turkey involves a meticulous process that starts with the brine and ends with a beautifully cooked bird, ready to carve and serve. Here’s how to do it: Brine Preparation: In a large stockpot, combine 1 gallon of vegetable stock with 1 cup of salt, 1/2 cup of brown sugar, 1 tablespoon of black peppercorns, 1 1/2 teaspoons of allspice berries, and 1/4 cup of chopped candied ginger. Bring to a boil over medium-high heat, stirring occasionally to dissolve the solids. Remove from heat and let cool to room temperature, then refrigerate until it’s below 40°F. Brining Turkey: In a non-reactive container, combine the cooled brine with an equal amount of cold water. Set the turkey, breast side down, into the brine, ensuring it’s fully submerged by weighing it down if necessary. Refrigerate for 12 to 24 hours. Preparation for Cooking: Remove the turkey from the brine and pat dry with paper towels. Place it on a rack over a rimmed baking sheet and let it air-dry in the refrigerator overnight for crisper skin. Aromatics for Flavor: Combine 1 sliced apple, 1 sliced onion, 1 cinnamon stick, and a cup of water in a microwave-safe bowl. Microwave on high for 5 minutes. Stuff the cavity of the turkey with the microwaved apple and onion, along with a few sprigs of rosemary and sage leaves. Close the cavity with a wooden skewer and fold the wings back under the turkey’s body. Tie the legs together and let the turkey come to room temperature. Preparing the Grill: If using charcoal, light a chimney full of charcoal and wait until the coals are covered with gray ash. Pour and arrange the coals on one side of the charcoal grate and place a foil pan on the other side to catch drippings for gravy. Rotisserie Cooking: Set the turkey on the rotisserie and cook over medium heat. An instant-read thermometer inserted into the thickest part of the breast should read 155°F after about 2 to 2.5 hours. Remove the turkey from the grill, rest it for at least 20 minutes to allow the juices to redistribute, then carve and serve. This process, while detailed, ensures a rotisserie turkey that is flavorful, moist, and a delight to present at any gathering, making all the effort supremely worthwhile. People also ask What is the best temperature to rotisserie a turkey? The best temperature for rotisserie cooking a turkey is 325°F. To achieve this, you should arrange the coals around the outer edge of the fire pan with a drip pan in the center, placing the rack in its lowest position. This setup helps to maintain a medium heat, as recommended by the manufacturer’s instructions. Using an oven thermometer to monitor the temperature is crucial for maintaining the right setting throughout the cooking process. Can you rotisserie on a gas grill? Yes, you can definitely use a gas grill for rotisserie cooking. Modern gas grills are often equipped with a rotisserie attachment and can hold a significant weight, enough for a large turkey, a rib roast, or multiple whole chickens. The key is ensuring the bird is balanced on the rod, facing the right way to ensure even cooking. Should you brine a turkey before rotisserie? Brining a turkey before rotisserie cooking is highly recommended. A brine, whether a simple solution or a basic dry brine with salt, brown sugar, and black pepper, enhances the flavor of the turkey. The process of spinning the bird on the rotisserie naturally bastes it in its juices, leading to crisper skin and more flavorful meat during cooking. How do you skewer a turkey for a rotisserie? To skewer a turkey for
Grill A Perfect Rotisserie Chicken Every Time
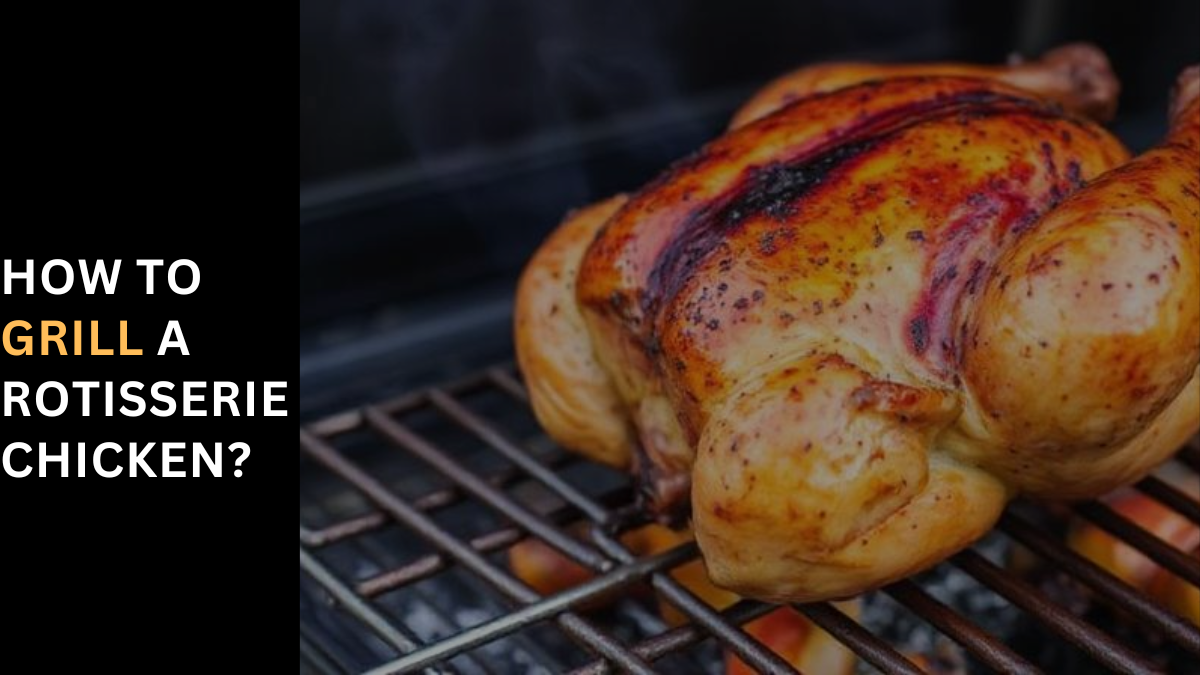
How to Grill A Rotisserie Chicken? Rotisserie Chicken Grilling a rotisserie chicken involves a simple recipe that transforms chicken into a delicious main dish. Prepare a butter mixture with your favorite seasonings to ensure the meat stays moist and flavorful. Carefully apply this mixture under the skin to make the chicken tasty and crispy on the outside. The key to a perfect rotisserie chicken is occasional basting, which ensures a crispy skin while keeping the meat succulent. As it grills, the chicken becomes the centerpiece, ideally accompanied by sides like French fries and coleslaw. Everyone loves this dish for its content that’s both contextually relevant and bursting with flavor, making it a number one choice for any occasion. Through personal experience, I’ve found that the right blend of seasonings and attentive basting can truly extract the full potential of this dish, offering a taste that’s unmatched by any other cooking method. Rotisserie Chicken Ingredients For a rotisserie chicken at home, the recipe starts with a 3-pound chicken, ideal for its cooking time and size. Butter under the chicken’s skin keeps the meat moist and juicy, giving it a rich flavor. Essential seasonings such as salt, pepper, and paprika make the chicken simply seasoned yet delicious. When using ingredients for a larger or smaller bird, adjust the quantities accordingly. This recipe is meant to extract the best flavors, ensuring the content is contextually relevant to anyone looking to create the perfect rotisserie chicken at home. How to Rotisserie a Chicken To rotisserie a chicken, begin by seasoning the chicken cavity with salt for flavor. Tie the wings and legs close to the body using twine or string to ensure even cooking. Place the chicken on the rotisserie and set the grill to high for 10 minutes to sear the skin, then turn down to medium. Baste the chicken with a butter and seasonings mixture, then close the lid and continue cooking, basting occasionally. The chicken is cooked through when the internal temperature reaches at least 180 degrees F. This step-by-step recipe provides an overview of what to expect as you make a full, flavorful rotisserie chicken. Directions How Long Is Rotisserie Chicken Good For? Rotisserie chicken stays good for up to four days when stored in a shallow, airtight container in the refrigerator. Ensure it is fully cooked before placing it in the refrigerator to maintain its quality. How to Cut Rotisserie Chicken? To cut a rotisserie chicken, allow it to cool for 15 minutes. Place the chicken breast side up on a cutting board. Pull the legs away from the body to expose the hip bone, then cut through it to separate the leg into drumstick and thigh. Next, cut through the wing tip joint and slice down one side of the breastbone to detach the breast. Repeat on the other side to fully separate the breasts from the body, allowing for easily carved meat. How to Reheat Rotisserie Chicken? To reheat a rotisserie chicken, you have several options: microwave, oven, or air fryer. In the microwave, place the chicken on a plate, cover it with a damp paper towel, and heat until heated through. For the oven, place the chicken in a baking dish, pour chicken broth until it’s ¼-inch deep, cover with aluminum foil, and bake at 400 degrees F for 15 to 20 minutes. In the air fryer, place the chicken in the basket and cook at 350 degrees F for three to four minutes for a crispy finish. What To Serve With Grilled Rotisserie Chicken? Rotisserie Chicken Versus Oven Roasted Chicken: A Comparison When it comes to achieving delicious results from your roasting method, both rotisserie and oven-roast offer their unique perks. Roasting a whole chicken is a weekly ritual for many, especially in chilly weather when the warmth of the oven adds comfort to the home. Oven roasting typically takes about an hour, making it a quick and efficient way to prepare a hearty meal. On the other hand, rotisserie chicken, which usually takes 1 ½-2 hours to cook, allows you to put the chicken on the grill, walk away, and check on it only occasionally. Before you know it, you’re presented with a gorgeous bronze bird that’s ready for dinner. The rotisserie method involves slow cooking over an open flame, which not only imparts a unique flavor but also ensures even cooking and a succulent texture that’s hard to achieve in an oven. Both methods require their tools and set-up: a rotisserie kit for the grill and a roasting pan for the oven. Choosing between the two often comes down to personal preference, the desired flavor, and the cooking environment. Whether you prefer the hands-off, flame-kissed approach of the rotisserie or the quick and comforting oven roast, both methods promise a delicious chicken dinner. Rotisserie Chicken for a Gas Grill or Pellet Grill Originally, the concept of rotisserie chicken might evoke images of a wood-fired setup, but in this post, we’re focusing on how it equally works wonders with a gas grill or a pellet grill, provided you have the necessary rotisserie attachment. The first step is a slight change in preparation: smear your bird with a light coating of mayonnaise or olive oil. Though it sounds strange, you’ll have to trust the process—it’s a game-changer for achieving crispy, flavorful skin. After this unconventional yet effective prep step, season your chicken well with your choice of herbs and spices. Proceed to set your gas or pellet grill to a steady temperature of 400°F. For pellet grills, make sure the hopper is full of good quality hardwood pellets to ensure a consistent burn and impart that subtle smoky flavor that complements the rotisserie chicken beautifully. This method seamlessly blends traditional rotisserie techniques with the convenience and control of modern grills, promising a deliciously roasted chicken with minimal fuss. Temperature and Timing for Rotisserie Chicken For a gas grill, the ideal temperature setting is around 400°F. If you’re using a pellet grill to roast your
Patience Pays Off – Get Your 10-Pound Brisket Smoke Time!
How Long to Smoke a 10 lb. Brisket? Embarking on the journey to perfectly smoke a 10 lb. brisket requires not just time but a deep appreciation for the craft of Texas barbecue. This substantial cut, a staple of good Southern cooking, demands careful planning and consistent management of your smoker. The full method often revolves around maintaining a steady 225 degrees, aiming for an internal temperature between 190-203 degrees—the sweet spot where connective tissues within the brisket melt into juicy, flavorful goodness. On average, expect the smoking process to take around 10 to 15 hours, depending on factors like the thickness of the brisket and how your smoker retains heat. The patience needed here is not trivial; it’s about giving the meat the respect and attention it deserves to achieve that fall-apart tenderness. Remember, every pitmaster may offer tips, but the essential nuances of your particular setup—like how the smoker handles temperature fluctuations—can make all the difference. Preparing to Smoke a Brisket Preparing to smoke a 10lb brisket is as much about the ritual as it is about the technique. This tough cut, revered in barbecue circles, requires a meticulous approach to detail that begins long before the brisket hits the smoker. It starts with selecting a brisket that’s evenly thick and has a good layer of fat. Handling this meat correctly from the outset can dramatically influence the final outcome. Before it ever sees heat, your brisket should be at room temperature, trimmed appropriately, and seasoned to enhance its natural flavors. The aim here is to transform what is inherently a tough piece of meat into a show-stopping main course capable of feeding up to 18 people. It’s a culinary challenge, certainly, but also a chance to showcase your prowess over a day-long commitment to low and slow cooking. Each step, from the rub to the rest post-smoke, is crucial, making the difference between a good and a great brisket. How To Select Your Brisket & Where to Buy a Brisket? When embarking on the journey to buy a brisket, whether for a backyard barbecue or a beginner’s cooking tutorial, the choice of where to make your purchase is as crucial as the cut itself. Grocery stores like Costco and Sam’s Club offer whole-packer briskets, which include both the flat and the thicker point. However, exploring a local butcher or an online market might reveal more options, including the leaner brisket flat, typically thinner and less fatty compared to its opposite side. These stores also provide briskets sealed in cryovac, ensuring freshness and extending shelf life. For those serious about their meat, the adventure of purchasing extends beyond simple buying; it’s about acquiring a prime component of culinary experience—ensuring it has just the right amount of intramuscular fat to prevent it from drying out during the slow cook. Grades of a Brisket To Choose From and Why it Matters The world of brisket grading can seem like a magic realm where the amount of intramuscular fat determines the juiciness and overall eating experience. Four grades are typically available: Select, Choice, Prime, and Wagyu—the latter being the equivalent of striking gold in fat content and flavor. Select is the least marbled and most likely to dry out if not cooked properly. Choice offers a moderate level of marbling, making it a good balance of price and quality. Prime boasts even more marbling, which melts during cooking, essentially basting the beef from the inside and creating lusciously juicy meat. Lastly, Wagyu, known for its whispy lines of fat running throughout, provides an unmatched level of marbling that can make every bite a luxurious experience. When selecting a grade, read about the meat’s characteristics and post-smoking expectations. The right choice can mean the difference between a meal you merely enjoy and one you’ll never forget. Therefore, expect to pay a bit more for higher grades, but the investment is well worth it for the superior flavor and texture they bring. How to Prep A Brisket to Smoke? Chilling Your Brisket For Easy Trimming Before diving into the trimming process, chilling your brisket is a crucial step. Placing the brisket in the freezer for 30 to 45 minutes before you begin helps firm up the fat, making it easier to handle and trim. Once chilled, remove the brisket from its package and pat dry with paper towels to eliminate any excess moisture. Set up your cutting board, ideally with a wet paper towel underneath to prevent it from sliding. A sharp knife is essential for smoothly cutting through the fat and shaping your brisket for the smoke. This preparation ensures that you have a well-shaped piece of meat that’s ready for the barbecue. Trimming Your Brisket (Tips and Process) The trimming of your brisket can make or break the good-tasting quality of your smoked meat. Start by donning a pair of gloves—this keeps your hands dry and prevents the fat from slipping as you trim. With your brisket still cold from the chill, it’s easier to move around and cut through the excess fat that won’t render well in the smoker, avoiding messy deposits on your cooked slices. Position your brisket on the cutting board and, using your favorite knife sharpener if needed, begin to trim the fat down to a uniform 1/4-1/8 inch. This thickness allows the fat to melt effectively during the cooking process, enhancing the flavor and moisture of the brisket. Always keep a sharp knife and paper towels handy to adjust as you go, ensuring your brisket is perfectly prepped for smoking. Fat Cap Side When preparing a brisket for the smoker, special attention must be paid to the fat cap side. This side, often white and covered in a thick layer of fat, should be carefully trimmed to leave about ¼” of fat. This ensures enough fat remains to keep the brisket moist during the long smoking process in your pellet smoker. It’s a common practice to place the brisket fat side down in the smoker.
Unlock Flavor Safely – Smoke Meat at 180 Degrees Now!
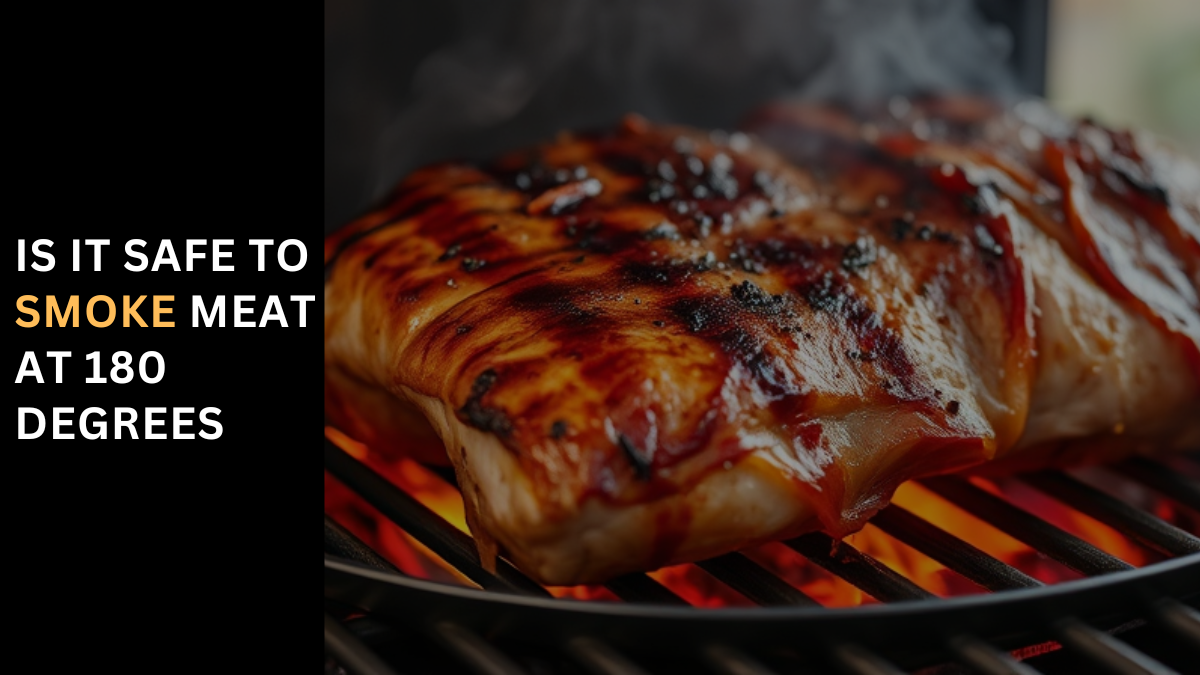
Is it Safe to Smoke Meat at 180 Degrees? Smoking has evolved from a process of preserving foods before the era of refrigerators and chemical preservatives. Smoke was used to extend the shelf life of food, particularly meat. Nowadays, smoking in barbecue is more about taste and texture, enhancing the flavor of the food and tenderizing even the worst cuts of meat into a wonderful meal. When you think of smoked meat, it’s not just ham, bacon, or fish; in traditional barbecue regions like Texas and North Carolina, smoking means something else. Smoking here is about cooking food low and slow, which requires special equipment such as a charcoal grill set up a special way. It can take anywhere from an hour to 20 plus hours, making it an art that involves as much patience and time as it does skill. It’s a far more nuanced art than simple grilling, and placing a slab of meat on the grill isn’t enough—you need the right tools and techniques to truly master this method. Selecting a Smoker When selecting a smoker, there are several factors to consider. The supplies and equipment you need include a container to hold the smoke and a source of fuel to generate that smoke. A smoker can range from a hole in the ground to a $20,000 smoker, and the fuel options range from electricity to hardwood. The type of smoker you buy will depend on your space, the fuel you want to use, and the effort you’re willing to put in, all within your budget. Smokers vary in size, from small drum smokers to large box smokers, and the amount of food they can hold will also vary. Smoking aficionados often prefer hardwoods like hickory, oak, or apple as the only way to go, though charcoal, wood pellets, propane, and electricity are also common fuel choices. While charcoal smokers are often the least expensive, electric smokers that heat wood are the most hands-free. Choose the type of fuel that best suits you, but keep in mind that if you don’t use hardwood, your smoker may not impart the satisfying smokey taste you’re after in your food. Using Hardwood When seeking that signature smokey taste, it’s important to understand the aspect of smoking meat with hardwood. You need to choose a smoker that uses hardwood if you want the best results. Freshly cut hardwood is ideal as it contains half its weight in water, which produces a nice, moist steam that helps flavor the meat. Although dried hardwood has only about 5 percent water, it still contains a lot of sugars and carbohydrates that impart that desired smokey taste. The species of wood and where it is grown have a direct effect on your food’s flavor. For example, Hickory provides a very smokey taste reminiscent of bacon, while maple is sweeter and milder. Using hardwood requires some preparation, like soaking the wood in water for about an hour before use. Wet wood will last for hours, while fresh wood may burn away in minutes. If you’re using wood chips, soak them first and place them in an aluminum foil pouch with several punctured holes to make them smoke for several hours. Choosing Cuts of Meat When selecting the right type of meat to smoke, it’s not just a matter of personal taste; certain cuts are more suited to the long, slow, and low temperature smoking process. For instance, brisket shoulder, which have grown tough over the lifespan of the animal due to frequent use of muscles, turn out exceptionally well when cooked with this method. These cuts require a very slow cook to break down the tough fibers, making them very easy to eat and enjoy. On the other hand, prime rib, leg of lamb, and lamb shoulder are also popular choices that benefit from smoking, as it enhances their rich flavors. In contrast, whole poultry, fish, cheese, and nuts represent a completely different spectrum of smoking options. These items don’t necessarily limit you but offer a variety of tastes and textures that are traditionally not associated with smoking but have become more popular as the smoking taste profiles have diversified. Each type brings its unique characteristics to the table, making smoking a versatile cooking method across various meats and other foods. Controlling Temperature Smoking meat requires precise temperature control to ensure that the meat reaches its safe and ideal internal temperatures—145 degrees for most meats and 165 degrees for poultry. However, when aiming for a tender barbecue, a higher final temperature of about 180 degrees is sometimes targeted, especially for tougher cuts where the collagen needs to break down into gelatin, making the meat succulent and full of flavor. The best range for smoking is typically between 200 to 220 degrees Fahrenheit, which allows the smoke and low heat to tenderize the meat over a long process without overcooking. Accurate thermometers are essential, with one placed inside the smoker to monitor the smoker temperature and another meat thermometer to track the internal temperature of the meat. This setup helps you keep the temperature low enough for the smoke to sink into the meat, allowing the natural connective fibers to slowly break down and change into tender, flavorful gelatin. Sustaining the Smoke The basic rule for smoking is to place the meat in the smoker and ensure it’s surrounded by a good, thick stream of smoke at all times to give the meat the exposure needed to enhance its flavor. The smoke needs to be moving to prevent the smoke from turning the meat bitter due to build-up of creosote. Managing this aspect ensures that the flavor of the smoke permeates the meat without overpowering it, creating a balanced and enjoyable taste. Maintaining the Moisture In smoking, using a steaming water pan is crucial to the process. In a large smoker, you may need to refill the water pan several times during smoking. Adding marinade before cooking or a sauce during the smoking can also assist
Side Dish Winners – Best for Smoked Tri Tip Revealed
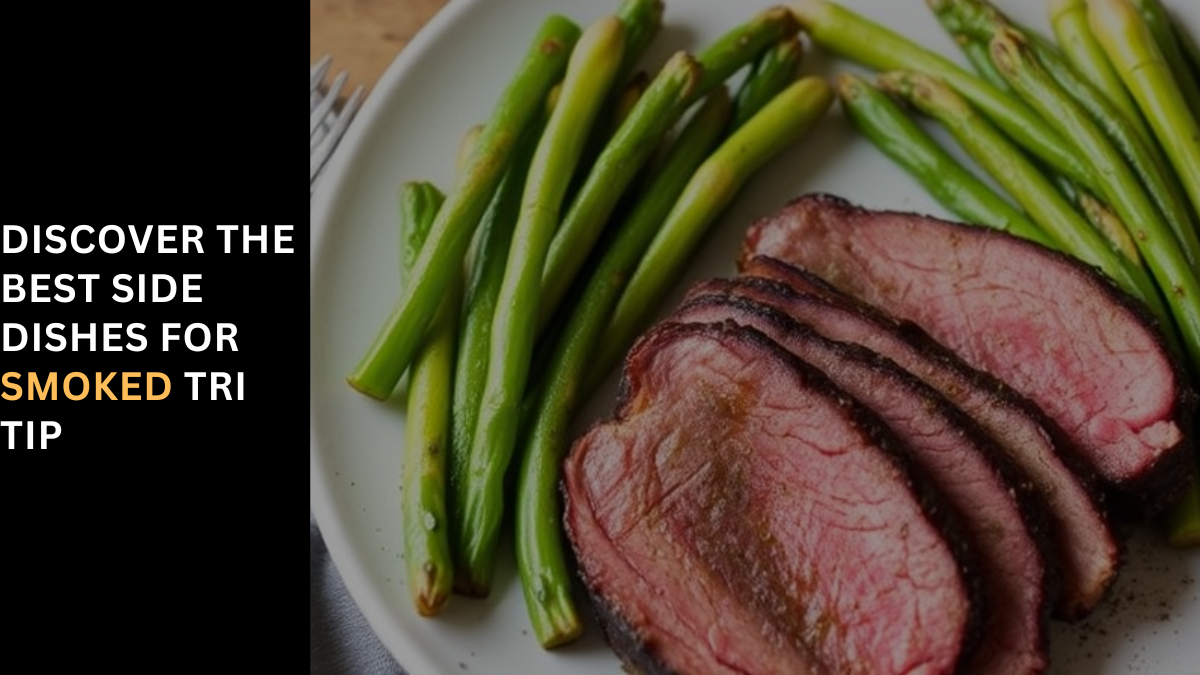
Discover the Best Side Dishes for Smoked Tri-Tip What to Serve with Tri Tip Steak? When planning a meal that includes smoked tri-tip steak, choosing the right side dishes can truly elevate the dining experience and make it unforgettable for your guests. Potato and Rice Side Dishes Potatoes and rice are not only popular and convenient; they also complement the flavor of tri-tip exceptionally well. Whether mashed, baked, fried, or roasted, these sides are versatile enough to enhance the flavorful and tender beef, offering a delicious and well-rounded addition to the meal. Mashed potatoes For a truly comforting addition, mashed potatoes stand out as a creamy, buttery, and fluffy choice that everybody loves. This side dish is easy to prepare and can be served with herb-infused butter or gravy, making it a perfect match for the savory flavors of tri-tip. It’s a simple yet hearty option that perfectly complements the main course, ensuring that young ones and the young at heart can enjoy it without any issues. Baked potatoes Fried Sweet Potatoes and Jasmine Rice Pairing smoked tri-tip steak with the right side dishes not only complements the main but turns an ordinary meal into a gastronomic delight. Baked potatoes are a timeless classic that never disappoints; topped with a sinful amount of bacon, cheese, chives, and sour cream, they please the palate and bring a comforting richness. Fried Sweet Potatoes For a healthier alternative, fried sweet potatoes offer a nutritious yet delicious contrast with their crispy, caramelized exterior balancing the salty, savory flavors of the steak Jasmine Rice Completing this trio, Jasmine rice, with its fragrant and fluffy texture, is the perfect side to balance the intense flavors of beef, ensuring every bite is as satisfying as it is sophisticated. Soups, Salads, and Vegetable Side Dishes French Onion Soup A well-rounded meal featuring smoked tri-tip steak demands side dishes that are not only flavorful but also healthy. Salads, soups, and vegetables are excellent choices to pair with the juicy, robust flavors of tri-tip, significantly enhancing the nutritional value of your dining experience. A steaming bowl of French Onion Soup, with its rich, savory broth, caramelized onions, and toasted bread, is an ideal companion for cooler weather and provides a good source of fiber and antioxidants. Spicy Green Beans To add a bit more heat and flavor to the meal, Spicy green beans serve as a tasty, healthy side dish that not only complements the steak but also aids in digestion and metabolism. This low-calorie, high-fiber option is a worthy partner to the main course, making it a complete and balanced offering. Classic Caesar salad Meanwhile, a Classic Caesar salad, with crispy croutons, fresh lettuce, Parmesan cheese, and tangy dressing, offers a perfect harmony of tastes and textures while supplying healthy fats, vitamins, and minerals. Baked Pinto Beans Baked pinto beans serve as an incredibly filling dish, loaded with high protein and fiber. This hearty side is created with a mix of tomatoes, garlic, and spices, making it a great choice for those who want to enjoy their steak without any guilt. The robust flavors of the beans complement the smoked tri-tip steak beautifully, providing a satisfying and guilt-free addition to any barbecue or dinner meal. Steamed Broccoli Steamed broccoli is a straightforward, yet attractive side dish that offers significant health benefits. It is high in fiber, vitamins, and antioxidants. The benefits of steaming include retaining more flavor and nutrients than many other cooking methods, making it a simple and quick choice that enhances any plate of smoked tri-tip steak with minimal effort. Roasted Veggies Roasted veggies bring a delightful burst of inherent sweetness and taste that is enhanced through the roasting process. Choose your preferred vegetables—such as bell peppers, carrots, zucchini, or eggplant—and season them with herbs and spices. Roasting these veggies until they are soft and caramelized not only maximizes their flavor but also provides a colorful and nutritious side that pairs perfectly with smoked tri-tip steak. Grilled Mushrooms Grilled mushrooms offer a low-calorie, high-nutrient option that pairs excellently with the beefy flavors of tri-tip steak. The umami flavor of the mushrooms, combined with their crisp, smoky texture, is significantly enhanced by grilling. This side dish adds a gourmet touch to the meal, complementing the main dish with its rich flavors and appealing texture. Comfort Food Classic Side Dishes When serving smoked tri-tip steak, choosing the right comfort food classic side dishes can truly sate your appetite and bring back fond memories of traditional, hearty meals. These filling sides are ideal for rounding out your dining experience, offering warm and inviting flavors that are as comforting as they are delicious. From cheesy mac and cheese to buttery dinner rolls, each dish adds a layer of home-cooked satisfaction to the meal, making it unforgettable. Mac and Cheese Mac and cheese is a timeless classic that takes steak dinners to the next level. This traditional comfort food, known for its rich, creamy, and cheesy goodness, is the ultimate crowd-pleaser and can be prepared in various ways. Whether made on the stovetop, baked in the oven, or enhanced with bacon and breadcrumbs, it always manages to serve as a perfect side dish to tri-tip steak. Garlic Butter Dinner Rolls Garlic butter dinner rolls are the ideal accompaniment to any meat dish, especially tri-tip steak. Their soft, fluffy, and buttery texture makes them not just a simple and warm addition to the table but also a fresh way to provide a homey feel and warming aroma to your food. They can be served straight from the oven, ensuring every bite is as inviting as the last. Cornbread To embrace the flavors of the South, cornbread is a fantastic choice to serve alongside tri-tip steak. This sweet, crumbly, and salty dish adjusts easily to your liking, whether you prefer it enhanced with honey butter or spiced up with jalapeno slices. Cornbread captures the essence of southern comfort food, complementing the robust flavors of the steak and enriching the overall meal. Old Fashioned
Juicy Results Await – Smoke Brisket at 250 How Long?
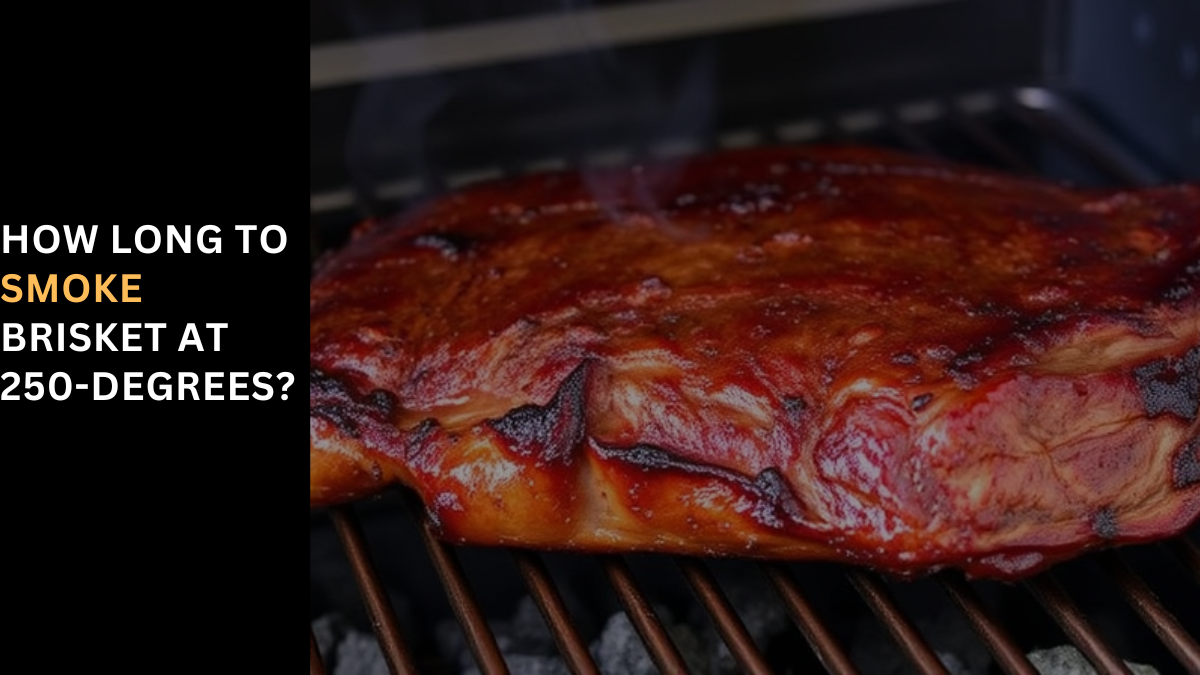
How Long to Smoke Brisket at 250 Degrees? Understanding the Intricacies of Smoking Brisket Smoking brisket at 250 degrees is a culinary art that embodies the patience and expertise necessary to transform this tough cut of meat into a succulent, life-altering experience. As a confessed foodie and long-time home cook, I’ve come to appreciate that this process is more than just cooking; it’s a rite of passage for those willing to learn the subtle nuances that make brisket so sought-after across the globe. This cut is not just food; it’s an emblematic centerpiece of traditional family barbecues and competitive competitions, where everyday people and seasoned grill veterans strive to showcase their skills. The key to perfecting this indulgent dish lies in maintaining a low and slow approach, allowing the flavorful juices to coalesce into something divine. Patience, precision, and a deep understanding of your grill’s temperament are crucial as each bite promises complete satisfaction. Through years of fine-tuning my methods at various backyard cookouts, I’ve honed a technique that offers that warmth and satisfaction with every succulent bite. Whether you’re a neighborhood grill master or someone just exploring the rich culture of BBQ, the journey to perfect this extraordinary cut of beef is well worth the challenge. Broad Statement on the Length of Time to Smoke a Brisket The time it takes to smoke a brisket can vary widely, influenced by several factors that impact the cooking duration. When focusing on a specific amount of time, it’s important to be aware of the factors that assess how a particular cut of meat might need more or less time than expected. Among the top factors to consider in determining the length of time to smoke a brisket are its size, weight, and cooking temperature. Size and Weight The number one factor to take into account when deciding the hours to smoke a brisket is its size and weight. Larger briskets take more time to cook thoroughly as the heat needs to travel further to the center of the cut to work its magic. Cooking Temperature Lower heat allows for a slow and gradual cooking process, which helps break down the tough collagen and connective tissues in the brisket, resulting in a tender and juicy texture. The low and slow cooking method is preferred by renowned pitmasters. However, those who cook at higher temperatures find the brisket can finish cooking faster, though achieving a tender result is more challenging and may lead to harder crust formation; a lot of pitmasters favor this technique for its distinct texture. Type of Smoker Different Smokers Impact Average Time to Smoke Brisket Different smokers impact the average time to smoke a brisket in different ways. An offset smoker, for instance, takes longer to smoke a brisket because its indirect heat provides a slower cook. On the other hand, electric smokers offer shorter cooking times due to their ability to generate and maintain consistent heat levels throughout the cooking process. Pellet smokers, which use wood pellets as a direct fuel source, and drum smokers which operate with hot coals without a water pan to provide direct radiant heat, also vary in their cooking times. Lastly, kamado grills, made of ceramic, are prized for their heat retention which results in an even and steady cook. To really master your smoking unit, it’s crucial to familiarize yourself with its nuances and research the best approaches for cooking with your particular smoker. The fun part? The opportunity to experiment with these different types to discover the ideal smoking times for that perfect brisket. Desired Doneness Ideal Texture of Smoked Brisket The ideal texture of a smoked brisket is largely a matter of personal preference, but as a general rule, a properly cooked brisket should be moist and able to pull apart easily with a gentle tug. It should boast a rich, dark caramelized bark or crust that is highly coveted. Some pitmasters prefer their brisket to have a firmer bite, especially if they intend to use the meat in a BBQ brisket sandwich or when making sliced pastrami. Finding the sweet spot that best suits your palette often requires a little experimentation with time and technique. Fat to Meat Ratio Brisket is typically characterized by a significant amount of marbling, which is crucial to ensure the fat properly breaks down and transforms into gelatin during the smoking process. This needs a quite long duration and is important in terms of texture and flavor. The fat naturally bastes the meat, keeping it moist and succulent. Always pay attention to how much marbling and connective tissue your brisket contains as a lot may need you to increase the smoking time to achieve a tender and flavorful final result. Guide to the Perfectly Smoked Brisket: Hours Per Pound When aiming for a perfectly smoked brisket, being aware of the factors that impact brisket cooking times is crucial. The secret to achieving delicious, melt-in-your-mouth brisket lies in knowing the hours per pound needed to smoke the brisket. Armed with this basic formula, the smoking process becomes much easier to manage, allowing you to determine the ideal cooking time for your particular brisket. Whether you are a novice or a seasoned smoker, this complete guide helps ensure that every brisket you prepare will be based on its weight and the hours it will take to smoke Understanding Base Temperature For smokers, it’s important to understand the average temperature range for smoking this premium cut of meat. The most common cooking temperature for a brisket is 250° F (120° C), which is advised as a base temperature. This indicates a mid-range in terms of cooking temperatures and is often the safest bet for getting an evenly cooked, tender brisket. If you need to increase the temperature to 300° F (150° C) for cooking in the high-temperature range, or cook low and slow, you might need to set your smoker to 225° F (110° C) or below. This general guide is extremely helpful for cooking smoked