

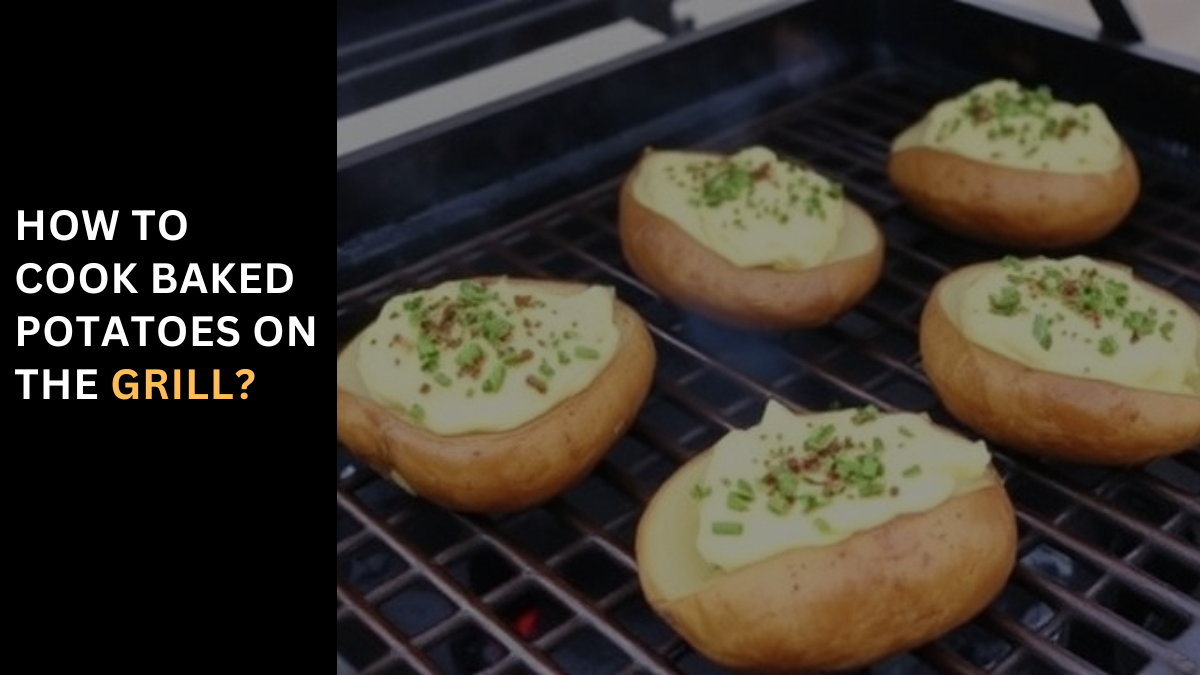
How to Cook Baked Potatoes on the Grill? Baked Potatoes On The Grill Mastering grilled baked potatoes is easy and results in a side dish that boasts a crispy skin and a fluffy inside, akin to a steakhouse experience but right from your grill. The key is making a salt crust on the potato, which enhances the flavor and keeps the potatoes naturally moist and tender. Whether you’re planning to serve them alongside your favorite protein or as a stand-alone treat, these grilled marvels comply with Whole30 and vegan diets, allowing you to load them up with various toppings or enjoy their simplicity. The transformation of baked potatoes on the grill into a crispy, fluffy delight will elevate any meal, proving that your grill can do much more than just cook meats. Why You’ll Love This Recipe? You’ll love this recipe because it turns ordinary baked potatoes into something extraordinary by using the grill. The grill imparts a unique flavor and creates a delightful salt crust on the skins, making them irresistibly crispy while keeping the insides perfectly fluffy. This method elevates your kitchen repertoire, allowing you to prepare side dishes that rival those of a high-end steakhouse. The contrast between the crispy skins and the fluffy insides makes these grilled baked potatoes a standout addition to any meal. What Makes These Potatoes So Good? What makes these potatoes stand out is their fluffy insides and crisp skins, achieved through a unique grill-cooking method that also forms a delectable salt crust. This combination enhances both the texture and flavor, making them irresistible. The process is made easy with a step-by-step guide, complete with pictures and clear directions in the article, ensuring you can replicate the results effortlessly. For those looking to save time, the potatoes can be precooked in the microwave, making the grill time even faster. Whether you’re cooking on your patio grill for company or a quiet night in, these baked potatoes are sure to impress. Ingredients for Grilled Baked Potatoes For grilled baked potatoes, you’ll need: How to Make Them To create perfectly grilled baked potatoes, follow these steps: Preheat the Grill: Start by preheating your grill to a high heat setting, aiming to reach an internal temperature of 350º F. This ensures a crisp exterior on the potatoes. Prepare the Potatoes: Wash the potatoes thoroughly, then prick each one multiple times with the tines of a fork. This allows steam to escape during cooking. After pricking, pat the potatoes dry to remove any excess moisture. Coat with Oil: Place a couple of tablespoons of avocado oil (or another neutral oil) in a wide, shallow bowl. Roll the dry potatoes in the oil, ensuring they are evenly coated. Allow any excess oil to drip off by lifting the potatoes and holding them for a moment before the next step. Salt the Potatoes: Pour a generous amount of Kosher salt or sea salt into another wide, shallow bowl. Roll the oil-coated potatoes in the salt, making sure they are fully coated with a layer of salt. This will help form a crispy crust. Wrap in Foil: Wrap each salt-coated potato in foil, using enough layers to completely cover the potato. This helps to lock in moisture, ensuring the insides stay fluffy. Grill the Potatoes: Place the foil-wrapped potatoes on the grill. Close the lid and cook for about 60 minutes. You can test for doneness by inserting a skewer or fork into a potato; it should slide in with minimal resistance. Unwrap and Serve: Once done, remove the potatoes from the grill and carefully unwrap the foil. Make a slit along the top of each potato, then press the ends towards the center to open them up. They’re now ready to serve with your choice of toppings. Remember to handle the hot potatoes with care, especially when unwrapping the foil and opening them up for serving. How To Make a Baked Potato on the Grill: A Foolproof Method for Fluffy, Smoky Spuds When winter fades and summer beckons, the oven often takes a backseat as the grill becomes the heart of cooking. Yet, there’s no reason for your cherished baked potato habit to come to a halt. It’s the perfect time to transition those steaming spuds outdoors, where they can roast to perfection on the grill, gaining a savory, smoky flavor that makes them irresistibly delicious. Start by selecting the right potatoes; large, fluffy potatoes work best. Oil and season them well to ensure a crispy skin that will make every bite a delight. Instead of the oven rack, place your potatoes directly on the grill, ramping up the heat to mimic the oven’s “bake” setting. This method doesn’t just bake; it infuses each potato with a smoky essence that is the hallmark of grill cooking. The joy of baked potatoes is in the load of accouterments your hearts may desire. From traditional butter and salt to a plethora of toppings, each potato becomes a canvas for your culinary creativity. As the potatoes sit roasting, the anticipation builds until it’s time to serve. Placed on a plate, these fluffy, smoky spuds become the centerpiece of any family gathering, where they disappear as fast as they’re served, leaving everyone enjoying the warm, comforting embrace of a perfectly grilled baked potato. Tips for Making Baked Potatoes on the Grill For perfect baked potatoes on the grill, consider these tips: Following these steps will ensure your grilled baked potatoes are a smoky, savory delight every time. The Best Potatoes for Grilling When selecting potatoes for grilling, Russet and Idaho potatoes are top choices due to their high starch content. This attribute makes their insides turn light and fluffy once cooked, making them exceptionally absorbent to the rich flavors of smoke and char characteristic of grilled foods. For those who prefer smashed potatoes or are looking for a sweeter taste, smaller varieties or even a sweet potato can be excellent alternatives, offering a delightful twist to traditional grilled potatoes. How to
Keep Prime Rib Deliciously Warm – Long-lasting Methods!
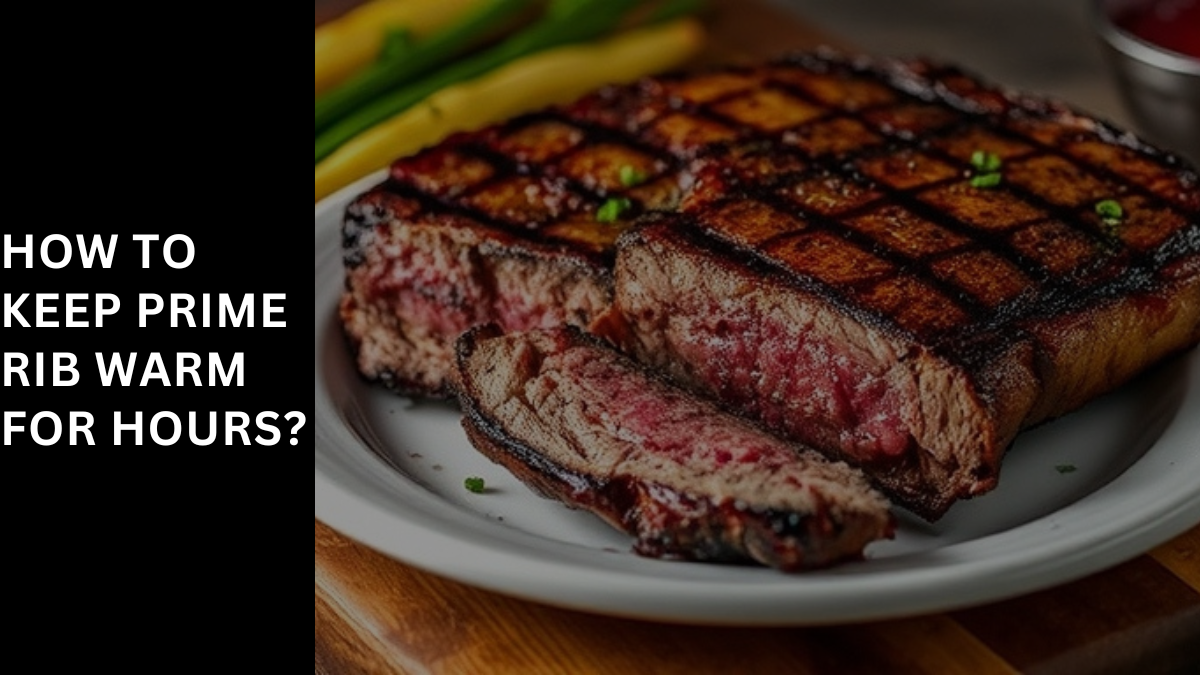
How to Keep Prime Rib Warm for Hours? Keeping your prime rib warm for an extended period ensures satisfaction among your guests as they enjoy the delicious texture and flavor that makes the dish so appealing. The challenge lies in employing effective tips and tricks to maintain that fresh-out-of-the-oven taste for hours. In my experience, mastering the techniques of using tools like an oven set at a low temperature and wrapping the meat in layers of aluminum foil can effectively trap the heat inside. This approach not only keeps the prime rib warm but also preserves its appeal, ensuring that every slice served is as succulent and flavorful as possible. Through this article, I share insights into the tools and techniques that I’ve found invaluable in keeping prime rib perfectly warm, offering a meal that guests will not only enjoy but remember. 1. Why It’s Important to Keep Prime Rib Warm? It’s important to keep your prime rib warm because, as it cools down, it can lose its juiciness and flavor, which are essential aspects of its appeal. Serving it hot ensures that the meat remains tasty and juicy, offering the best experience possible. We’ll dive into methods to preserve this texture and warmth, which is critical to serve at the right time. The purpose here is not just about maintaining temperature but also enhancing the overall enjoyment of the dish. 2. Tools and Materials Needed To achieve this, you’ll need certain tools and materials. Aluminum foil is key for wrapping the meat to trap heat. A meat thermometer helps monitor the internal temperature, ensuring it stays perfect. For larger gatherings, a large cooler or an insulated bag can be repurposed to hold the prime rib, keeping it warm without cooking it further. Warming trays and a low-set oven offer more controlled environments for keeping the meat at an ideal temperature. Each of these tools plays a vital role in the process, ensuring your prime rib stays warm and delicious for your guests. 3. Preparing Your Prime Rib In preparing your prime rib, start by taking the meat out of the fridge a few days before cooking to ensure an even temperature throughout. This abbreviated method involves preheating your oven to °F, then seasoning the prime rib with salt, pepper, and any preferred rub. Place it in a roasting pan, bone-side down, and roast for a few minutes before you reduce the heat and continue cooking to your desired level of doneness. It’s crucial to double-check with a meat thermometer to ensure it’s just right for every person at your table. 4. Wrapping Your Prime Rib After your prime rib is fully cooked and finished, the next step is to wrap it properly to retain its warmth and moisture. The easy steps involve letting the prime rib rest for a few minutes after taking it out of the oven, then covering it completely in aluminum foil, making sure it’s wrapped tightly. For further insulation, you can place the wrapped meat in a large cooler or an insulated bag. This helps to trap the heat right where it needs to be, keeping your prime rib succulent and ready to serve. 5. Use a Cooler to Keep Your Prime Rib Warm A cooler serves as an excellent tool to keep your prime rib warm for hours. By following some simple steps, you can create a makeshift warmer. Start by placing a layer of towels or blankets at the bottom of the cooler, then place your wrapped prime rib on top, adding another layer of insulation above. Once closed, leave the cooler closed until it’s time to serve. This method not only maintains the warmth but also makes it easy to transport the prime rib to any location without losing its perfect temperature. 6. Using a Warming Tray A warming tray is another option to keep your prime rib warm. Begin by preheating the tray according to the manufacturer’s instructions, ensuring your prime rib is wrapped to retain moisture. Place it on the tray and adjust the temperature settings to prevent overcooking. This method is ideal for serving at a buffet where the meat needs to stay warm for an extended period, providing a constant source of heat without compromising the quality of the prime rib. 7. Using an Oven Using an oven to keep prime rib warm is perhaps the easiest option. The steps involve preheating the oven to its lowest setting, ideally around °F, then placing the wrapped prime rib in a baking dish. This method ensures that the meat doesn’t dry out, especially important for dry-aged cuts. It’s crucial to monitor the temperature with a meat thermometer to maintain the desired temperature, ensuring your prime rib remains succulent and ready to serve. 8. Monitoring the Temperature To ensure your prime rib stays perfectly warm without overcooking, it’s crucial to monitor the temperature closely. Use a reliable meat thermometer to check the temperature regularly, making sure it stays above °F. This not only helps to prevent any potential bacterial growth but also maintains the prime rib at an ideal serving temperature. 9. How Long Can You Keep Prime Rib Warm? You can keep your prime rib warm for several hours using the right methods without it becoming dry or losing its flavor and texture. However, it’s usually better to reheat it briefly before serving if it has been kept warm for an extended period to ensure the best quality. 10. Tips for Serving Your Prime Rib When it’s time to serve your prime rib, consider these tips to enhance your meal: allow the meat to rest for about 20 minutes after cooking to let the juices redistribute. Use a string to hold the roast together if needed and a sharp carving knife for clean, precise cuts. Offer horseradish sauce, au jus, and other condiments to complement the rich flavors of the prime rib. How To Keep Prime Rib Warm Before Serving? When preparing prime rib, a large cut of beef
Warm Brats After Grilling – Quick & Easy Solutions!
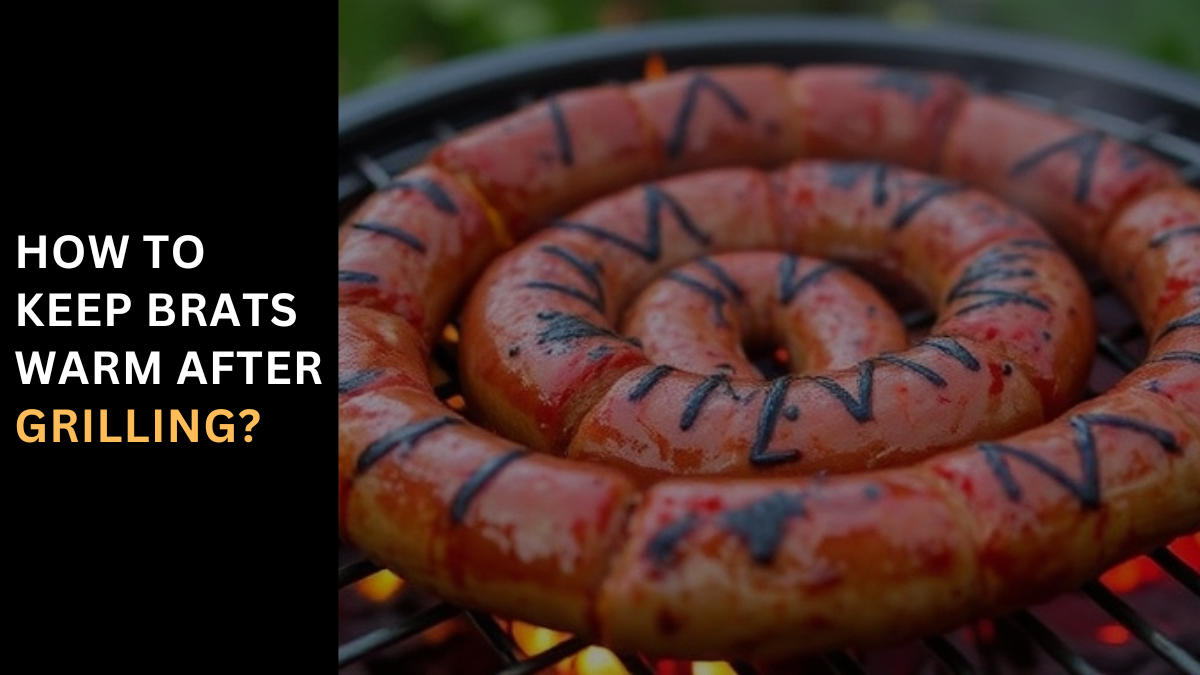
How To Keep Brats Warm In Slow Cooker Without Beer? This method hinges on the delicate art of slow cooking, where alternative liquid options serve as the cornerstone for infusing brats with flavors and seasonings that transform them into flavorful masterpieces. The key is in maintaining temperature within the slow cooker, ensuring the brats remain moist and ready to serve. Drawing upon personal culinary adventures, I’ve discovered that this technique not only preserves the juiciness of brats but also enhances the overall enjoying experience, offering a mouthwatering alternative for those seeking to savor every bite. Key Takeaways: Navigating the art of keeping brats flavorful and juicy post-grilling involves a slow cooker and a dash of culinary creativity. This choice not only introduces creative flavors but also plays a crucial role in maintaining the perfect cooking temperature, crucial for that mouthwatering outcome. Such an approach not only elevates the bratwurst experience but also enriches the serving and enjoying moments with tips that guarantee flavorful and juicy delights, turning each meal into a memorable feast. Here are some tips to keep your brats warm without overcooking: 1. Use the warm setting on your slow cooker to keep the brats at a safe serving temperature. If you need to transfer the brats for serving or transport them for an extended period, cover them with a lid or wrap them in foil to retain heat and moisture. 2. For serving at a party or buffet-style, a chafing dish or an electric warmer provides access to heated serving options. If these devices aren’t available, preheat a serving platter, plate, or surface to help the brats stay warm for a longer period. 3. A covered dish with a lid can also help trap heat, allowing your guests to enjoy the brats in the following hours, ensuring they remain delicious and exciting to savor. How to Keep Brats Warm and Flavorful? 1. Choosing the Right Brats Selecting the perfect brats for a delicious and satisfying meal starts with choosing between fresh bratwurst and pre-cooked varieties. The key to juiciness and tenderness lies in the meat-to-fat ratio; fatty brats tend to be more juicy, while leaner options offer a different flavor profile. Consider traditional flavors like garlic, onion, and spices, or opt for brats infused with herbs, fruits, or cheese for a unique twist. The size of the bratwurst also matters, with larger ones providing a more substantial bite and smaller versions ideal for appetizers or sandwiches. Exploring different brands and varieties, possibly with recommendations from a local butcher or meat counter, lays the foundation for a truly flavorful and satisfying culinary experience. 2. Preparing the Slow Cooker Ensuring your slow cooker is clean and free from residue or food debris is paramount; a thorough wash of the insert and lid with warm soapy water, followed by a rinse and dry, sets the stage. Grease the cooker lightly with cooking spray, oil, or butter to prevent sticking, then create a flavorful bed with a layer of ingredients like onions and peppers. Carefully position the brats in a single layer, allowing enough space between each for even cooking. The size of your cooker should accommodate the brats comfortably without overcrowding. Set the temperature to high heat or low heat depending on your cooking process, then place the lid on top for a tight seal that traps moisture and flavors within. 3. Using Alternative Liquid Options Exploring alternative liquid options beyond beer for cooking brats in a slow cooker opens up a world of flavor and moisture possibilities. Broth or stock, whether beef, chicken, or vegetable, serves as a savory base that can enhance the overall dish. Apple cider adds a hint of sweetness that complements the brats’ flavors, while tangy, flavorful fruit juices like apple, pineapple, or orange juice infuse a touch of natural fruity aroma for a unique taste. Wine elevates the cooking game by adding depth and complexity; white, red, or rosé can be chosen based on preference. A dash of cider vinegar, diluted with water to lessen its intensity, introduces an acidic mix. Even soda or cola, with its carbonation, can help to tenderize the brats, adding a sweetness and a twist to the flavor profile. When choosing, it’s key to pick liquids that complement the brats and align with personal preferences. Don’t hesitate to experiment with combinations for a delicious, unique taste. Adjust the quantity depending on the recipe and size of your cooker to ensure the brats are properly cooked and tender. Explore and add seasonings to further tailor the dish to your liking. 4. Adding Flavors and Seasonings Adding flavors and seasonings to brats, especially when using alternative liquid options, significantly contributes to the overall flavor. To enhance the taste of these slow-cooked delights, consider sautéing onions and garlic in a separate pan until they’re softened and aromatic before adding them to the slow cooker; this can create a caramelized base that infuses the dish with a rich, savory flavor. Incorporating herbs and spices like rosemary, thyme, paprika, cayenne pepper, and mustard powder adds depth and complexity. Simply sprinkle or mix these into the cooking liquid for a burst of flavor. For those who enjoy a tangy or sweet element, brushing the brats with BBQ sauce or mustard allows them to absorb these flavors and develop a delicious coating. Sauerkraut not only elevates the juices but also ensures the flavor permeates throughout. If a spicy kick is preferred, a few dashes of hot sauce can add heat without being overpowering. Brown sugar introduces a sweetness that can caramelize for a hint of flavor that balances the savory notes. Exploring creative combinations tailored to personal taste and adjusting throughout the cooking process ensures the perfect balance, leading to tender, succulent results. 5. Cooking the Brats in the Slow Cooker Once the brats are prepared and added to the slow cooker with the desired flavors and seasonings, the journey to perfection begins. Cover the brats with your liquid of choice, whether it’s an alternative
Keep Mice Out of Grill – Effective Pest Prevention!
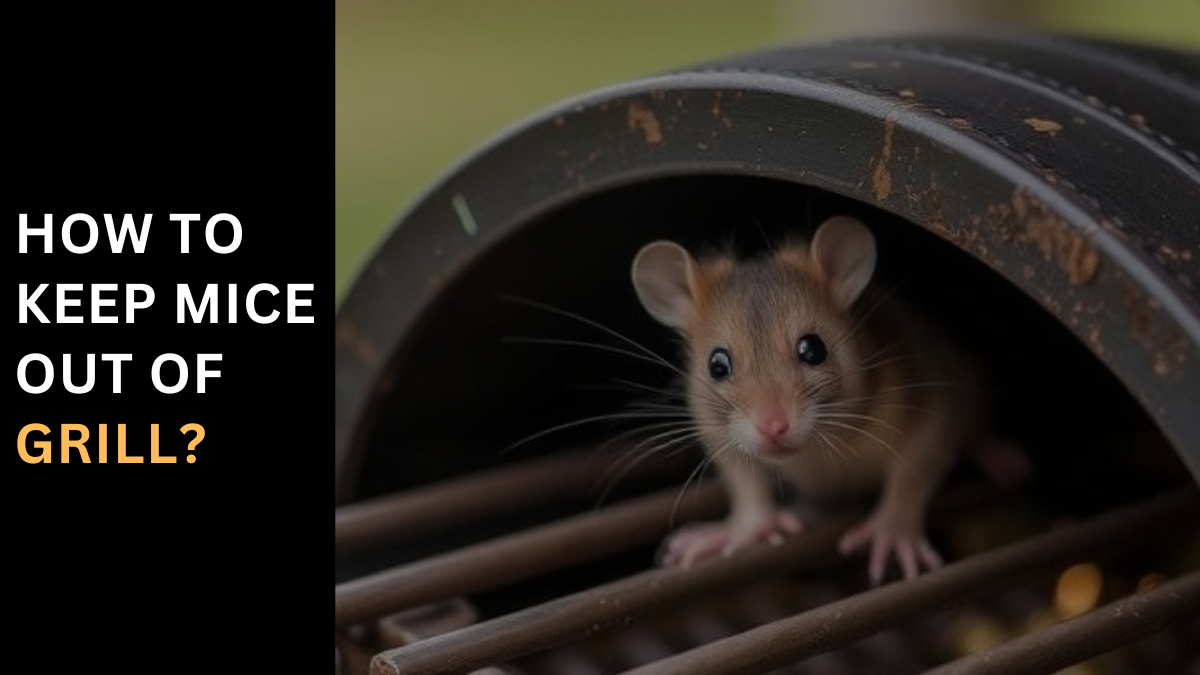
How to Keep Mice out of Grill? Implement Preventative Measures To prevent mice from being attracted to your grill, it’s crucial to address the allure of uncleaned surfaces that harbor food residue. Based on my tips and steps honed from years of grilling, maintaining a routine that ensures no residue remains is key. After every use, taking the time to thoroughly clean the grill surfaces and components can significantly reduce the health hazards and damage potential infesting rodents may cause. This involves a disciplined approach to scrubbing away any remnants of food and grease, which are the main culprits in attracting these pests. Regular checks for signs of mice and sealing any entry points they might use to access the grill are also effective strategies. By proactively keeping your grill spotless and monitoring for early signs of rodent activity, you can enjoy the pleasures of outdoor cooking without the unwanted company of mice. 1. Keep Your Grill Clean Prioritize Grill Hygiene Maintaining a clean grill is not just about food safety; it’s an essential step in preventing mice and other rodents from turning your barbecue into their home. Mice are attracted to the remnants of grease and food particles that accumulate during cooking. From my own experience, taking the time to clean your grill after each use is a game-changer. Brushing the grates with a wire brush to remove debris and stuck-on food, followed by a wipe-down of the interior with a non-toxic cleaner made from warm water and dish soap, ensures your grill remains free from attractants. Don’t overlook the drip pan, which should be emptied regularly to discard excess oil and drips that attract pests. After cleaning, drying everything thoroughly before placing it back helps deter any problems. Moreover, storing your grill in a secure location and inspecting it for signs of rodent activity can prevent it from infesting, causing damage, or creating health hazards. These steps allow you to enjoy outdoor cooking without the worry of unwanted guests. 2. Store Your Grill In A Secure Location Secure Grill Storage Solutions Storing your grill in a secure location like a shed or garage can greatly reduce the chances of mice, pests, and other rodents making it their home. These creatures are attracted to areas where they can find food and shelter, making your outdoor cooking equipment a potential target. By keeping the grill less accessible to the outdoors, and ensuring the space is clean and dry, you minimize the attractants. Moisture and food particles are key factors that attract these unwanted guests. Using a waterproof cover to protect your grill from dust, rain, snow, and other environmental factors also helps keep it inaccessible to pests. It’s important to check the cover for any holes or tears that might allow mice to enter. Placing the grill in a covered area that’s protected from the elements, like under a tarp in a shed, can further shield it from moisture and pests. Regular inspections for signs of rodent activity, such as droppings or chewed wires, are crucial. If you notice any signs of infestation, it’s vital to remove pests immediately, using traps or hiring a professional exterminator if the situation is severe. 3. Use A Grill Cover Maximizing Protection with a Grill Cover Using a grill cover is an effective way to protect your grill from mice, pests, and the elements, thus preventing rodents from getting inside and causing damage. When choosing a cover, ensure it fits the right size for adequate protection; a cover that’s too large might allow pests to enter. Measure your grill to ensure the cover fits snugly. Opt for a durable material that can withstand high-quality conditions like rain and wind, with options including polyester, vinyl, or canvas. It’s crucial to secure the cover tightly to prevent it from being blown away by the wind or allowing pests to crawl underneath. Remove the cover before using the grill to avoid any dangerous fire hazards. Clean the cover regularly to prevent the accumulation of dirt, dust, and debris which can attract pests. A mild soap and water solution is sufficient for cleaning without leaving behind any odors or food particles. This way, you stay safe and pest-free while enjoying your grilling. 4. Repair Any Holes or Gaps Ensuring Integrity by Repairing Openings Repairing any holes or gaps is crucial as mice are notorious for their ability to squeeze through surprisingly small openings to enter the grill area. It’s important to inspect the surroundings of your grill and its entry points, including the ground where it stands. A silicone-based sealant, known for its durability, waterproof qualities, and ability to withstand extreme temperatures, is an ideal choice for this task. Apply the sealant with a steady hand to ensure all openings are filled. Using a caulking gun can help spread the sealant evenly. Allow it to dry thoroughly before using the grill, as only when cured does the sealant act as an effective barrier to prevent pests from accessing your cooking space. Regular checks and maintenance keep your grilling area safe and pest-free. 5. Consider Using a Natural Deterrent Embracing Nature’s Repellents When it comes to keeping mice away from your grill, consider using natural deterrents. Many people find these methods not only effective but also safer and more environmentally friendly. Peppermint oil, known for its strong scent, is highly unpleasant to mice and serves as a useful deterrent. You can soak cotton balls in peppermint oil and place them around the perimeter of your grill area, or mix a few drops with water to create a spray solution. Another option is steel wool, which mice are unable to chew through, making it ideal for stuffing into holes and gaps to prevent them from entering. Always wear gloves when handling steel wool to avoid injuring your hands. While mothballs are another deterrent, they contain the chemical naphthalene, which is toxic. Caution is advised when placing them, as they can be harmful to pets and children if ingested. Catnip
Mastering Grill Rotisserie – Easy Steps & Pro Tips!
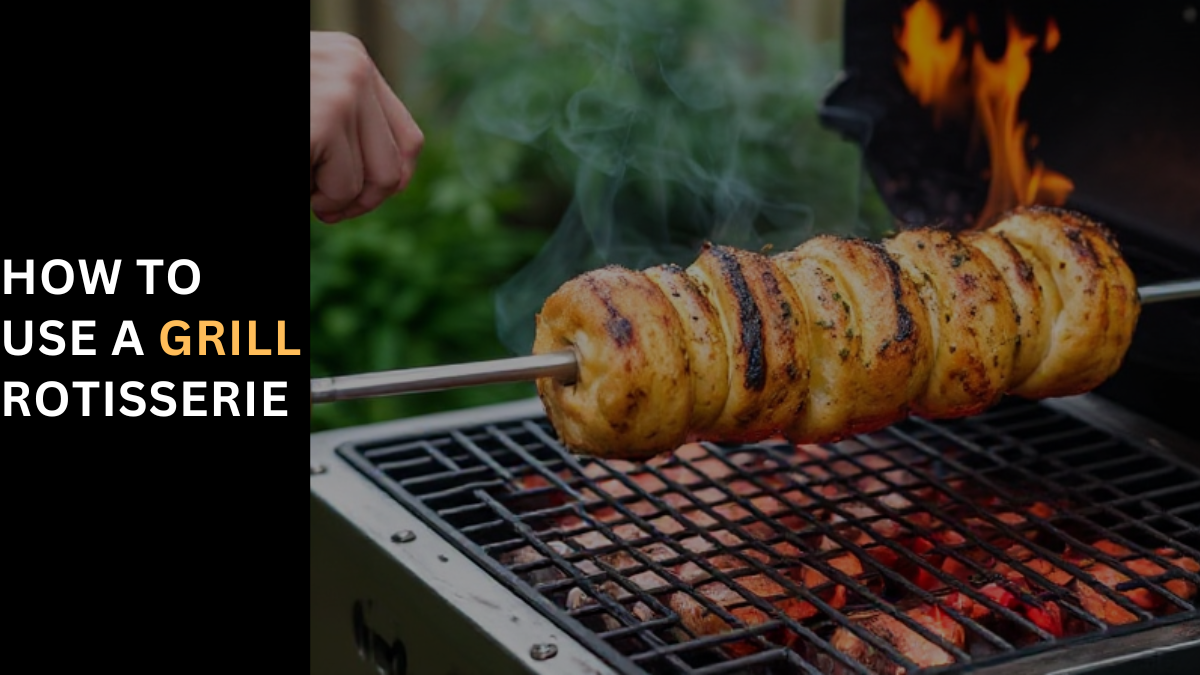
How to Use a Grill Rotisserie? The Science of BBQ – How Rotisserie Cooking Works From the ancient castles of wealthy homes, where a boy or even dogs on treadmills tirelessly turned the spit by fire, to modern steam-powered devices and clockwork mechanisms that rotate meat with precision, rotisserie cooking has evolved significantly. This method, where meat is seasoned and rotated on a spit near heat, ensures the outside is crisp while the inside remains succulent. The food cooks in its juices, basting itself to irresistible perfection, a technique once reserved for amazing meals in grand homes but now accessible to anyone. Rotisserie style is not just about cooking; it’s an art that uses wheels, worm drives, and even heat from a chimney to create flavors that are hard to replicate with other methods. The key question isn’t just how to cook with a rotisserie, but how to master this culinary tradition to make every meal memorable. How Does Rotisserie Cooking Work? Mastering Rotisserie Cooking: A Symphony of Flavor Embracing the rotisserie method for your grill transforms cooking into an art form, where direct grilling and flareups are replaced with a crisp exterior and juicy meat beneath. This technique allows food to be basted inside-out, with juices and fat rendered and released over the surface, creating a self-basting action as it spins. The warmth from indirect heat sources like a rear burner or bottom burners gently transfers inward, ensuring a low and slow cooking process that renders fat in an unhurried fashion. This action prevents collagen from contracting too quickly, allowing it to break down, absorb water, and turn into gelatin. Alongside melting fat, this forms a tender and delicious coating of fats and flavorful liquids, literally basting the meal you’re making. The benefits of rotisserie cooking are evident in every bite—a perfect harmony of flavor and texture, from the outside-in and inside-out. More Insights on Rotisserie Cooking The Evolution and Precision of Rotisserie Cooking Rotisseries have evolved significantly since medieval times, when they were not just a culinary tool but a symbol of opulence. Modern rotisseries are equipped with specialized motors that are calibrated to ensure constant turning at a consistent speed, typically between 3 and 6 RPM (revolutions per minute). This constant turning uses less heat, allowing foods to cook lower and slower, a testament to the method’s efficiency and effectiveness in producing perfectly cooked meals. The Crucial Role of Balance in Rotisserie Cooking Achieving balance in rotisserie cooking is not just important; it’s integral to the entire operation. An unbalanced load can strain the motor, leading to uneven cooking as one side may rotate slower than the other. Properly securing the food, ensuring its shape is uniform, and trussing or tying roasts are essential steps to ensure evenness and prevent any loose bits from causing issues during cooking. The Versatility of Rotisserie Cooking Once an infamous BBQ accessory used for large cuts of meat or a whole animal, rotisserie cooking has changed to adapt to modern needs. Now, it’s a method that can provide delicious meals for families of four or less, a far cry from its origins of feeding entire castles of people. Whether it’s traditional roasts of poultry and beef, vegetables, chicken wings, ribs, or even tacos, the rotisserie offers a versatile cooking option. The real question is, what CAN’T you cook on your barbecue’s rotisserie? Rotisserie Grilling 101 – The Complete Guide Rotisserie Grilling Basics Diving into rotisserie grilling opens up a world of flavorful, aromatic recipes that can be achieved with various rotisseries. Whether you’re using a gas grill with attachments, charcoal kettles, or even fire pits, the essentials like a rotisserie attachment, spit forks, butcher’s twine, and heatproof gloves are key. The technique involves trussing the meat to prevent it from being torn apart while cooking, securing it tightly on the spit fork, and ensuring it can spin properly over indirect heat. This setup, complete with a drip pan placed between the coals or burners, allows for an even cook and captures those flavorful drippings. Preparing Your Grill Preparing your grill is a crucial step whether you’re using a charcoal grill or a gas grill. For charcoal grills, start by lighting your coals and placing them in piles on both sides of the grill, with a drip pan in the middle. On gas grills, remove your cooking grates and preheat the grill for fifteen minutes with all burners on high. Then, turn off the center burners and set the outer burners to medium. This creates the perfect environment for rotisserie cooking by providing indirect heat. Remember to light your rotisserie burner if available, and adjust the burners to avoid overcooking the outside of your food while ensuring the inside is perfectly done. Preparing Your Rotisserie When setting up your rotisserie, it’s crucial to ensure everything is aligned for perfect cooking. Start by setting your grill to provide indirect heat, aiming for a temperature of around 350 degrees. Attach the rotisserie motor to the mounting bracket and check if it’s working by turning it on and off. This ensures that the motor is properly plugged in and functional. Open the lid of your grill, wear heat-safe gloves, and carefully insert the spit into the meat, making sure the point of the spit is securely plugged into the motor. The meat should be secured so it can turn freely without the risk of becoming unbalanced or ripping loose from the spit fork. Position a drip pan directly below the meat to catch drippings, adding a layer of flavor and preventing flare-ups. Cooking Your Meat With the motor running, close the lid to trap the heat and ensure even cooking. It’s advisable to open the lid as little as possible, but a quick check after thirty minutes ensures everything is working properly. After cooking, carefully remove the spit using heat-safe gloves and transfer the meat to a carving board. Be mindful that the spit will be hot. Cut off the butcher’s twine and discard
How to Convert Gas Grill to Charcoal – Make the Switch?
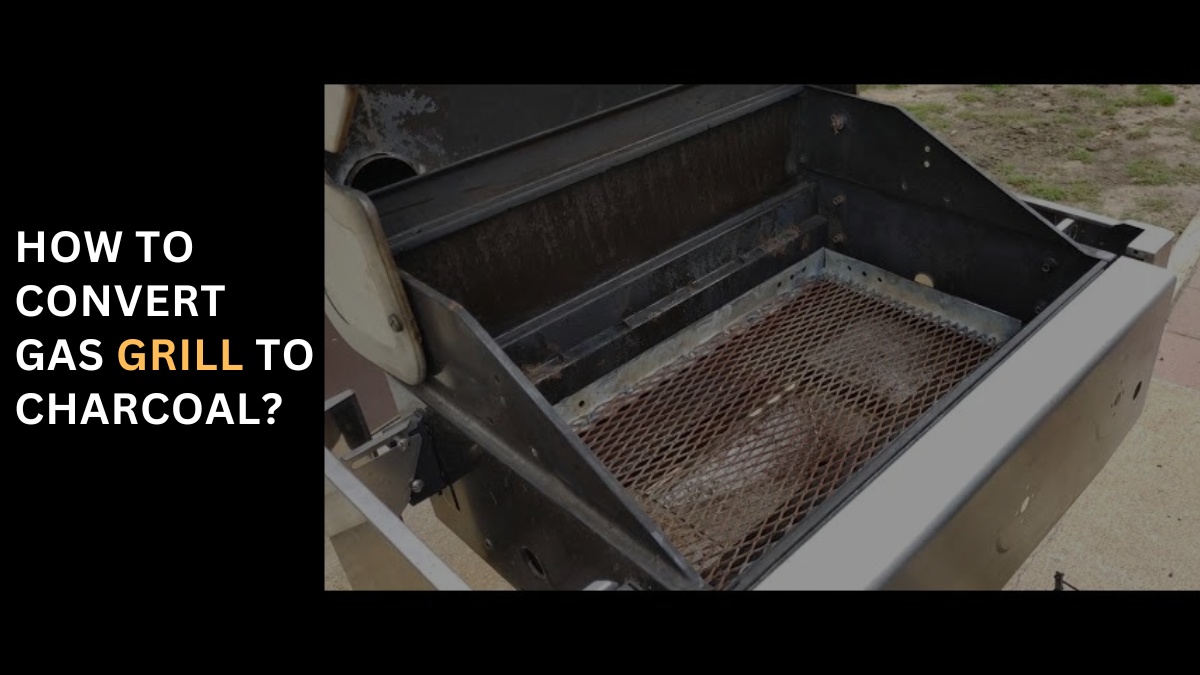
How to Convert Gas Grill to Charcoal? Embarking on the adventure of converting your gas-burning grill into one that burns charcoal is a thrilling process. The allure of charcoal grilling, with its smoky flavor and traditional appeal, often calls to those of us who have grown a bit weary of the convenience of gas. My journey began with a gas barbecue that was no longer working as it once did but was still in good enough shape to warrant a transformation rather than a retirement. This option to convert came as a revelation, presenting a relatively easy set of instructions that promised a great new lease on life for my current grill. How to Convert a Gas Barbecue to Burn Charcoal? Required Tools Step 1 – Initiate by Cleaning the Gas Grill Initiating the transformation of your old gas grill into a charcoal sanctuary begins with a thorough cleaning. Check for rust or signs of poor condition within the grill’s interior, which faces constant heat and exposure. This initial assessment is crucial; purchasing a new rack or other mechanical components might be more cost-effective than attempting to convert if the grill is too far gone. For those mechanical components no longer in use, it’s essential to maintain the grill’s ability to withstand the demands of charcoal grilling. Be sure to consider the state of the existing rack. Investing in a new one could enhance your gas barbecue’s transformation if it’s compromised. This step is not just about cleaning but about ensuring your grill can handle its new life under constant heat. Step 2 – Dismantle Gas-Related Parts The next phase involves safely removing all gas-related parts. Start by removing the gas tank from the grill, ensuring there’s no gas left to avoid any potential hazard. Disconnect the hose and venturi tubes, which are typically located underneath the grill and are part of the lead pipes system that delivers gas to the burners. When removing the rack for a clearer working area, take a moment to look for the burner and identify the screws holding it in position at the base of the grill. Carefully unscrew the burner and venturi assembly. A word of warning: ensure all gas connections are fully functional and safe to dismantle. If there’s any gas left, it poses a potential hazard, so take precautions to store the gas tank safely away from your working area. Step 3 – Install a Steel Sheet To accommodate the new fuel source, installing an 18-gauge steel sheet at the grill base is essential. This sheet will cover the area previously occupied by the burner, providing a sturdy platform for charcoal and wood chips. First, measure and cut the sheet to the right size and thickness to fit snugly at the bottom of your grill. Using a jigsaw or similar tool, carefully cut the steel to ensure it covers the bottom effectively, including over the burner hole at the base. This prevents any charcoal or wood chips from falling through. The sheet should be large enough to extend slightly over each side of the base, depending on the grill’s size. Attach it securely to the bottom of the grill using sheet metal screws, placing a few screws around the perimeter to allow for a stable and secure fit. Step 4 – Ignite Your New Charcoal Grill With the physical conversion complete, it’s time to ignite your new charcoal grill. Begin by filling the base with charcoal briquettes and wood chips, avoiding any flammable material nearby. Light the charcoal using your preferred method, ensuring the grill is in a safe, open area. Once the charcoal is lit, replace the rack on top and wait until the temperature has reached a sufficient level for cooking. This might take a few moments, but patience is key to achieving the perfect grilling conditions. Once the grill is ready, you can start cooking your favorite meals, enjoying the rich, smoky flavors that only charcoal grilling can provide. Comparing Gas and Charcoal Grills The debate between gas and charcoal grills is a long-standing one among barbecue aficionados, each side swearing by the difference in taste and convenience their preferred method offers. When considering a conversion from a gas grill to charcoal, it’s essential to weigh the pros and cons of each type, especially if your current grill is still in working condition and not too far gone to be usable. This comparison becomes meaningless if your grill is beyond repair, but for those still working, the choice can significantly relate to the quality of a barbecue meal. Gas Grill: Gas grills are prized for their convenience. With the simple press of a button, they heat up faster and can be easier to clean, making them a less expensive option to purchase and maintain in the long run. Their fuel is also more conveniently obtained than charcoal, which can be a deciding factor for many. Charcoal Grills On the other hand, charcoal grills offer a smokey taste that is often closely related to the traditional notion of a barbecue meal. The fuel, while not as convenient to obtain as gas, is often less expensive or even free if you have access to wood scraps or buy in bulk. The ability of charcoal to catch and release grease as smoke back onto the food provides a distinct flavor that many favor. Newer, more expensive models of charcoal grills might include features like a ceramic bar that mimics this ability, further enhancing the smokey taste. If considering a switch, it’s crucial to add that some charcoal grills allow for more temperature control and can gain a wider range of smokey flavors. This can be a significant advantage for those looking to explore different barbecue techniques and flavors, making charcoal grills the best type for culinary experimentation. However, the most suitable grill type ultimately depends on personal preference and lifestyle. If speed, convenience, and minimal cleanup are your priorities, gas grills are the way to go. But if you cherish
How to Light a Charcoal Grill on a Windy Day -Avoid Mistakes
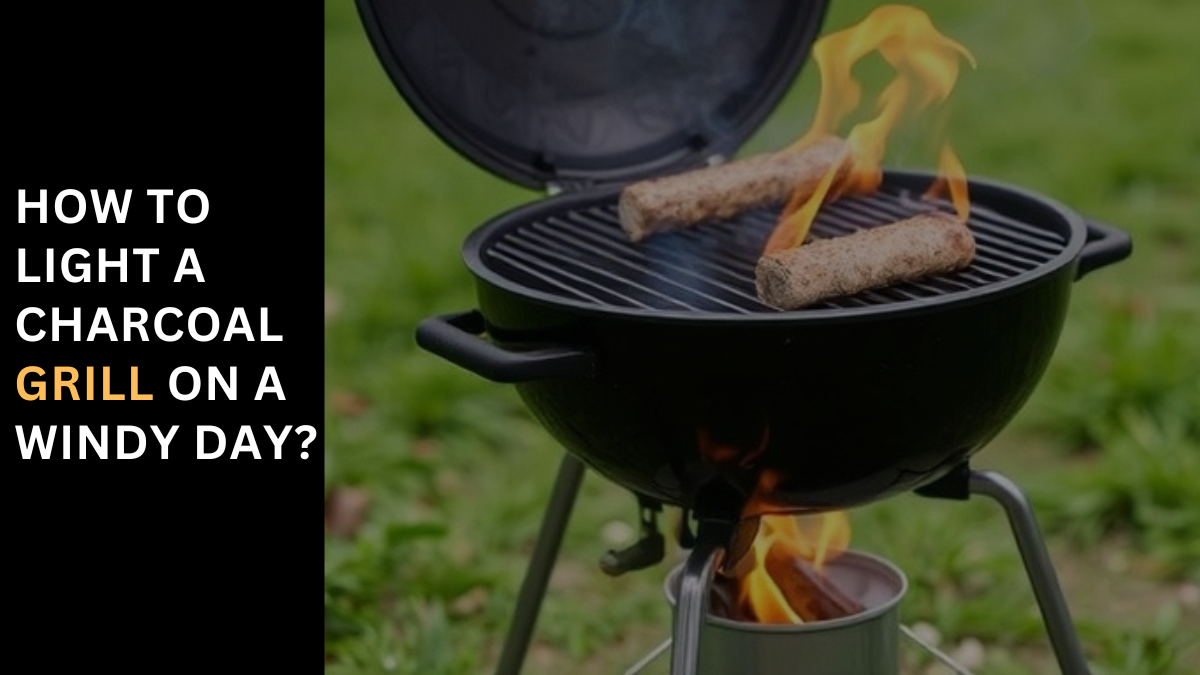
Why Is It Hard To Charcoal Grill On A Windy Day? Grilling on a windy day presents unique challenges, as even a mild breeze can significantly affect the process of keeping your grill lit. Wind speeds play a crucial role; while strong gusts can damage grills and make even smart grills with windshields fail, wind makes grilling outright uncomfortable, especially in the presence of rain or snow. Professional grillers often struggle with these conditions, as windy, rainy, or snowy weather causes temperature swings that can make grilling effectively a test of patience and skill. Temperature Swings When facing the wind, even a light breeze can become dangerous as it gets stronger, causing trouble in maintaining consistent heat. Strong winds can make the heat spread unevenly, leading to food cooking unevenly. Imagine a minute spent cooking a steak, only to find it barely warm on one side due to the erratic heat distribution caused by the wind. Struggle for the Flame The struggle to keep the flame going when the wind is blowing can feel like wrestling with an uninvited houseguest who blows out the candles at a birthday party. In charcoal cooking, a strong wind acting against the fire is not just annoying but can significantly delay your meal, as relighting becomes a frequent and frustrating necessity. Safety Concerns Safety becomes a paramount concern when winds carry sparks and embers that can be blown away, potentially starting unwanted fires. A sudden gust of wind can also generate flare-ups, making it essential to be careful not to singe your hands or eyebrows while managing the grill. How to Grill on a Windy Day? When a family BBQ is on the horizon, and the window shows nothing but grey skies and gusts of wind, it’s easy to worry your plans could be ruined. However, grilling enthusiasts know that with the right tricks, even the windiest days can’t deter the joy of tossing juicy meats on the grill. The key is to keep the grill lit amidst the windy challenges. For those using a gas grill, check the match-light hole regularly and add charcoal cautiously. It’s advised to avoid using a charcoal grill in high-wind conditions, as wind affects both gas and charcoal grills. Wind is the primary deterrent to an ideal BBQ get-together, but owning a gas or electric grill makes it easier to manage. The effort in maintaining the fire on a charcoal grill in windy conditions requires patience and skill. Charcoal Grilling in Windy Conditions Grilling with charcoal on a windy day can be significantly trickier than using a gas grill. Charcoal grills require more maneuvering and patience, as the fire is more prone to go out under windy conditions. Maintain a steady temperature: in such windy weather conditions, it’s essential to add charcoal judiciously. This is because the wind can cause the fuel to burn more quickly as smoke and heat escape, making your fuel choices and their management crucial. The repeated process of adding charcoal and ensuring the flame doesn’t extinguish is vital to ensure your food is grilled evenly and reaches a consistent temperature. Flame fluctuation: Flame fluctuation is a common issue in windy conditions, making the cooking time somewhat unpredictable and the grilling process more challenging. This can affect the final food product, making the weather a significant factor in the unpredictable cooking process. The key to adding charcoal and keeping a steady eye on the flame is to overcome these elements with patience and precision. Adjusting the vents: Keeping them open allows the smoke to escape and prevents buildup that could extinguish the flame. However, when you lift the lid to add charcoal or check the food, do so cautiously to avoid ashes blowing onto the food as the wind rises. In high wind conditions, extra caution is advised for safety reasons, as the unpredictable nature of the wind can introduce additional risks to the grilling experience. Gas Grilling in Windy Conditions Gas grilling in windy conditions demands strategy. Position your gas grill at an angle to the wind to disrupt the flow of gas to the burners, setting them perpendicular to the wind. Before lighting, always check the match light hole for obstructions. Avoid lifting the lid of the grill frequently, as this can cause the flames to go out. Preparation is more important than ever; if the wind extinguishes the burners, turn the gas valves off to stop gas from emitting. In such instances, shut the grill immediately, open it to air out, wait for the smell of gas to dissipate for about five minutes, and then ignite the grill again. A windscreen can help angle the flame away from the wind, allowing you to enjoy your BBQ without interruption. Safety in Windy Conditions Mindful of Surroundings and Fire Safety Being aware of your surroundings and practicing fire safety is essential when grilling in windy conditions. Super-dry weather combined with wind can create particularly dangerous conditions for grilling. The Danger of Grills Falling Over A grill falling over in a dry environment can quickly catch on fire, making dry weather conditions especially dangerous. A minor ignition could escalate into a significant disaster. Choosing the Right Grill for Windy Conditions For safety in windy conditions, opting for a gas or electric grill is advisable. These grills are generally safer and less prone to accidents caused by wind gusts. Select a gas grill that is durable, freestanding, and capable of withstanding windy conditions to ensure safety and stability during use. When using a charcoal grill, choose one that is manageable and maneuverable, with a design that minimizes risk in windy conditions. An electric grill can be a safe and convenient option, allowing you to enjoy grilling indoors if outdoor conditions become too extreme or unsafe for traditional grilling. Best Tools for Windy Conditions 1. Grill with Wheels: Choose a grill that’s easy to move. Wheels allow for quick adjustments to sheltered areas, protecting your setup from the wind. 2. Secure with Heavy Objects: Use
Ignite Your Napoleon Grill: Easy Start Guide!
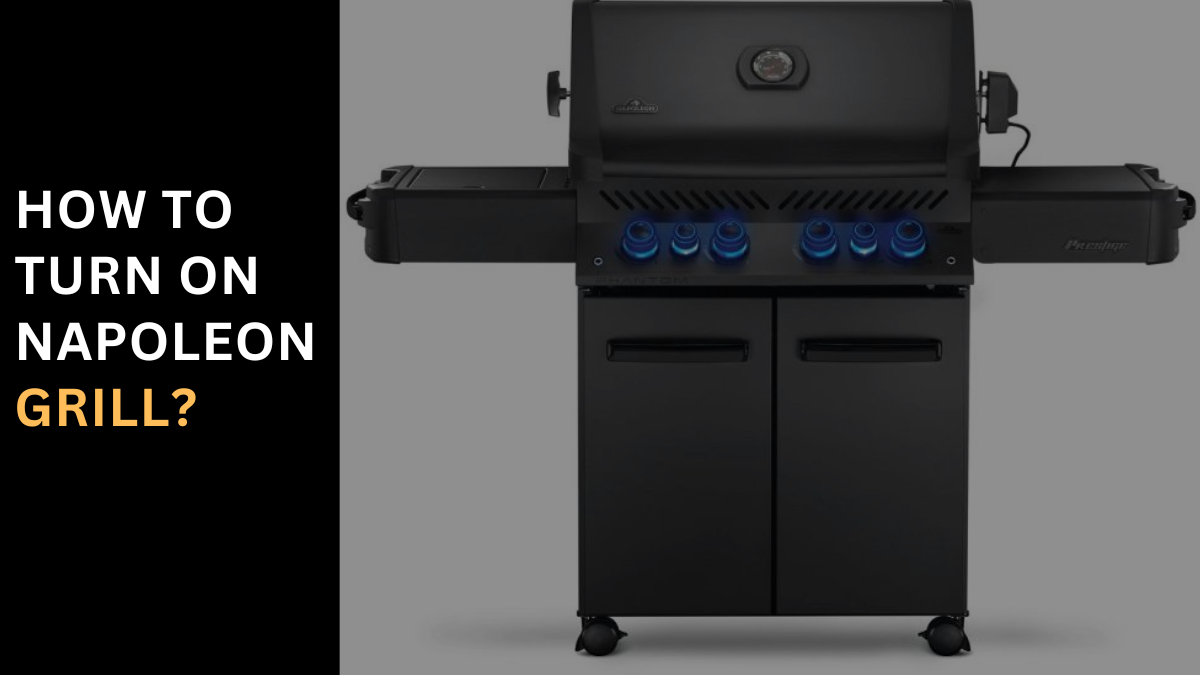
Why won’t my Napoleon GRILL LIGHT? A common reason your Napoleon gas grill won’t light is an oversight in checking the Followings: 1. Check the burners Ensure the control panel valves are positioned correctly and the burner tubes are free from debris, spider webs, or obstructions by pests. It’s crucial to follow the manual’s instructions carefully, especially regarding which burner to light and how to engage the ignition system properly. To turn on the grill, first, make sure all control panel valves are off before opening the gas supply. Then, engage the ignition as per the manual’s instructions, checking that burner tubes are clear and valves are accurately positioned. Regular maintenance to remove debris and prevent pest blockages can greatly improve ignition success and grill performance. Drawing from personal expertise, a meticulous approach to maintenance and operation, guided by the manual, ensures a seamless start-up and optimal grilling experience with your Napoleon grill. 2. Check the battery When attempting to light your Napoleon grill and encountering issues, it’s essential to check the ignition battery first. A dead or incorrectly positioned igniter battery can often halt the lighting process. The manual provides clear instructions on how to replace, remove, or clean the battery electrodes if they’re wet, oxidized, or slightly corroded. Using a dry cloth or an alcohol wipe to clean them before reinstallation ensures a smooth ignition. 3. Check the electrode wires Simultaneously, checking the electrode wires to ensure they are connected is crucial. If disconnected, reconnect them or replace the electrode wire assembly if needed. The electrode tip should be in the right position, pointing towards the gas port opening of the burner at a distance between 1/8 inch and 1/4 inch. Should the light not ignite, adjusting the distance, cleaning dirty electrode terminals with rubbing alcohol and a cotton swab, and ensuring there are no damaged electrodes are all effective troubleshooting steps. These tips, grounded in personal experience and expertise, not only aim to resolve common lighting issues but also enhance the grill’s performance by ensuring that all components are in optimal condition for creating the perfect sparks for lighting. 4. Check the propane tank Ensuring your Napoleon grill lights without trouble begins with checking the propane tank. The tank must be connected to the grill correctly. Often, lighting issues stem from the coupling nut not being fully engaged with the propane tank cylinder valve. To check, first ensure the valve is fully connected; you should turn it one-half to three-quarters of a turn until it hits a solid stop. Always tighten by hand to avoid using tools that could strip the threads, potentially leading to a hazardous leak. This simple yet critical step ensures a secure connection, providing a stable gas flow for efficient lighting and grilling. A BEGINNER’S GUIDE TO GRILLING For many, the first time firing up a grill can be a daunting experience, yet it’s an honored task when it comes to cooking delicious meals for family and friends. Taking charge of this responsibility means stepping into a role of culinary excellence, a journey every home chef—from the beginner to the aspiring true blue pitmaster—embarks on with excitement. This guide is tailored specifically for the rookie, aiming to demystify the art of grilling on Napoleon’s Freestyle grill, a versatile choice for those looking to earn their stripes in the world of BBQ. BBQ TIPS Prep Your Grill Taking that step closer to the grilling action of your dreams means getting your grill ready for what’s to come. Whether your barbecue is brand new or pre-loved, prep involves cleaning to remove any dust, oil, coatings, and adhesives that have accumulated from being stored or during manufacture. For a new grill, it’s important to burn off these residues on the first use by brushing with a grill brush and then letting it heat. This process removes anything that might impede your BBQ experience. Once finished, season the grates by applying a thin layer of canola oil and wiping off the excess with a paper towel to prevent potential burn and create buildup. For a pre-loved grill, a thorough brush to remove food residue and grease buildup is essential. Heat: On! The moment you’ve been waiting for is here: time to turn up the heat. For gas grills, ensure the valve on your gas line is open to start the flow. With electric grills, find a nearby outlet and plug in. And for those using charcoal grills, light your charcoal using a chimney starter or lighter cube, and set up a two-zone fire by having the lit charcoal dumped on one side of the grill. Place the cooking grids back on to preheat, similar to an oven, as per your instruction manual. This unit preparation, allowing for varying preheating temperatures, is akin to heating a stove and is crucial for heating, even cooking. Now, you’re ready to enjoy the grilling experience. COOL DOWN AND CLEAN UP After a fun and productive day of grilling your culinary masterpieces, the final task for any chef is the cleanup. It’s essential to restore your grill to its original, clean, and flawless state. A good practice is to turn up the heat one last time to burn off any accumulated food residue on the grates. With the grill still lit, this step helps to incinerate any debris, oil, and gunk that’s been removed. Once the grill has cooled down completely, it’s time to cover it up and give yourself a pat on the back for a job well done. This routine not only ensures your grill is ready for its next use but also prolongs its lifespan and maintains its performance. BEGIN YOUR BBQ CHEF JOURNEY WITH NAPOLEON If you love BBQ and are ready to take your skills to the next level, having the right equipment in your toolkit is crucial to commence your barbecue journey. Premium grills from Napoleon offer a wide range to browse through, designed to complement and enhance your culinary skills. Whether you’re a novice
Grill Frozen Chicken? Tips for Perfectly Cooked Results!
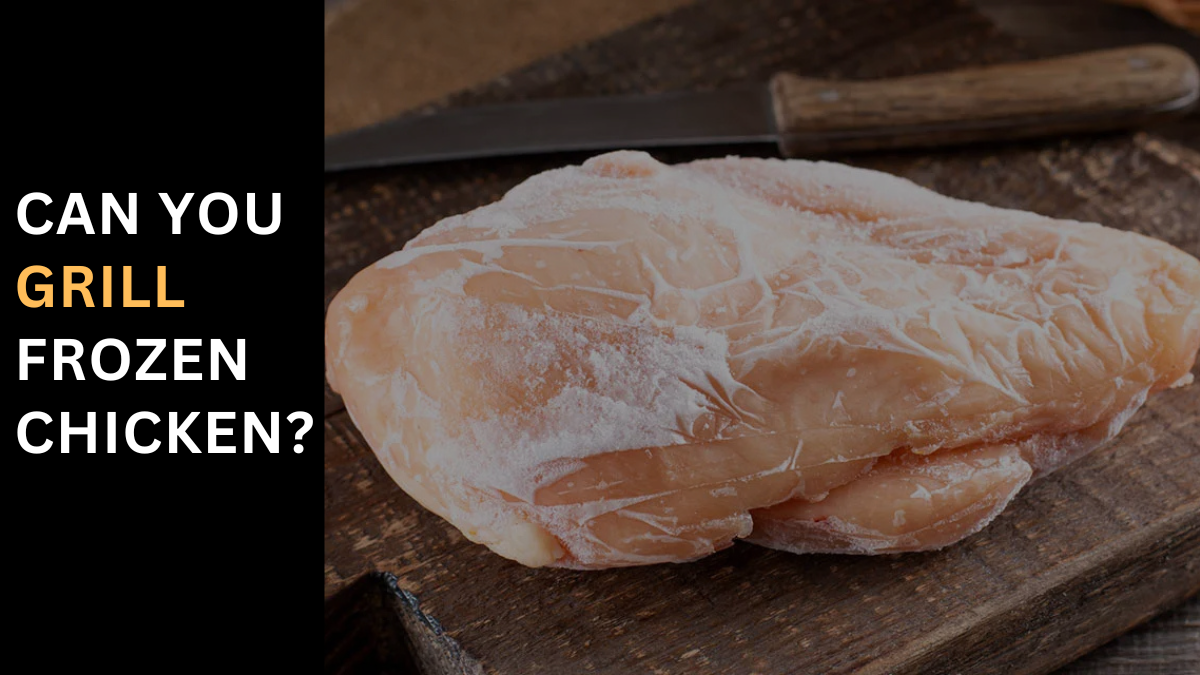
Can You Grill Chicken From Frozen? When faced with whether it’s feasible to grill chicken straight from the freezer on a busy night, the answer is a cautious yes. Grilling frozen chicken is a technique I’ve discovered that requires patience and attention to detail to ensure the meat is both safe to eat and delicious. The process is longer, as frozen pieces need more time on the grill to thaw and then cook through properly, reducing the risk of food poisoning. To avoid any bacteria buildup, handling the chicken on a clean surface is crucial. I prefer using a non-wood cutting board to prevent cross-contamination. While the chicken is on the grill, there’s ample time to prepare side dishes, turning what could have been a mundane dinner into a flavorful barbecue feast. This method provides a prepared meal without the need to pack away leftovers or resort to takeout and also answers many questions about cooking frozen chicken safely and effectively. How To Grill Frozen Chicken? Step 1: Prepare and Preheat the Grill Begin by removing the frozen chicken breasts from their packaging. If possible, pat dry the chicken using a paper towel to remove any excess moisture, which helps in reducing flare-ups on the fire grill. While you can’t thaw them fully due to their frozen state, reducing surface moisture is beneficial. Preheat your grill to a medium-high setting to ensure it’s ready for cooking. This preparation step is key to achieving a delicious outcome, even when starting with chicken straight from the grocery store freezer. Step 2: Grill the Chicken Once the grill is preheated, place the frozen chicken breasts directly on the grill. Due to being frozen, expect the cooking time to be longer than usual; however, the direct heat will help in thawing and cooking the chicken simultaneously. Grill the chicken, turning occasionally for even cooking. Keep an eye out for flare-ups due to dripping juices. The recommended grilling time can vary. But it generally takes a few more minutes than thawed chicken to ensure it’s cooked thoroughly and reaches a safe internal temperature. Step 3: Place The Chicken Over Direct Heat And Cook Set your grill to a medium-high temperature to ensure efficient cooking. Place the frozen chicken directly over the direct heat. This method may increase the cooking time due to the chicken being frozen, but it ensures even cooking throughout. Keep in mind that frozen chicken requires more attention as the cooking time will be less predictable than with thawed meat. Monitor the grill closely to manage flare-ups and ensure uniform cooking. Step 4: Check The Internal Temperature After allowing sufficient time for cooking, check the chicken’s internal temperature. The safe minimum is 165°F (74°C) to ensure the chicken is fully cooked and safe to consume. If the chicken hasn’t reached this temperature, continue cooking it, checking periodically. Once done, transfer the chicken to a wooden cutting board and let it rest before slicing it into portions. This resting period allows the juices to redistribute, making the chicken more flavorful and juicy, aligning with the qualities of the best smoked or grilled meats. Can You Barbecue Frozen Chicken? Barbecuing frozen chicken can be a hands-on task that requires following specific instructions to ensure safety and flavor. While not typically recommended due to the risk of uneven cooking, it can be done with care and attention. Start by setting your grill to medium heat to avoid the outside burning before the inside is cooked. Grill the chicken, flipping it regularly to cook evenly. As the chicken nears completion, adding sauce can enhance the flavor, but ensure the chicken is nearly cooked to prevent the sauce from burning. Always check the internal temperature; it must reach 165°F (74°C) to be safe to eat. This method might just make your neighbors love your next backyard bash, offering a unique twist to your barbecue and could become one of those gift ideas they’ll want to know. Can You Pressure Cook Frozen Chicken? Pressure cooking frozen chicken is a more straightforward process than grilling, requiring less time and patience. Using a pressure cooker, you can cook frozen chicken without the need to thaw it first, making it a quick start to a meal. Place the frozen chicken in the pressure cooker, set the necessary cooking time, which is generally longer than for thawed chicken, and start the cooking process. This method ensures the chicken cooks evenly and retains moisture, making it a reliable and efficient way to prepare chicken directly from the freezer. To cook frozen chicken in a pressure cooker, begin by placing a trivet or steaming rack at the bottom of the cooker. This prevents the chicken from sitting directly in the liquid, promoting more even cooking. Add the required amount of liquid to the cooker, as it’s essential for creating the steam that cooks the food. Arrange your frozen chicken pieces, whether they’re breasts, thighs, or even a whole chicken, on the trivet. This method allows for steamed cooking, ensuring the chicken cooks thoroughly without direct contact with the intense heat at the bottom. Determine The Cooking Time The cooking time for frozen chicken in a pressure cooker is dependent on the weight and thickness of the chicken pieces. A general guideline is to add about 50% more cooking time than you would for thawed chicken. For example, if chicken breasts typically require 10 minutes, frozen ones might need 15 minutes. However, for larger pieces like a whole chicken, the time should be adjusted more significantly, often requiring several extra minutes per ounce or per inch of thickness to ensure thorough cooking. Consider Your Release Method When your frozen chicken finishes cooking in the pressure cooker, choosing the right release method is crucial for the outcome. A natural release, where you allow the pressure to decrease on its own, is often recommended for meats as it allows them to continue cooking slightly in the residual heat, making them more tender. This method can take
Grilling Frozen Burgers – Yes, You Can! Try It Now!
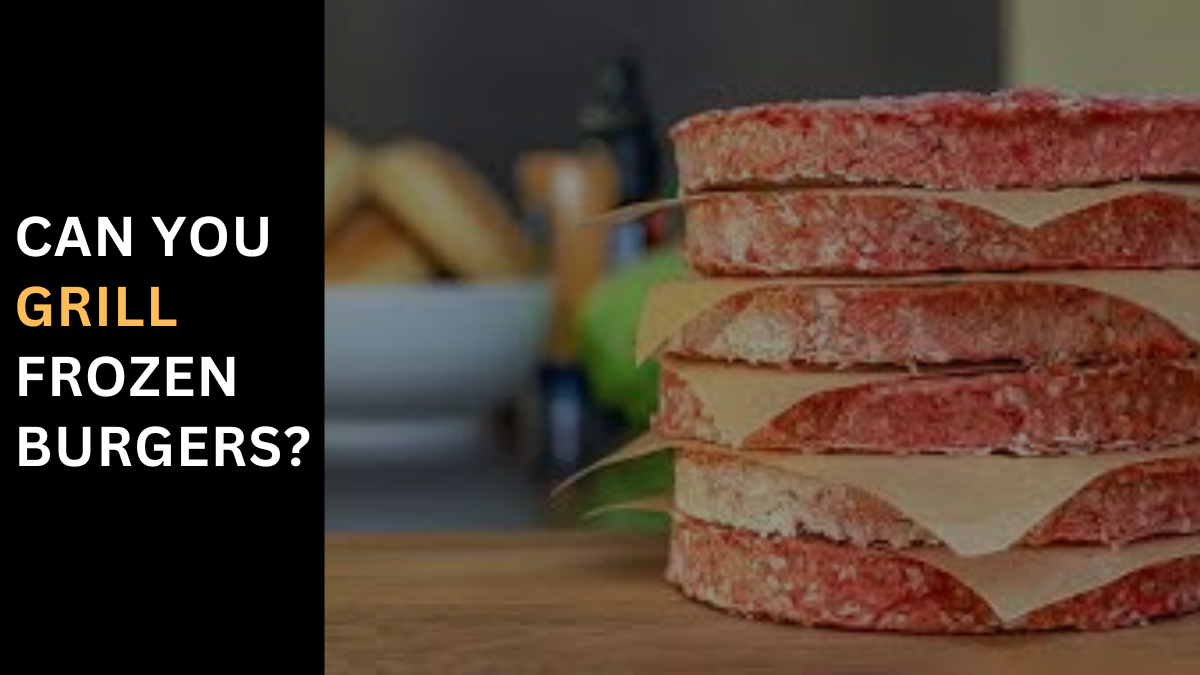
Can you cook frozen burgers at a BBQ? As the weather gets warmer and the nights become longer, it marks the perfect time for a BBQ, grilling your favorite meats into a beloved summertime activity. In the UK, reaching for frozen meat becomes a convenient solution when hunger strikes unexpectedly. While fresh burgers are often touted as the best for flavor and texture, a patty straight from the freezer shouldn’t be overlooked. This piece serves as your ultimate guide, drawn from personal experience and backed by butchers’ advice, on how to cook frozen burgers on a BBQ. Embracing the frozen patty can make your hot summer’s day BBQ not just a possibility but a delightful reality. Important Factors to Consider While Grilling Frozen Burgers: 1. Choosing burgers for your BBQ When hosting your annual garden BBQ, the centerpiece of this friend and family summer event often boils down to selecting the right burger. Whether it’s a classic burger like the traditional beef burger, something with a twist like lamb and mint, or for the more adventurous, a chorizo blend, choosing the perfect frozen hamburger patties is crucial to a successful BBQ. 2. Quality of your frozen burger The foundation of a delicious burger lies in the quality of the patty. Opt for patties made from higher welfare animal produce with high meat content to ensure a juicy experience once defrosted. When you purchase burgers online and they arrive frozen, it’s crucial to keep the product in the best possible condition during transit. Even if they’re defrosted by the time they reach you, if they start off as great quality, you’re on the right track. 3. Size and thickness of your frozen burger The size and thickness of frozen burgers can greatly vary, impacting how you cook the patties on your BBQ grill. Sizes can cater to different taste preferences, with thicker patties often preferred for medium-rare to medium cooking, as they retain more juices for a juicy, pink center. Conversely, thinner patties tend to cook faster, whether they’re frozen or defrosted, and are more suitable for those who enjoy their burgers well done. How to Grill Frozen Burgers? The form of ground meat, fish, or vegetables into a patty and cooking it on a hot grill or skillet seems straightforward, yet achieving the perfect charred outside without being raw within, or avoiding a texture like rubber, requires skill. Here are some tips for shaping, seasoning, and cooking your burgers to ensure they are the highlight of your best grilling nights all summer long: Pay close attention to the quality of your meat, aiming for a balance of fat and lean for juiciness and flavor. Be gentle when forming your patties to avoid overworking the meat, which can lead to a tougher burger. Season generously with salt and pepper, and consider adding your blend of spices or herbs for a unique twist. When grilling, ensure your grill is hot to achieve a good sear and resist the urge to press down on the burgers, as this squeezes out precious juices. Flip only once, cooking to your desired doneness, and let the burgers rest briefly before serving on toasted buns for the perfect finish. Make sure you have enough fat in your burger blend For a standard ground beef burger, or if you’re getting fancy with chicken, turkey, fish, or vegetables, the single best thing to up your burger game is to ensure there’s enough fat in your burger mix. When exposed to high-heat cooking, fat will melt, imbuing the burger with moisture and flavor. Without it, you risk ending up with dry, rubbery, and bland burgers. A basic ratio to aim for is 20% fat; this serves to keep your burger from becoming too dry, even if it’s covered in gooey cheese or slathered in mayo. The exterior fat can save the texture of your burger. If there’s too little fat, particularly when using ground beef, aim to buy an 80/20 blend from the store. For other proteins, consider adding grated butter, shortening, ground bacon, or another source of solid fat into your blend to make up the difference. Press a dimple into the center of the patties Pressing a dimple into the center of your patties ensures that when your perfectly formed patty hits the grill, it doesn’t end up looking like a meatball. It’s simple: as burgers cook, the heat causes the meat to shrink, but the exterior shrinks faster than the inside, causing steam from the juices to make the center swell, which can result in a domed, puffy burger. This isn’t ideal when you’re looking for a flat surface to pile on those toppings. To avoid this shaping issue, make the center of your burger slightly less thick than the exterior dimensions. Press down in the center of the patty to create a crater about 1/3 deeper than the rest of the burger. This tip does not apply to burgers designed to be cooked straight from frozen, as they are often already docked or shaped to address this issue, nor to smash burgers for obvious reasons. Season your burgers before you cook them Seasoning your burgers before you cook them is crucial. The stuff that goes on top is important, but you have one shot at getting the seasoning right on the patty itself. For both store-bought and home-formed patties, it’s essential to season them well on both sides with salt and pepper before cooking. If you’re forming your patties, integrating the season into the blend as you mix and shape them is ideal. This allows the seasoning to work its way through the patty, enhancing flavor from the inside out. For the best results, season your patties at least 30 minutes to up to two hours before cooking. Skipping this step can lead to Unseasoned burgers that taste bland, undermining the quality of your BBQ. Let your burgers chill before cooking Burgers cooked on high-heat, direct-heat methods leave little room for error to achieve that