

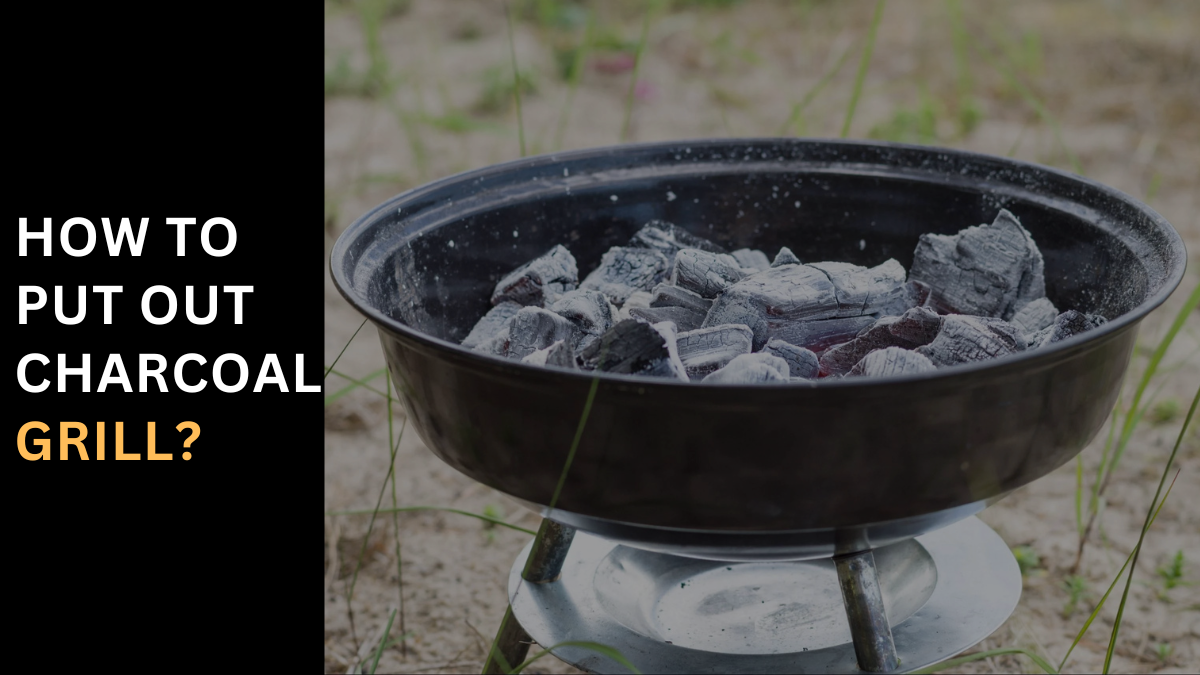
Why Do We Need To Put Out A Charcoal Grill After Cooking? Preventing Uncontrolled Fires When you’ve nailed the exact amount of charcoal for your grilling session, there’s often a sense of satisfaction. However, any burning embers and coals left unattended can quickly become a hazard, especially if the grill is knocked over. It’s crucial to put out these coals to eliminate the risk of starting a fire, safeguarding both the grill and its surroundings. Managing Leftover Heat A common problem with leftover burning charcoal is that it keeps the grill hot for a long time, making it risky to cover. Putting a cover on a hot grill is a bad idea, as the heat could melt the cover, potentially damaging it and leaving the grill unprotected from the elements. Differences from Gas Grilling For those who have spent the majority of their grilling life using a gas grill, adjusting to charcoal requires understanding the differences. With gas grills, shutting off the burners and the propane tank suffices, and you can let it cool before putting a cover on. Charcoal grills demand additional considerations due to their continuous supply of heat, which can’t be switched off as easily. Safety and Convenience Especially important during activities like camping, where time is of the essence, and you may need to pack up and leave in minutes, ensuring the charcoal is extinguished promptly is vital. Employing a method that uses every single word of caution and preparation helps manage time effectively, making the process of cooling and safely handling the grill more efficient. By adopting these practices, we ensure our grilling adventures are both enjoyable and safe, leaving no lot of charcoal burning unnecessarily and no essence of risk behind. How to Put Out Charcoal After Grilling? After a delightful session of grilling, it’s crucial to dispose of and handle the used coals and ash with care. Remember, these remnants should only be approached once cooled. My go-to tips for safe handling involve letting nature do its work, ensuring all charcoal is devoid of heat, and preventing any accidental mishaps. What You’ll Need To eliminate the possibility of accidental flare-ups, cool down your used charcoal and ash effectively. Two common methods for extinguishing and cooling coals stand out. One is to suffocate the fire by closing the grill side and shutting the vents for a solid 48 hours until everything is completely cooled. Alternatively, you could douse the coals with water, pouring and stirring slowly and carefully to avoid creating hot steam. This approach eliminates the possibility of dormant embers reigniting, ensuring a safe environment. How to Dispose of Used Charcoal and Ash? When your grilling session ends and the charcoal and ash have completely cooled, it’s time to dispose of them responsibly. I recommend thoroughly wrapping the remnants in aluminum foil before tossing them into a non-combustible outdoor trash receptacle. It’s essential to never compost or fertilize with used briquets, as the ingredients in products like Kingsford® and Kingsford® Match Light® do not aid in the breakdown of organic matter. How to Reuse Partially Burned Coals? For those looking to reuse partially burned coals, avoid submerging them in water. Instead, carefully spray them down to prevent further burning. Once they’re completely cooled, allow the coals to dry. You can then keep them in your grill for later use. This method not only conserves resources but also ensures your grill is always ready for your next barbecue adventure. Can I Douse My Charcoal Grill With Water? Pouring water on your charcoal grill might seem like a quick solution, but it’s rife with risks. This method can instantly create steam capable of causing burns and send hot ash flying, creating a safety hazard. For those with ceramic grills such as the Big Green Egg, Kamado Joe, or Primo XL, the sudden thermal shock could lead to damage or cracking, severely affecting your grill’s durability. Additionally, this approach turns ash into mud, complicating cleanup and promoting rust development at the grill’s bottom. In essence, while it technically works, the potential for harm and mess suggests looking for safer alternatives. How to Use Water to Extinguish the Coals Quickly and Safely? Dunking Method for Safe Extinguishing Remove pieces of charcoal from the grill and dunk them into a bucket of water. This method reduces the production of steam and is safer than pouring water directly into the grill. It also allows you to potentially salvage good-quality charcoal for future use, though be aware that cheaper charcoal may not withstand the process. Safety Precautions and Equipment Always use grill gloves to protect your hands from the heat when handling burning charcoal. Keep the bucket of water conveniently close to the grill to ensure a quick and safe process. Spritzing Method for Cooling Spritzing charcoal with water can accelerate the cooling process with less risk compared to pouring. However, this approach must be done carefully to avoid creating a mess inside the grill and to minimize the risk of steam burns. Considerations and Recommendations While dunking offers a way to reuse charcoal and minimizes steam, it’s important to approach it with caution due to the downfall of handling hot coals. The spritzing method, although less messy, is not highly recommended because of its potential for creating steam and mess. Always prioritize safety and follow best practices when extinguishing coals with water. At Home, With Plenty of Time Closing the Grill Properly After removing the food from the grill, ensure to close the lid and all vents. It’s important for safety to wear insulated gloves or mitts, as the vents can be hot. This step is crucial and takes time, potentially a whole day, for the coals to eventually go out. Avoiding Water for Extinguishing It is strongly advised to NOT pour or spray water on the coals to put them out faster. Applying water can lead to extremely hot, billowing steam that could burn. Moreover, dirty, dusty water might splash onto your deck or cooking area, leaving

How to Cook Filet Mignon on the Grill – Quick & Delicious
How to cook filet mignon on the grill? Cooking Filet Mignon on the grill is my go-to method for achieving that tender, juicy steak we all crave. This favorite cut, known for its tenderness and rich flavor, requires precise cooking instructions to maintain its juiciness and avoid over-cooking. Start by searing the steak on high heat to lock in the flavors, then finish at lower temperatures based on the steak’s thickness and weight. I always recommend using a meat thermometer to ensure perfection, aiming for an internal temperature that reflects your preferred doneness. Whether you’re grill, pan-seared, broil, or oven cooking, each steak is a chance to perfect your technique. For those looking to enhance their skills, a video tutorial can be an exceptional resource. Remember, the key to a perfect Filet Mignon lies in the details: temperatures, times, and cooking methods tailored to each unique cut. How to Cook Filet Mignon on the Grill Choose a Filet Mignon Cut When buying Filet Mignon, whether at a supermarket meat counter or from a butcher, it’s crucial to specify your desired thickness. Ideally, Filet Mignon, or tenderloin steaks, should have even edges and be about 2 inches thick for a juicy result. Follow these guidelines to select the best cut: Look for good color in the beef. The steak should appear moist but not wet or ragged. Avoid prepackaged steaks with tears in the packaging or liquid at the bottom of the tray, as these are signs of mishandling or aging. Ensure the steak is firm and cold to the touch, indicating it has been properly refrigerated. Plan on serving about 6-8 ounces per person, adjusting based on your guests’ appetites. Selecting the right Filet Mignon cut with attention to these details ensures a premium, flavorful steak that’s tender and enjoyable. Step 1: Choose a quality meat source Grilling a restaurant-quality Filet Mignon in the comfort of your backyard starts with choosing a premium, 2-inch thick steak, known for its exceptional marbling, flavor, and tenderness. Opt for grass-fed and grass-finished beef, sourced from farms that prioritize regenerative agriculture methods, ensuring the meat is free from synthetic hormones and antibiotics. This choice not only guarantees a steak rich in nutritional benefits but also supports a healthier environment. Before grilling, allow the steak to reach room temperature and season lightly to enhance its natural flavors. High heat is crucial for searing, creating a delicious crust, while moving to a cooler zone ensures it cooks to perfection without overcooking. Resting the steak post-grill allows juices to be redistributed, ensuring every bite is as juicy and flavorful as possible. Step 2: Season Filet Mignon To fully appreciate the complex flavor of a well-grilled Filet Mignon, experts suggest keeping the seasoning simple. A generous sprinkling of salt and pepper often becomes the favorite steak seasoning, enhancing the meat’s natural flavors without overshadowing them. Allow the seasoned steak to sit at room temperature for about 30 minutes to an hour before grilling. This step ensures that the seasoning fully permeates the meat, contributing to a richer taste profile. Step 3: Preheat Preheat your grill to high heat for at least 15 minutes before cooking your steak. A hot grill is crucial for achieving a perfect sear, locking in those succulent juices, and creating a delicious crust on the surface of your Filet Mignon. This initial blast of heat is key to transforming a good steak into an unforgettable culinary experience. Step 4: Grill Place your steak on the grill and cook for approximately 4-5 minutes per side, depending on thickness, for a perfect medium-rare finish. The goal is to achieve an internal temperature of 130-135°F, as measured with a meat thermometer. Remember to flip the steak only once during the cooking process to ensure even cooking and a beautifully charred exterior. This careful attention to cooking time and temperature guarantees a Filet Mignon that’s flawlessly grilled to your preference. Step 5: Rest Upon achieving the desired internal temperature, remove the steak from the grill and let it rest for 5-10 minutes. This allows the juices to be redistributed, making the steak more tender and flavorful. Step 6: Serve and Enjoy Slice the steak against the grain and serve with your favorite sides, such as grilled vegetables, mashed potatoes, or a side salad. Filet Mignon on a Charcoal Grill Light the Charcoal: Begin by lighting your charcoal grill, giving it time to reach the right temperature. Wait until the coals are covered in white ash, indicating they’re hot enough for grilling. Prepare a Two-Zone Fire: Arrange the coals to create a two-zone fire with a hot zone for searing and a cooler zone for indirect cooking. This setup provides control over the cooking intensity, crucial for grilling Filet Mignon. Preheat the Grill: Allow the grill to preheat properly. A hot surface is key for searing the steak and locking in flavors. Sear the Steak: Place the Filet Mignon on the hot zone of the grill for searing. This step imparts a distinct, smoky flavor and aroma that’s highly desirable. Move to Cooler Zone: After searing, move the steak to the cooler zone for indirect cooking. This method ensures the steak cooks through to your desired level of doneness without burning. Monitor Temperature: Using a reliable meat thermometer is handy to monitor the steak’s internal temperature. Adjust the grill vents as needed to maintain the desired cooking temperature. Let the Steak Rest: Once the Filet Mignon reaches your preferred doneness, remove it from the grill and let it rest before serving. This allows the juices to be redistributed, ensuring a tender and flavorful steak. Grilling Filet Mignon on a charcoal grill requires a bit more skill and attention compared to a gas grill, but the distinct smoky flavor it imparts is well worth the additional time and effort. Grilling Filet Mignon on Gas Grill Grilling Filet Mignon on a gas grill combines convenience with precise temperature control, leading to consistent results with minimal effort. The primary advantage of
How To Grill Burgers on A Gas Grill?
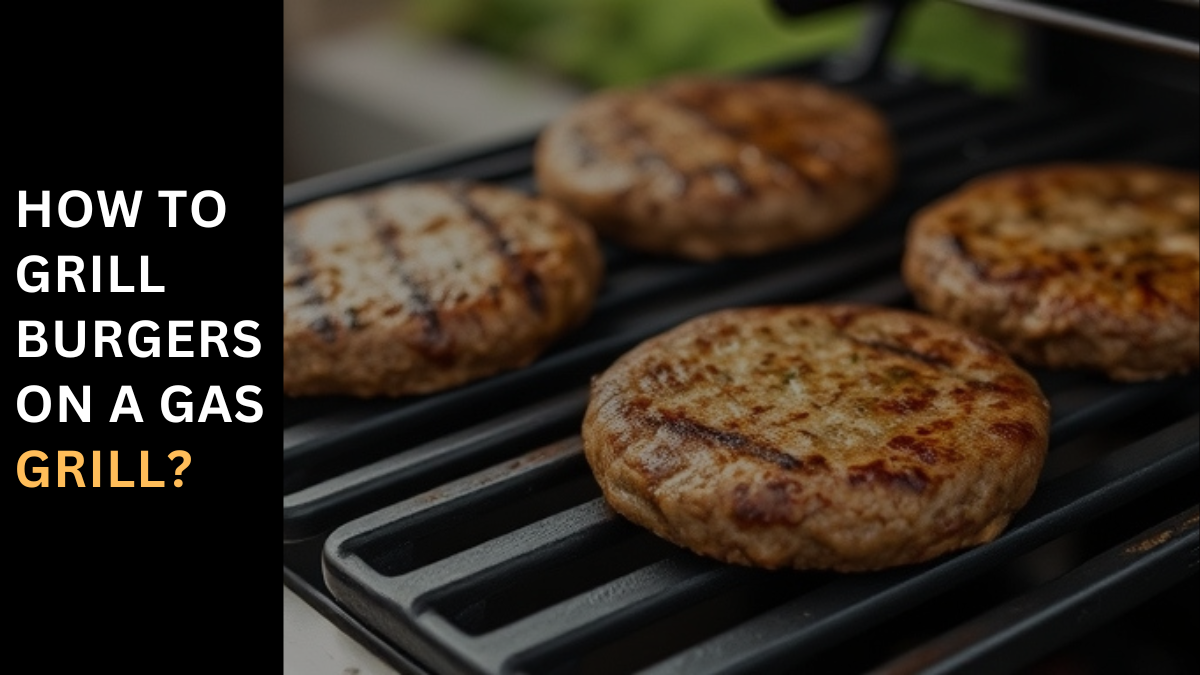
Burgers 101: How to Grill Burgers? Diving into the heart of summer, the backyard transforms into a stage for barbecues that promise mouthwatering, flame-kissed burgers nestled between a toasted bun with all the desired fixings. This is not just about satisfying hunger; it’s about elevating the grilling game with tips and tricks to ensure every burger is as juicy and delicious as it can be. Whether it’s a casual cookout or an elaborate gathering, mastering how to cook and grill burgers is essential. Beyond burgers, expanding the menu to include blackened salmon, tacos, and various sides like corn and salad, topped off with a sweet dessert of peaches and ice cream, can transform any grilling event into a feast to remember. However, the focus remains on perfecting that burger, turning every grilling opportunity into an adventure that lasts the months of summer. How to make burgers? To craft the best and juiciest burgers, it’s recommended to use hand-formed patties rather than preformed or frozen pre-made ones from the store. Starting with fresh, ground beef allows you to shape each burger by hand, ensuring quality and flavor. Choose the right meat When it comes to choosing the right meat, the key is finding the perfect balance between lean for flavor and enough fat to stay juicy. Many prefer lean ground beef for their recipes, with a preference for a fat-to-meat ratio of 80/20 or 85/15. This ensures a juicy burger without being overly greasy. For the connoisseur looking to elevate their burger game, opting for freshly ground meat from the butcher—or even grinding it at home with a meat grinder—opens up possibilities for custom blends, such as sirloin, chuck, or brisket. Gently press the burgers into patties To form your burgers into patties, start by dividing the ground beef into portions that match the number and size you prefer, commonly around a ⅓-pound for each burger. Using your hands, gently press the meat into a flat, even thickness that’s slightly larger than the buns you plan to use. It’s crucial not to overwork the meat or squeeze it too tightly, as this can make the edges crumble when transferring them to the grill. Make a small indentation in the center of each patty with your thumb; this helps the burgers cook more evenly and prevents them from puffing up in the middle. Season the burgers well Season your burgers generously with kosher salt and freshly ground black pepper on all sides. The larger crystals of kosher salt are key in drawing out moisture, leading to a juicier burger than when using regular table salt. For an added twist, incorporate your favorite rubs like Cajun, BBQ, or Montreal steak blends for an excellent spice kick. Be sure to adjust the seasoning based on the blend used, possibly using a bit less if the blend is potent. When seasoning, sprinkle from a few inches above the burger patties to ensure even coverage. Grill temp for burgers For grilling burgers, aim for a grill temperature of medium-high to high heat, typically around degrees F. While many gas grills come with built-in thermometers, they may not always be reliable. Investing in an inexpensive, grilling thermometer can help you dial in the perfect temperature, making it easier to achieve consistent results. How long to cook burgers on the grill? To cook burgers on the grill, ensure it’s properly heated and plan for about 3-5 minutes on each side, flipping once. This timing should allow the burgers to char nicely while cooking through, yet retain a little bit of pink in the middle if you prefer them medium. For those who enjoy their burgers medium-well or well-done, leave them on for a couple of minutes longer. It’s a general guide to cook the burgers until they reach your desired level of doneness. keeping in mind that the USDA guidelines for ground beef call for cooking to an internal temperature of degrees F. Remember, burgers will continue to rise in temperature after removing from the grill due to carryover cooking from residual heat, so it might be beneficial to pull them off sooner and let them rest the way through. Do you need a binder? For a binder like egg and breadcrumbs in ground beef to help it stick together on the grill, it’s generally unnecessary. The fat content in the beef should allow the patty to hold together fine on its own, providing a juicier and best burger experience when hand-shaped and seasoned. Can you make burgers ahead of time? Yes, you can prepare burgers ahead of time. Shape and season your patties up to 6 hours in advance and keep them in the fridge, covered with plastic wrap until you’re ready to grill. It’s recommended to let them sit out at room temperature for 10-15 minutes to take the chill off before placing them on a hot grill for even cooking. My tips & tricks for the best burgers Meat Selection and Fat Content For the best burgers, lean meat with a bit of extra fat is your friend for an excellent, flavorful outcome. Aim to use meat with 15-20% fat content. This fat is crucial for adding flavor and juiciness to your burgers. Seasoning and Shaping Season your patties well with coarse kosher salt and freshly ground black pepper. When shaping and mixing, be careful not to overwork the meat to avoid tough burgers, and don’t underseason, or you might end up with bland results. Sprinkle the seasonings from high above the patty, at least 10 inches, for even coverage. Aim for perfection with even thickness, pressing them flat to about ¾- to 1-inch thickness using your hands, a flat-bottomed plate, or a burger press. Ensure they are all the same size; a kitchen scale can help weigh and shape the patties. Make your patties about ½-inch wider than your buns since they will shrink as they cook. When shaping, make an indent in the center with your fingers to prevent the burgers from
Grill Master’s Secret – Quick Electric Rib Cooking Guide!
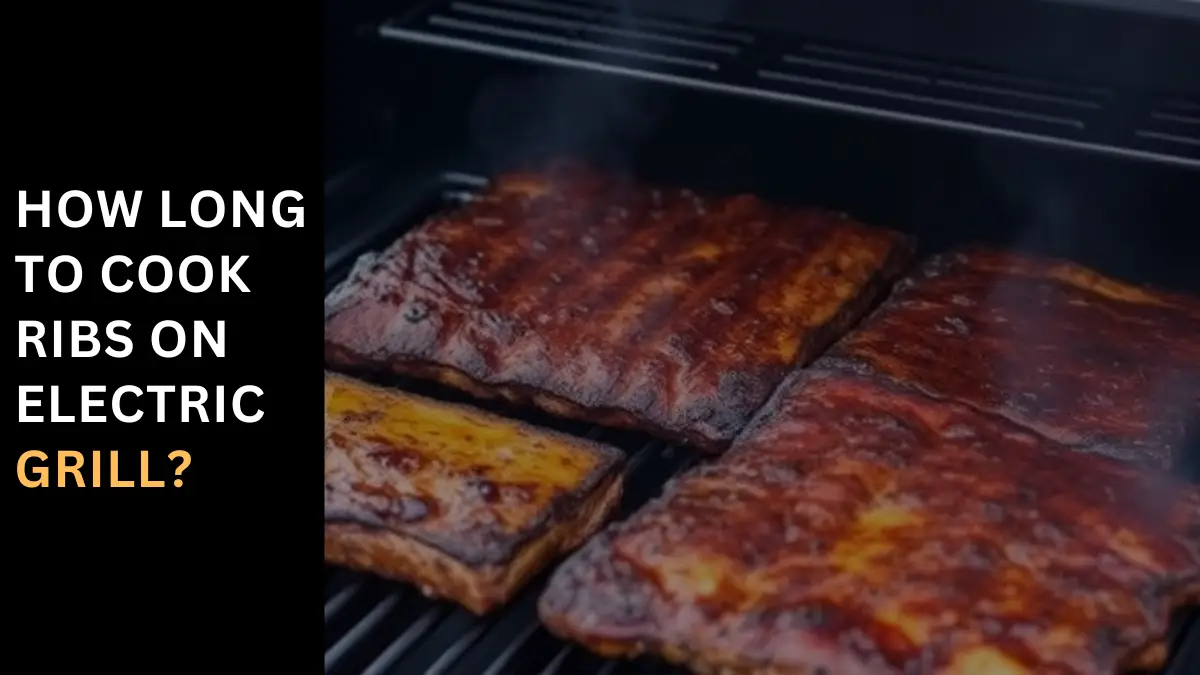
How Long to Cook Ribs on Electric Grill Choosing the Right Ribs When grilling ribs on an electric grill, it’s crucial to choose the right type based on your taste preferences and the texture you desire.For a less fatty option, Baby Back Ribs from the upper portion of the ribcage offer a tender yet robust flavor. If you’re in the mood for something even more meatier with a robust flavor, Beef Ribs might be your go-to, although they require longer cooking times. Prepping the Ribs Properly prepping the ribs is pivotal for enhancing flavor absorption and ensuring they cook evenly. Begin by removing the thin membrane on the bone-side using a butter knife and paper towel—this allows the seasonings to penetrate more deeply. Generously coat the ribs with a dry rub, whether a homemade blend or store-bought. For those looking to add an extra layer of taste, marinating the ribs in a flavorful marinade and letting them sit in a resealable bag in the refrigerator can make all the difference. Mastering the Electric Grill The real art comes in mastering your electric grill. Preheat your grill to a medium-high heat of about 300-350°F. Utilize Indirect Heat for cooking by turning off one or more burners and placing the ribs on the unlit side—this technique allows for slow and even cooking. Keep the lid closed to maintain a consistent cooking temperature; remember, every time you open the lid, heat escapes, prolonging the cooking process. In the last 15-30 minutes, you might choose to baste the ribs with barbecue sauce for those saucy ribs everyone loves, but be cautious of sauces with high sugar content as they can easily burn. In cooking ribs on an electric grill, these steps not only ensure a delicious meal but also imbue the cooking experience with a sense of personal touch and craft. Checking for Doneness As you grill those delectable ribs, knowing when they’re perfectly done hinges on a couple of crucial tests. Utilize the Bend Test by grabbing the ribs with tongs and giving them a gentle twist; if they crack or break apart, they’re ready to come off the heat. Also, check the Internal Temperature with a meat thermometer—pork ribs are ideal at around 190°F, while beef ribs should hit between 200-205°F to ensure they’re tender and flavorful. Resting and Serving After cooking, let your ribs rest for about 10 minutes. This allows the juices to redistribute, making every bite succulent and rich. Serve your ribs with a variety of barbecue sauces and sides for a finger-licking good meal that will have your family and friends clamoring for seconds. As you fire up your grill, remember that each moment spent savoring these unforgettable flavors transforms your backyard into a true BBQ powerhouse. Conclusion: Cooking ribs on an electric grill involves careful timing and the right techniques to achieve that perfect tenderness and flavor. Whether using a power pressure cooker for a quick, juicy meal in about 45 minutes or an electric oven for a slower, richer roast over several hours, the method chosen can greatly affect the outcome. Key steps like choosing the right type of ribs, proper seasoning, and maintaining the correct cooking temperatures are crucial. By mastering these elements, you can ensure your ribs are always cooked to perfection, making every meal memorable and satisfying for friends and family. People also ask How long does it take to grill ribs? When grilling ribs on an electric setup, the typical method involves placing the ribs bone-side down in a foil pan, adding water, and covering with aluminum foil. For optimal tenderness, cook on a preheated grill and keep adding water as it evaporates. The process usually takes between 1 hour 30 minutes to 2 hours 30 minutes. Towards the end, add barbecue sauce and continue cooking for an additional 30 minutes to infuse the flavor and achieve a perfect glaze. How to grill ribs in 1 hour? For a quicker option, the 1-Hour Grilled Ribs technique involves first removing the membrane from the bone side of the ribs, cutting them into individual pieces, and giving them a light salt seasoning. Amp up the flavor with Mediterranean-ish or other sugar-free seasoning before grilling over a medium-hot fire at 400°F+. Flip the ribs as they brown and achieve a slightly char to ensure even cooking and a savory crust. This method not only saves time but also delivers mouthwatering ribs in half the usual cooking duration. How to cook ribs in a power pressure cooker xl? To master ribs in a power pressure cooker xl, start by removing and discarding the membranes from the rib halves to ensure they absorb the flavors fully. Add water to the cooker, place the ribs on a trivet, and seal the lid to cook under HIGH PRESSURE for 30 min. After the time has elapsed, turn off the cooker, slowly remove the lid, and bake the ribs for another 10 to 15 min until the sauce is hot and bubbly—a quick way to get fall-off-the-bone ribs. How long to cook ribs in an electric oven? If you’re using an electric oven, the process changes slightly. Wrap the ribs in foil to keep them moist and cook at 300 degrees for up to 3 hours. For those who prefer a faster method, crank the oven up to 400 degrees and reduce the cooking time to 1 1/2 to 2 hours. This method is especially effective for Great big beef dino ribs, which may require a longer time in the oven to ensure they don’t dry out and maintain their succulence.
Teres Major Grill Magic – Click for Juicy Tips!
How to cook Teres Major on Grill? Teres Major Steak, aka Petite Tender Steak Preparing a Teres Major Steak on the grill can transform a simple meal into a restaurant-worthy experience. Known for its tender texture and rich flavor, this cut of beef is not only budget-friendly but also delicious and easy to prepare. For those new to this grilled delight, the Teres Major Steak, or Petite Tender, is a top recipe that should definitely make your list. This post is a collaboration with Beef. It’s What’s For Dinner. on behalf of the Beef Checkoff. I received compensation, but all opinions are my own. You can’t go wrong with a flavorful grilled steak recipe To achieve perfection, it’s crucial to grill the steak properly. Start with a good grill pan or use an indoor grill if the weather isn’t cooperating. The key to a flavorful, fork-tender steak lies in its preparation. Grilling should be quick to keep the meat succulent, typically under 20 minutes. Pairing the steak with stir fry vegetables can turn your dish into a well-rounded meal, ready to impress any guest throughout the year. A clean-up that’s a breeze and the versatility to adapt whether cooking outdoors or indoors solidifies its stature as a top recipe for any occasion. What Is Teres Major Steak? Teres Major Steak, often hailed as the Petite Tender or Mock Tender, emerges from the shoulder or chuck section of the cow. It is celebrated for its lean, affordable, and tender texture that rivals the poor man’s Filet Mignon. Known for its juicy, fork-tender qualities, this cut of beef is not just versatile and easy to prepare, but it also boasts an incredible flavor that makes it a favorite among beef cuts. Getting enough quality protein remains one of my biggest nutrition goals Incorporating Teres Major into your diet is a brilliant way to meet nutrition goals, especially if you’re seeking quality protein from lean beef. This cut is not only economical and delicious, but it also adds a robust flavor to your meal prep rotation. Grilling Teres Major enhances its natural flavors, making it a superb choice for anyone looking to inspire a healthy diet with tender beef cuts that are both satisfying and nutritive. Why You’ll Love This Recipe Embracing the Teres Major Steak—also known as Petite Tender—offers a delicious source of lean, high-quality protein that’s superb for both meal prep and spontaneous dining. The Asian beef marinade is easy to make and enhances the steak’s savory, rich flavor, making it a perfect recipe to grill either indoors or outdoors, no matter the weather. Its versatility shines, allowing you to store and reheat it without losing its allure, ideal for those days when you need a quick yet delicious meal. You can prepare this cut whole When it comes to preparing the Teres Major Steak, the options are plentiful. This cut can be prepared whole, sliced into small steaks, or cut into tips. Its resemblance to beef tenderloin is uncanny yet it remains a rare find in typical grocery stores, more often stocked by butcher shops. For those lucky to have a local butcher shop that keeps this cut in stock, seizing the opportunity to prepare this cut at home provides a unique culinary experience. Recipe Ingredients When planning to grill Teres Major Steak, also known as Petite Tender or Mock Tender Steak, ensuring you have the right ingredients on hand is crucial for enhancing its natural, tender qualities. Here’s a refined list for a marinade that will infuse the steak with rich, multi-dimensional flavors: This combination ensures each bite of the grilled Teres Major is as flavorful as it is memorable. How To Make Grilled Teres Major Steak? Preparing a grilled Teres Major Steak involves a few key steps that enhance the meat’s natural flavors, ensuring a tender and delicious result: This method not only infuses the Teres Major with robust flavors but also ensures a meal that is both satisfying and enjoyable, perfect for any grilling enthusiast. Storing & Reheating For the Teres Major Steak, proper storing and reheating techniques can make a significant difference in enjoying your meal at its best. After grilling, if you have leftover steak, it’s crucial to wrap it tightly in plastic wrap and put it in an airtight container; you can keep this in the fridge for a few days or freeze for up to three months. When ready to enjoy again, thaw the steak in the refrigerator overnight. For reheating, my favorite way to restore its just-grilled taste is to place the steaks on a wire rack over a rimmed baking sheet and put them into a 250-degree oven. Monitor the internal temperature, which should reach 110 degrees F before removing. To finish, pat the steaks dry and give them a quick sear in an oiled small skillet (preferably cast iron, but not required), on medium-high heat for just seconds, depending on the size of the steak, to recapture that fresh-off-the-grill crust and warmth. Recipe Tips & Variations For a delicious twist on your Teres Major Steak, consider these tips to elevate the flavor and adapt the recipe to your dietary needs. First, marinate the beef for a minimum of two hours, though hours are recommended to achieve the maximum infusion of flavors. Use a gluten-free version of the marinade by substituting soy sauce with Tamari to cater to dietary restrictions. If you prefer not to marinate, simply season the steak with coarse salt, then refrigerate for 30 minutes before grilling. Pat the steak dry with a paper towel to soak up excess moisture prior to cooking. This helps achieve a better sear. For a fun presentation, slice the steak against the grain into 1.5” cubes, thread them onto skewers with fresh vegetables, and grill for simple, Asian-style beef kabobs. Always let your steak rest after grilling before serving to ensure it retains its juices and remains succulent. Steak Grilling Tips For the perfect Grilled Teres Major Steak, follow these expert
Grill’s Up: Sheepshead Perfection – Click & Cook!
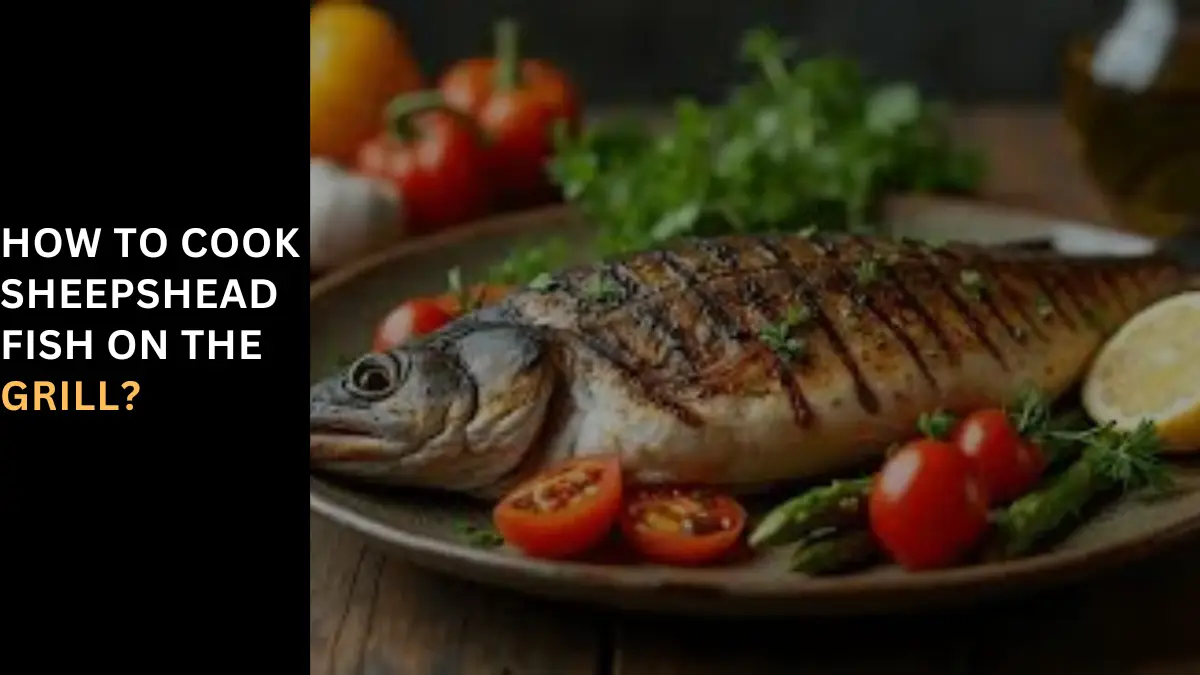
How to Cook Sheepshead Fish on the Grill? Choosing Sheepshead Fish When selecting a sheepshead fish at the market, always consult a knowledgeable fishmonger and look for clear, bright eyes and firm flesh that rebounds when pressed. The fish should have a fresh, sea-like smell without any off odors, which indicates it’s truly fresh. Ensure the scales are intact and the skin isn’t discolored. Whether you go for a whole fish or fillets, these markers are crucial for quality. Preparing Sheepshead Fish To properly prepare a sheepshead fish for cooking, start by giving it a thorough rinse under cold water to remove any loose scales or debris. Pat the fish dry with a paper towel. If handling a whole sheepshead fish, use a fish scaler or the back of a knife to remove the scales by scraping against the grain. Make a shallow cut along the belly of the fish to remove the entrails, then rinse the cavity again with cold water. Trim any excess fins and the tail to make the fish more clean and presentable. This method ensures the sheepshead fish retains its mild, sweet flavor and makes it perfectly ready for a delicious meal on the grill. What is Sheepshead Fish? Sheepshead fish, a saltwater fish found in the coastal waters of the Atlantic Ocean and the Gulf of Mexico, often reaches a large size. Commonly found along the Florida coast where they have their highest concentration, these fish are prized for their moisture, fat content, and flavor that’s similar to shellfish or dubbed the poor man’s lobster. Where Can I Buy Sheepshead? Sheepshead can be caught fresh and bought at local seafood markets, particularly along the Atlantic coast. Ensure it’s freshly purchased to maintain the best quality. Fast and Easy For a fast and easy method, the best way to cook sheepshead fish involves simple seasoning with salt, pepper, and a dab of compound garlic butter to finish. Just ten minutes on a very hot cast iron skillet on a closed grill, and the fish is ready. This simplicity lets the fish’s flavor truly shine, maintaining its moisture and enhancing its taste with simple ingredients. Cooking sheepshead this way prevents the fish from getting spoiled and offers a delicious, quick meal. Equipment and Tools Ingredients Instructions Recipe Tips and Tricks When grilling sheepshead fish, it’s crucial to preheat your cast iron skillet on the grill until it’s hot enough to crisps the fish beautifully. Always wait until the fish starts to turn white and pull away easily from the skillet before you attempt to flip it. Flipping too early can prevent achieving that delicious, crispy exterior. Ensure the fish becomes golden brown on both sides for a perfect finish. How to Cook Sheepshead on the Stove if It Rains? If the summer grilling plans are thwarted by rain, the sheepshead fish can easily be cooked on the stove top using a similar method. First, heat a cast iron skillet over medium-high heat and add some olive oil. Once hot, place the sheepshead in the skillet and cook for a few minutes, just as you would grill it. Flip the fish to finish cooking for a few more minutes. Finally, top with garlic butter for an added flavor burst, turning any weather issues into an opportunity to bring the summer feel inside. Storage and Reheating To properly store leftovers, keep your cooked fillets of sheepshead in an airtight container in the refrigerator for one to two days, though the USDA recommends 3 days as the maximum. If you have too much to use right away, freeze the leftover sheepshead; it can be safely stored wrapped and sealed in airtight containers for one to two months. When you’re ready to reheat, a skillet works best, especially if repurposing the fish into a crab meat-like dip, soup, salad, scrambled eggs, or an omelet. If you catch and want to freeze sheepshead, first clean and fillet it, then vacuum-seal it to maintain freshness, storing frozen for up to 3 months. Meal Prep To prep for a meal, first clean and fillet your sheepshead if you caught too much for one meal. Rinse the cleaned fish and pat it dry, then either keep it refrigerated if almost ready to grill, or freeze the extra sheepshead in airtight containers or vacuum-sealed packaging. For grilling for a crowd, have everything ready: Measure your garlic and parsley into a glass measuring cup and calculate the amount of butter needed, setting it aside until the fish is finishing on the grill. You might even delegate the task of melting butter to a child or guest, so it’s ready for a quick stir just before serving. Cooking Methods When cooking sheepshead fish, the key is to choose the method that best suits your taste and occasion. Grilling the fish over medium heat with a bit of oil on the grates ensures it doesn’t stick. Simply season your fish with your favorite herbs and spices, and grill each side for a few minutes until the flesh is opaque and flakes easily. Baking in an oven set to 375°F (190°C) involves placing the seasoned fish in a greased baking dish and letting it bake until the flesh similarly flakes easily with a fork. Pan-frying requires oil or butter in a skillet over medium-high heat; again, season the fish, place it skin-side down, and cook until each side has turned the skin crispy and the flesh has cooked through. Steaming offers a lighter option where you boil water in a pot, place the seasoned fish on a steamer rack or basket, cover, and steam for several minutes until the flesh is opaque. Flavorful Seasonings and Accompaniments Enhancing sheepshead fish with flavorful seasonings and accompaniments elevates the dish. A splash of fresh lemon or lime juice adds a citrusy zing, while a mix of freshly chopped herbs like parsley, dill, or cilantro introduces a burst of freshness. Before cooking, brush the fish with a marinade of your choice, perhaps
Grill the Perfect Cobia – Quick & Easy Tips!
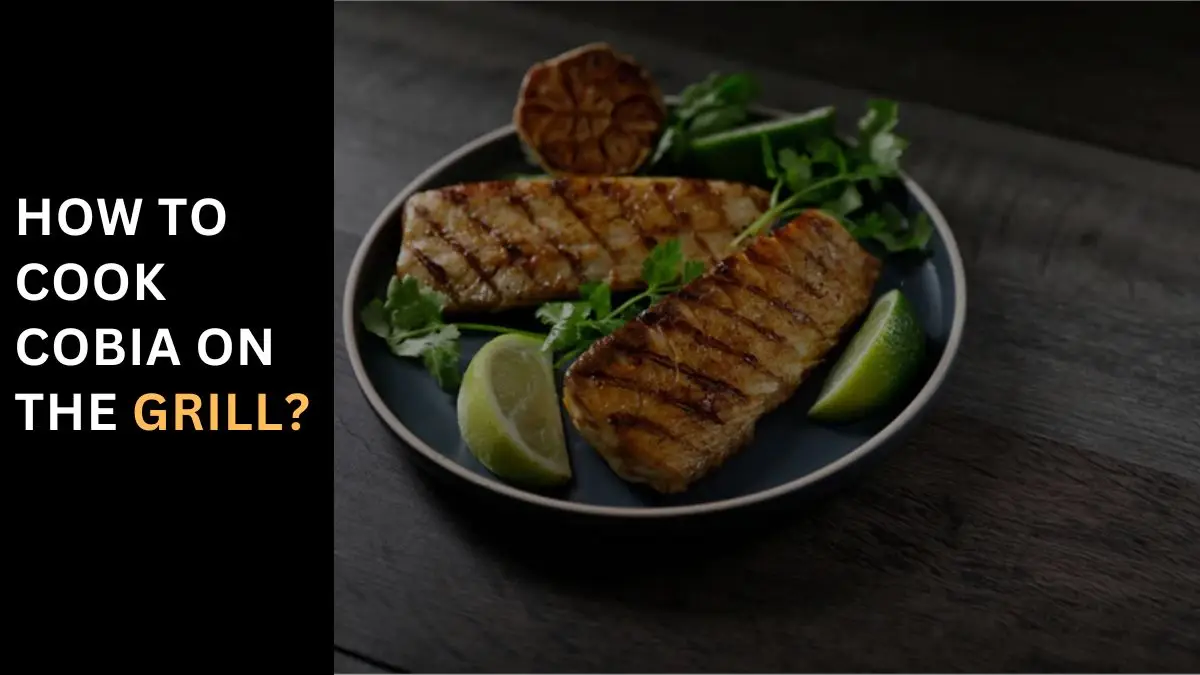
How to Cook Cobia on the Grill? Selecting Fresh Cobia When I scout for Cobia to grill, my first stop is usually a reputable fishmonger or a supermarket known for its freshness. The true test of freshness for me is bright, clear eyes and firm flesh that springs back to the touch. This quality check ensures that there’s no fishy smell—only the clean scent of the ocean. Preparation Techniques Before lighting up the stove, I ensure my Cobia is ready to meet the heat. This begins with a thorough rinse under cold water and a gentle pat down with paper towels. Removing any remaining scales from the skin is crucial to avoid any unwanted texture. Then, I prepare a simple marinade of olive oil, lemon juice, salt, and pepper, which I brush over the fish to enhance its buttery flavor. Cooking Methods for Cobia Grilling is my method of choice to coax out the rich, meaty nature of Cobia, providing it with a slightly crisp crust and preserving its moist texture. I preheat my grill to high heat, ensuring the fish cooks evenly, usually requiring about 4-6 minutes per side depending on its thickness. Whether I’m aiming for a quick lunch or a more substantial supper, Grilled Cobia always presents a delicious and light option with its firm texture. What makes this recipe so yummy It’s the simplicity of the recipe and the natural qualities of the Cobia that make it so appealing. The light, delicious, and subtly rich taste of the Grilled Cobia shines through, especially when the grilling technique is just right, offering a versatile option for both lunch and supper. The preparation may be simple, but the results are consistently yummy. Groceries you’ll need: Ingredients Instructions Hint When preparing cobia fillets, it’s crucial to consider their thickness to achieve perfect doneness. For thick fillets, typically about 2″ thick, cooking for 6-7 minutes per side is ideal. However, for smaller or thinner pieces, reduce the time accordingly to avoid overcooking. Recipe Variations and Substitute Ideas To enhance the naturally rich flavor of cobia, experiment with various marinades and sauces. A basic marinade of olive oil, lemon juice, and garlic can be modified by substituting lemon juice with lime juice or adding balsamic vinegar for a touch of umami. For a sweeter profile, blend in some brown sugar or create a balsamic glaze. Spicy aficionados might enjoy a sprinkle of Cayenne Pepper, while Sesame Seeds add an interesting texture. If in the mood for something more exotic, top your grilled cobia with Mango Salsa or use Soy Sauce for additional umami flavor. Checking for Doneness Checking the doneness of cobia is straightforward with an instant-read thermometer: the ideal internal temperature is 145°F. The flesh should be opaque and should flake easily with a fork. Be mindful to not leave the fish on the grill too long as it might become dry and less enjoyable. Serving Suggestions Serve your perfectly grilled cobia with a light and refreshing citrus-based salad or a side of grilled vegetables. Enhancing the dish with a drizzle of sauce made from Dijon mustard, honey, and a dash of soy sauce can significantly enhance the dining experience, complementing the cobia’s natural flavors splendidly. Marinade and Seasoning Ideas Exploring different marinades and seasonings for cobia can significantly enhance its flavor, whether opting for bold or subtle flavors. A mixture of Cajun seasoning adds a delightful heat, while a blend of fresh herbs like dill, parsley, and cilantro lends a lighter touch that makes the dish truly stand out. Experimenting with these combinations allows the natural flavors of the fish to shine through. Nutritional Benefits of Cobia When discussing cobia, it’s essential to mention not only its pleasing taste but also its substantial nutritional benefits. This fish is well-regarded for its healthy fats and lean protein, making it a nutritious choice for any meal. Perfect Pairings with Cobia The meaty texture of cobia makes it ideal for pairing with a variety of wines. A glass of light, crisp white wine like Sauvignon Blanc or Chardonnay can elevate the meal, while Pinot Noir offers a robust complement to the rich flavors of the grilled fish. Storing the Leftovers Storing the leftovers properly is crucial for maintaining the freshness of cobia. Leftover fish should be placed in an airtight container and refrigerated. It remains fresh for up to two days and can be enjoyed in dishes like fish salad or flaked over pasta. Potential Challenges and Solutions One common challenge when cooking cobia is preventing it from sticking to the grill or pan. Ensuring the cooking surface is hot and well-oiled helps the fish to cook without disturbance and makes it easier to be flipped, thus maintaining the integrity of its texture. What Are Some Tips for First-Time Cooks of Cobia? For those new to cooking cobia, here are some invaluable tips: Start by selecting the freshest fish possible to ensure the natural flavors truly shine. When prepping, dry the surface of the fish thoroughly for a perfect sear. Use a meat thermometer to check the internal temperature—cobia is best enjoyed when it’s not overcooked. Allow the fish to rest after cooking to redistribute the juices. Be creative with your side dishes and flavor profiles; simple seasonings can beautifully complement the rich, buttery taste of cobia, making your homemade meal a delightful experience. Embrace the process and enjoy the art of grilling. What is the best method to cook cobia? The best method to cook cobia involves either grilling or broiling, as these techniques apply direct heat which perfectly matches the hearty fish’s firm texture. Whether you opt for a lightly oiled grill or a pre-heated broiler, these methods help in highlighting cobia’s naturally rich flavor and achieving that desirable char. What flavors pair well with cobia? Cobia’s unique, mildly sweet flavor pairs well with citrus, garlic, and fresh herbs such as cilantro and basil. Creating a marinade with lemon juice, minced garlic, and a touch of olive oil can
Quick Grill Guide: Turkey Tips in Minutes – Try Now!
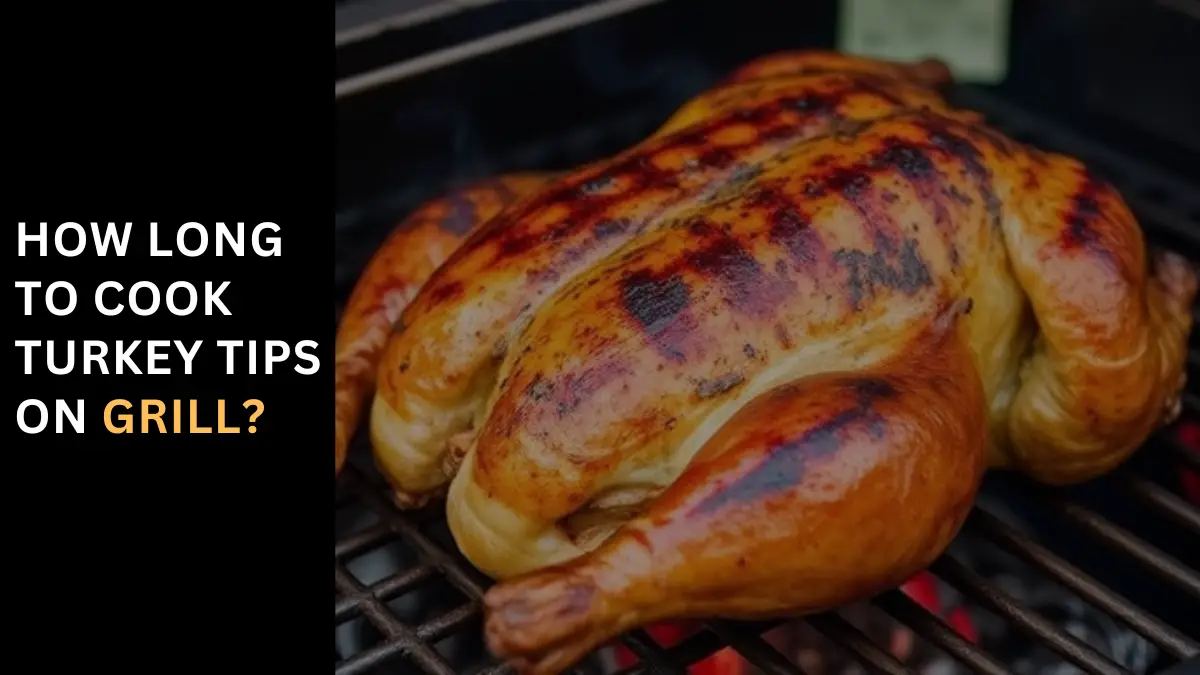
How Long to Cook Turkey Tips on Grill? When preparing your turkey for the holiday season, especially during Thanksgiving, you might find some great specials on tenderloin and other cuts at your local supermarket weeks ahead of time. The perfect time to start grilling your turkey is when the weather is mild—this ensures you can enjoy cooking outside without worrying about the cold. If it’s BBQ turkey you’re aiming for, try using a ribbed grill pan on your stove top if grilling outside isn’t an option. Keep an eye out for suspect sales on frozen packages, but don’t let them discourage you from finding the best deals. A quick tip: grilling a tenderloin can be faster, but for a whole turkey, a lower temperature over a longer period will ensure the juiciest result. Whether you use a grill or cook inside, these grilled turkey tips will help create a memorable meal for your holiday. How to Make BBQ Turkey Tips? To prepare Grilled BBQ Turkey Tips, start by cutting turkey tenderloin into bite-sized pieces and placing them in a zipper seal bag. Add Italian dressing, lemon juice, or your favorite homemade vinaigrette—even a bottled dressing works well. Marinate the turkey overnight for the best flavor. Before grilling, pat the pieces dry with paper towels, lightly coat your grill pan with oil, and preheat the grill. Grill the turkey for a few minutes on each side, making sure to flip and brush with BBQ sauce as you go. Use an instant-read probe thermometer to check the internal temperature, aiming for 165 degrees F. Once cooked, transfer the grilled pieces to a platter, cover with foil, and let them rest in the residual heat. This ensures they stay tender and juicy. Serve with extra BBQ sauce for a delicious, crowd-pleasing dish. Ingredients Instructions TURKEY TENDERS Grill Before you begin, preheat the grill to high heat and clean the grates well. Brush a light coat of oil on them to prevent sticking. Place the turkey tenders on the grill, close the grill cover, and cook for about 6-7 minutes. Turn the turkey tenders over, close the grill cover again, and cook for another 6-7 minutes until the internal temperature of the thickest part of the tender reaches 165°F. Remove the meat from the grill, cover, and let it rest for 5-10 minutes before serving. ALWAYS COOK to an INTERNAL TEMPERATURE of 165°F, as MEASURED with a THERMOMETER. Air Fryer For the air fryer method, preheat the air fryer to 400ºF for 3-5 minutes. Arrange the turkey tenders in the air fryer basket in a single layer, leaving space between the pieces. Cook at 400ºF for 6-8 minutes, then turn the tenders over and continue cooking for another 6-8 minutes until the internal temperature of the thickest part reaches 165°F. Remove the meat from the air fryer basket, cover, and let it rest for 5-10 minutes before serving. Oven To bake turkey tenders in the oven, preheat the oven to 400°F. Coat an oven-safe pan with cooking spray and place the turkey tenders in the prepared pan. Bake for 15-20 minutes until the internal temperature of the thickest part of the tender reaches 165°F. Remove the meat from the pan, cover, and let it rest for 5-10 minutes before serving. As an alternative, you can preheat the oven to 350°F and bake for 25-30 minutes while ensuring the internal temperature reaches 165°F. ALWAYS COOK to an INTERNAL TEMPERATURE of 165°F, as MEASURED with a THERMOMETER. Stove Top For the stovetop method, lightly coat the bottom of a large skillet with cooking oil and set it over medium-high heat until the oil starts to simmer. Add the turkey tenders to the skillet, ensuring not to overcrowd the pan. Cook for 4-5 minutes on one side, then turn and cook for another 4-5 minutes until the internal temperature of the thickest part reaches 165°F. Remove the meat from the pan, cover, and let it rest for 5-10 minutes before serving. ALWAYS COOK to an INTERNAL TEMPERATURE of 165°F, as MEASURED with a THERMOMETER. How to Cook Turkey Tenderloin What kind of BBQ Sauce should I use on Turkey Tips? Recipe, Store-bought, Homemade BBQ Sauces When grilling turkey tips, the choice between store-bought and homemade BBQ sauces can greatly influence the flavor and enjoyment of your meal. For a rich and uniquely tailored taste, a homemade BBQ sauce is unbeatable. Consider crafting a Bourbon Barbecue Sauce for a smoky kick, or a Guinness Barbecue Sauce for a deeper, malt-infused profile. If you’re in the mood for something tangy and slightly sweet, a Cranberry Barbecue Sauce works wonders, especially during the festive seasons. For those who appreciate a classic, Mozelle’s Barbecue Sauce is a must-try. These homemade options allow for customization in terms of spice levels and sweetness, ensuring your turkey tips are nothing short of spectacular. Nutrition Facts People also ask How long does it take to grill turkey tips? To achieve perfectly grilled turkey tips, start by heating your grill to medium-high heat. Place the turkey strips on a greased part of the grill. Grill them for about 10 minutes, making sure to turn them once or twice. They are done when they are no longer pink inside. It’s best to enjoy these succulent pieces right away, or you can let them cool, cover, and refrigerate for a few days for later enjoyment. What is the internal temperature of a turkey tip? For safety and the best culinary results, ensure that the turkey tips reach a safe minimum internal temperature of 165°F (74°C) as measured by a food thermometer. This internal temperature ensures that the poultry is cooked thoroughly and safe to eat. At what temperature is turkey grilled? Properly grilling turkey involves monitoring its internal temperature closely. Use a meat thermometer to ensure the turkey reaches 165°F in the thigh and 160°F in the breast. The cooking time can vary, especially for larger turkeys, which may take several hours on the grill. After grilling,
Sizzle & Savor: Tilefish Grilling Secrets – Discover How!
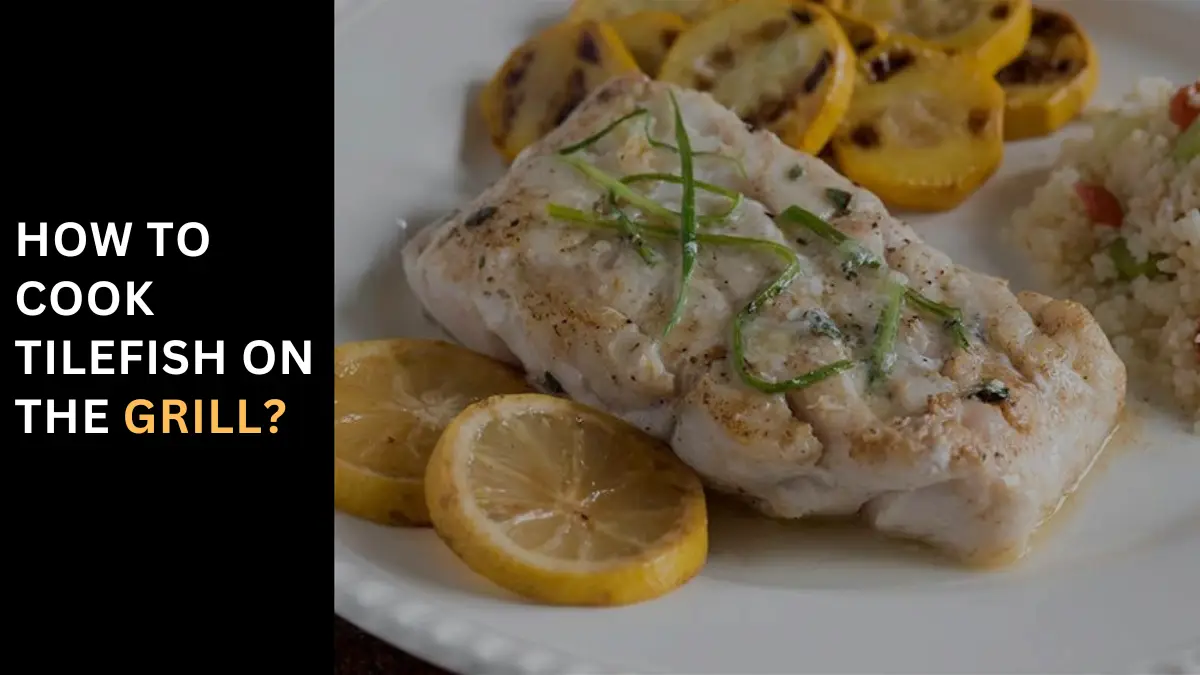
How to Cook Tilefish on the Grill? Citrus Grilled Golden Tilefish with Coconut Lime Compound Butter When Peter Jarvis, a renowned seafood purveyor from Triar Seafood in Hollywood, FL, advises on grilling the Golden Tilefish, he emphasizes the importance of season and sustainability. As recognized by the Fish Wildlife Service in Florida, this sweet, meaty white fish embodies a sweet flavor derived from its natural diet of crustaceans, offering a texture akin to grouper. Jarvis, known for supplying top chefs and white-tablecloth restaurants, including those run by celebrated chefs like Rick Bayless and venues like the James Beard House, recommends a unique grilling approach that leverages the essence of citrus to elevate the fish’s natural flavors. About Golden Tilefish Originating from the Atlantic, particularly the waters around Florida, Golden Tilefish is a charismatic choice for any grilling enthusiast. As supported by suppliers like Francesca’s Favorites and Triar Seafood, who can ship fresh seafood from shore to door in 24 hours across the US, this fish is perfect for those who value both flavor and texture. A preferred method by Peter, often shared in culinary circles from Boston to Charleston, involves placing lemon slices directly on the grill as a barrier, allowing the citrus smoke to permeate the fish, infusing it with a brilliant zesty aroma. This method, popularized through platforms like PatioDaddioBBQ.com and Buzzfeed, has turned many into devout converts of this grilled, citrus-infused recipe, often paired with a side of coleslaw for a refreshing touch. Ingredients Instructions What is Tilefish? Tilefish, a Treasure of the Deep Tilefish are a fascinating species from the family Malacanthidae, known for their distinctive appearance which includes a flattened body and a scale pattern that resembles tiles. These fish can grow to impressive sizes, often reaching several feet in length, and are found in the warm waters of the Atlantic Ocean, from the rocky and sandy ocean floor of the offshore areas of the Gulf of Mexico to the Caribbean Sea. They dwell at depths ranging from a hundred to over a thousand feet below the surface, where they display a variety of coloration that helps them blend into their surroundings, including shades of yellow, brown, gray, and blue, adorned with striking patterns and markings on their bodies. In the culinary world, tilefish are prized for their firm, flaky flesh which offers a delicate flavor that many describe as sweet and succulent. This makes them a favorite among seafood enthusiasts for grilling, broiling, baking, and pan-frying. Each meal prepared with tilefish promises a delightful experience, although it’s important to consider local advisories and guidelines regarding mercury levels and set consumption limits to ensure the safe enjoyment of this seafood, especially for pregnant women, nursing mothers, and young children. Tilefish Consumption: A Culinary Exploration Tilefish, known scientifically as Lopholatilus chamaeleonticeps for the Golden Tilefish and Caulolatilus microps for the Blueline Tilefish, is a culinary delight celebrated for its delectable taste and unique texture. Its firm, flaky flesh and delicate flavor make it a popular choice among seafood enthusiasts and a staple in many seafood restaurants. The versatility of tilefish in culinary preparations allows it to be the perfect main dish, whether grilled, broiled, baked, or pan-fried. Each method enhances its natural flavors, which are mild yet distinctive, making it ideal for various flavor profiles and seasoning combinations. Tilefish is not just limited to traditional plates; it excels in recipes such as fish tacos, fish sandwiches, seafood stews, and fish curries. Moreover, the Sand Tilefish, Malacanthus plumieri, found in sandy areas, also offers a mild taste and firm texture, advocating for sustainable fishing practices to ensure species protection and healthy fish populations. How is Tilefish Prepared? Nutrient Content of Tilefish Sustainability considerations 11 Delicious Tilefish Recipes Grilled Tilefish Coat tilefish fillets with olive oil, and season with salt, pepper, and your choice of herbs. Grill the fillets over medium-high heat, turning once, until cooked through, about 4-6 minutes per side. Serve with a squeeze of lemon and a side of grilled vegetables for a delightful meal. Baked Tilefish with Lemon and Garlic Place tilefish fillets in a baking dish. Drizzle with olive oil and lemon juice, then sprinkle with minced garlic, salt, and pepper. Bake in a preheated oven at 400°F (200°C) until the fish flakes easily with a fork, about 10-12 minutes. Tilefish Ceviche Cut tilefish into small pieces and marinate in lime juice with diced tomatoes, red onions, cilantro, and jalapeños. Let the flavors meld in the refrigerator for about 30 minutes. Serve as an appetizer with tortilla chips or as a topping on tostadas. Tilefish Tacos Grill or pan-sear tilefish fillets until they easily flake into small pieces. Warm some tortillas and divide the tilefish among them, adding toppings like shredded cabbage, avocado slices, and salsa. Serve with lime wedges for squeezing over the tacos. Tilefish Poached in Coconut Milk Simmer tilefish fillets in a mixture of coconut milk, ginger, garlic, and lime juice along with a selection of spices. Cook until the fish is opaque and cooked through. Serve this delicate dish over steamed rice, garnished with fresh cilantro for a touch of brightness. Tilefish Piccata Lightly coat tilefish fillets in flour seasoned with salt and pepper. Sauté the fillets in a skillet with butter until golden brown on both sides. Remove the fillets from the skillet, then deglaze the pan with lemon juice, capers, and chicken broth. Pour the sauce over the fillets and serve with a side of roasted potatoes or pasta for a classic meal. Tilefish with Mango Salsa Grill or pan-sear tilefish fillets and serve topped with fresh mango salsa. Combine diced mango, red onions, jalapeños, cilantro, and lime juice with a pinch of salt. Spoon the vibrant salsa over the cooked tilefish to infuse the meal with tropical flavors. Tilefish Curry Saute onions and garlic with curry paste in a large pot. Add coconut milk and vegetables, then bring to a simmer. Add the fish and cook until tender and the flavors are well melded. Serve
Turkey Burger Time – Master Pellet Grill Cooking
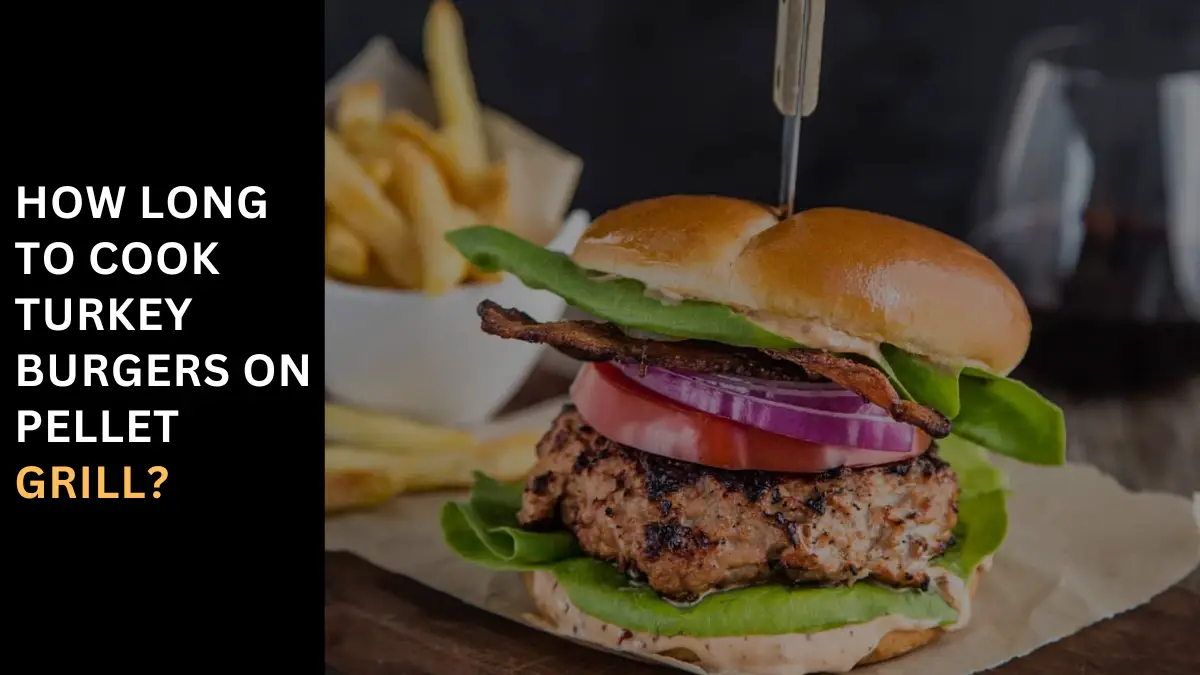
How Long to Cook Turkey Burgers on Pellet Grill? Smoked Turkey Burgers Turkey Burgers: A Healthy and Easy-to-Make Alternative Opting for smoked turkey burgers can be a delightful change from the usual beef offerings at your summer BBQ. These burgers are not only a healthy alternative, but they also bring a rich, smoky flavor that elevates them beyond the typical burger fare. The process is quite easy and the recipe can be a fun, filling main course at any picnic or BBQ. What makes these turkey burgers a top favorite is their versatility in toppings. From pickles and onions to ketchup, mustard, and cheese, you can customize them to taste just as you like. Crafting Smoked Turkey Burgers: An Impressive Recipe for All Smoking turkey burgers on a Traeger or any smoker during warm weather brings out an impressive flavor that even the most picky eaters will appreciate. This leaner option is not only delicious but also easy to make. Pair these burgers with your favorite sides for an unforgettable meal. Whether it’s a casual family gathering or a special event, smoked turkey burgers offer a unique taste experience that’s both healthy and easy to prepare. The recipe usually serves several, making it perfect for any occasion. Ingredients How To Make Smoked Burgers Recipe Variations and Substitutions for Turkey Burgers Mediterranean Twist Incorporate chopped Kalamata olives, feta cheese, and dried oregano into your ground turkey for a Greek-inspired flavor that brings a touch of the Mediterranean to your grill. Spicy Kick Add a spicy twist by mixing diced jalapeños and chipotle peppers into the turkey mixture. This version is perfect for those who love a little heat with their meal. Mushroom Lovers Sautéed mushrooms with garlic and thyme mixed into the turkey patties offer an earthy flavor that mushroom enthusiasts will appreciate. Asian Fusion Incorporate soy sauce, grated ginger, and chopped scallions into the turkey mixture for an Asian-inspired twist that’s both unique and flavorful. Cheese Lover’s Delight Place a slice of your favorite cheese—be it cheddar, Swiss, or pepper jack—on top of the burger during the last few minutes of smoking for a gooey, melty addition. Pesto Paradise Spread a spoonful of basil pesto on the burger bun for a burst of fresh flavor that complements the smoked turkey perfectly. Gluten-Free Option For those avoiding gluten, opt for gluten-free hamburger buns to enjoy these delicious burgers without compromise. Veggie Boost Add grated zucchini, carrots, and spinach to the turkey mixture to increase the moisture and nutritional value, making the meat go further and adding a healthy twist. BBQ Fusion Baste the burgers with barbecue sauce while grilling for a tangy, sweet flavor combination that’s irresistibly mouthwatering. Lettuce Wraps Serve your smoked turkey patties wrapped in large lettuce leaves instead of traditional buns for a low-carb option that’s light yet satisfying. Storage Tips SERVE and STORE After removing your smoked turkey burgers from the smoker, it’s essential to let the burgers rest for a few minutes before prepping your toppings. To keep these burgers fresh, they can be stored in the fridge for up to three days. FREEZE for Longevity For longer storage, properly seal the burgers in a freezer bag; they’ll remain fresh for up to two months when frozen. REHEAT with Ease To reheat your smoked turkey burgers, thaw them overnight in the fridge and then warm them in a skillet or microwave for best results. How long to cook turkey burgers on a grill pan? To perfectly cook turkey burgers on a grill pan, start by grating a shallot using a medium plane grater into a large bowl, capturing all the juice for added flavor. Add turkey, mayonnaise, steak sauce, and parsley, then mix gently with your hands until fully incorporated. Divide the mixture into four equal portions and form them into patties. Season the tops with garlic salt and pepper. Spray the skillet with cooking spray and set over medium-high heat. Once hot, place the burgers, seasoned sides down, and apply seasoning to the opposite sides. Allow them to cook until they are nicely browned, about 4 to 5 minutes per side. Flip them halfway through to ensure they are no longer pink in the middle. Get Kids Involved in Cooking Ages 2-3 Teach your littlest cooks the names of various small utensils and tools they can safely grab. Ages 4-5 At this age, kids often enjoy mixing seasonings in a small bowl and can help place the finished patties on burger buns and add toppings. Ages 6-8 This group can prepare and season patties. Older kids can also begin to check the temperature of the meat on the grill and observe the cooking process. Ages 9-11 Supervise as they prepare the recipe and show them how to use the grill or smoker. It’s helpful to read the recipe twice before beginning to ensure understanding. Ages 12+ Let them prepare the entire recipe unsupervised, but stay in the corner ready to jump in if needed and do a happy dance when they succeed. Budget Tips for Making Turkey Burgers When making turkey burgers, buying ground turkey in bulk can significantly save money as larger quantities are often cheaper per pound. Always look for sales and deals at your local grocery store and stock up. For seasoning, rely on pantry staples instead of purchasing expensive seasoning blends to flavor your burgers effectively. If there are leftovers, don’t hesitate to freeze the leftover turkey burgers for a quick and easy meal on a short notice or tight budget. Additionally, adding grated vegetables like zucchini and carrots to the turkey burger mixture can stretch the meat further, adding extra nutrition to your meal without breaking the bank. Conclusion: Cooking turkey burgers on a pellet grill involves preheating the grill to a steady 350°F and grilling the burgers directly over medium heat. By keeping the lid closed as much as possible and flipping the burgers halfway through, you can ensure they cook evenly, typically requiring about 15-20 minutes to