

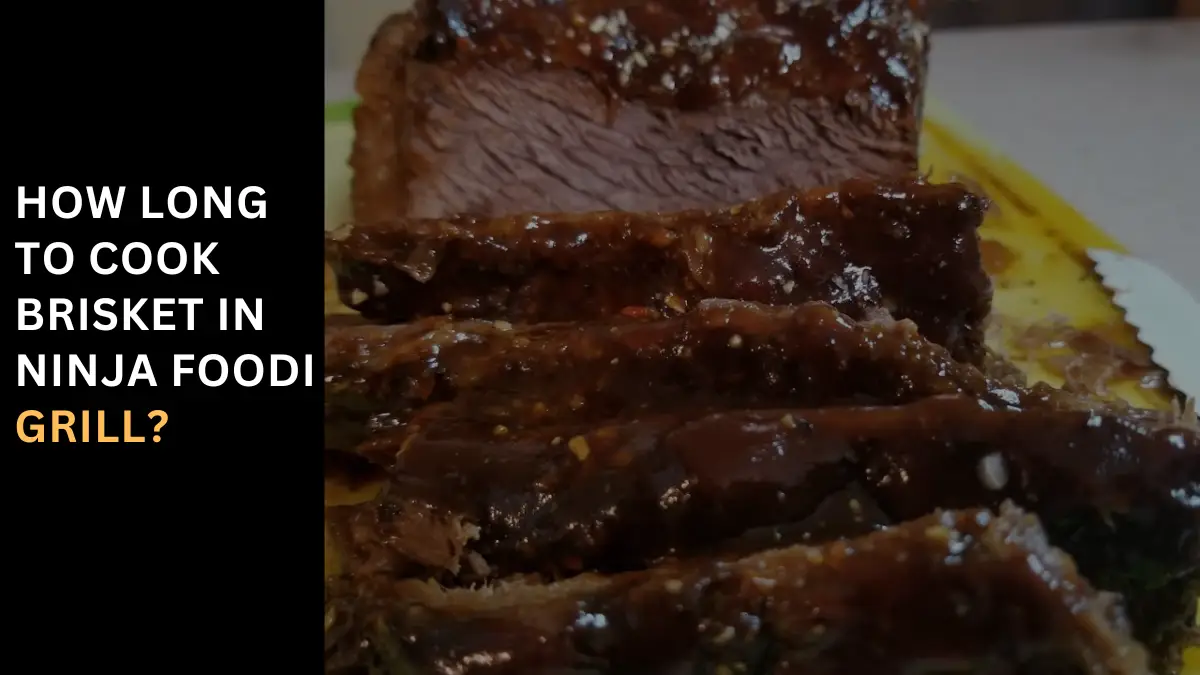
How Long to Cook Brisket in Ninja Foodi Grill? Ninja Foodi Brisket What type of brisket should you use for Ninja Foodi Brisket? When choosing a brisket for your Ninja Foodi, keep in mind that you’ll want a trimmed piece that will comfortably fit in the cooker. Typically, a flat cut brisket, known for its full flavor and nice, moist texture, is ideal. It works great for a variety of meals, from sandwiches that can be easily shredded, chopped, or sliced. My last purchase was a 4-pounder, which was just the right size. Tips for Making Ninja Foodi Brisket To achieve that desirable crust on your brisket, brush and coat the pot of your Ninja Foodi before you start. Using the saute function, sear the brisket until it turns a rich brown—avoiding any gray areas which indicate under-searing. Transitioning to the pressure cooker function, add either water or broth for moisture, followed by your choice of sauce. Securely place the lid, set it to seal, and pressure cook according to your recipe. It’s crucial to let it naturally release to enhance the flavor and give the meat ample rest. Once cooked, chop or shred it using a food processor if you prefer it coarsely chopped. Ingredients and Instructions for Ninja Foodi Brisket Ingredients Instructions Notes on Cooking Beef Brisket in the Ninja Foodi Choosing the right cut for your brisket—flat cut or point cut—is essential, as it affects both the texture and taste of the finished dish. The flat cut is generally leaner, making it perfect for slicing, while the point cut, with more fat marbling, offers a juicier bite. It’s crucial to consider these attributes when deciding whether to shred or chop your brisket post-cooking. The trimmed brisket typically cooks faster and more evenly, providing a more consistent texture that is neither too tough nor too soft. When pressure cooked in the Ninja Foodi, brisket achieves a tender texture in a fraction of the time it would take to smoke, making it an excellent option for those seeking to reduce cooking times without sacrificing flavor. Ninja Foodi Beef Brisket The Ninja Foodi transforms beef brisket into a succulent main course that’s ideal for celebrating Father’s Day weekend or any other occasion. This versatile appliance allows you to bypass the traditional smoker, cooking the brisket rapidly with its pressure cooker function. The result is a tender beef brisket with a crispy outside and a juicy center, seasoned to perfection and cooked in mere minutes compared to traditional methods. The Ninja Foodi ensures that your brisket is not only quick to prepare but also rich in flavor, providing a smoked brisket taste and texture without the need for a smoker. How to Pressure Cook a Beef Brisket in the Ninja Foodi? Preparing the Beef Brisket for the Ninja Foodi This step-by-step method ensures your brisket is cooked perfectly with minimal monitoring, utilizing the Ninja Foodi’s efficient pressure cooking capabilities to deliver tender and flavorful meat every time. Tips for Pressure Cooking a Beef Brisket in the Ninja Foodi Are Point or Flat Cut Briskets Best? When pressure cooking in the Ninja Foodi, selecting between a point cut or flat cut brisket can significantly affect your dish’s outcome. The flat cut is typically leaner and more uniform, ideal for those who prefer their brisket in neat slices for serving. In contrast, the point cut, with its extra fat and marbling, yields a juicier and more flavorful brisket, perfect for more decadent meals. What Should I Serve with Beef Brisket? A well-prepared brisket, whether served with mashed potatoes, air-fried vegetables, or made into hearty brisket sandwiches accompanied by seasoned french fries, can elevate any meal into a feast. This versatility makes brisket an excellent choice for various dining occasions. Tips for Pressure Cooking a Beef Brisket To ensure your brisket remains moist and delicious during pressure cooking, start by placing the brisket with the fat side up in your Ninja Foodi. This position helps the fat render slowly, naturally basting the meat while it cooks. Add a mix of water or beef broth to the pot to enhance the flavor, and consider sprinkling rosemary, black pepper, and paprika for an extra flavor boost. After cooking, trim any excess fat before serving to balance the richness of the dish. Should I Shred or Slice Beef Brisket? Deciding whether to slice or shred your beef brisket often comes down to personal preference and the intended use of the meat. Slicing the brisket into thin, uniform pieces against the grain is ideal for standalone dishes or neatly stacked sandwiches. On the other hand, shredding—pulling the meat apart into smaller, stringy pieces—is perfect for more casual dishes like barbecue sandwiches or tacos. Both methods enhance the taste and needs of your specific dish, allowing you to tailor your brisket to the occasion. How Do You Store Leftover Beef Brisket? To keep leftover beef brisket tasting fresh, store it in an airtight container in the refrigerator for 3-4 days. When ready to reheat, place the brisket in a pan, cover it lightly, and warm it gently in its own juices to maintain its moisture and flavor, ensuring it remains delicious until the very last serving. Conclusion: In summary, cooking brisket in the Ninja Foodi Grill requires a careful balance of time and temperature to achieve tender, flavorful results. Typically, a brisket should be cooked low and slow, around 250°F, for approximately 60-75 minutes per pound, ensuring the internal temperature reaches 195°F for optimal tenderness. By utilizing the grill’s pressure cooking and air crisping features, you can significantly reduce cooking time while still achieving that perfect, smoky brisket finish. Adjust timing based on the size and thickness of your brisket, and always allow for a proper rest period before slicing. People also ask How Long to Cook Brisket on Ninja Grill? For those using the Ninja grill, cooking brisket requires setting the dial to SMOKER mode, adjusting the temperature to 250°F, and timing it for approximately 5 hours.
Grill the Best Boudin – Tips for Pellet Perfection
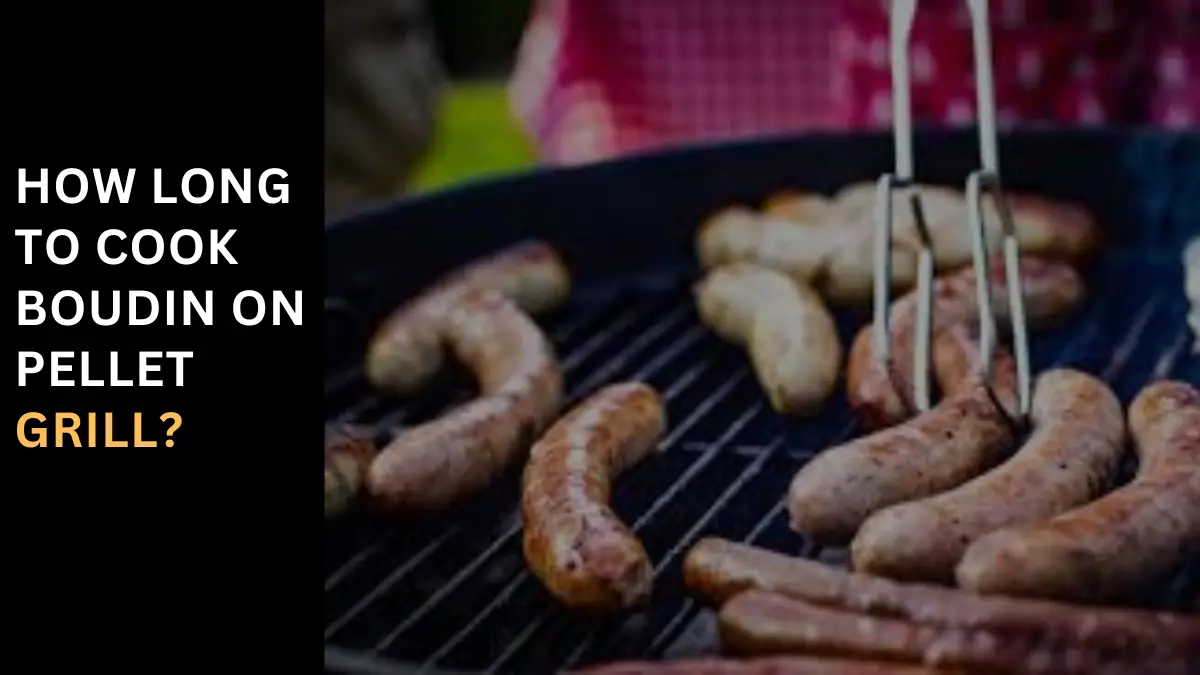
How Long to Cook Boudin on Pellet Grill? Smoked Boudin Cooking Smoked Boudin on a pellet grill is a culinary adventure that combines traditional flavors with a modern twist. If you’re experimenting with new meats and products, this smoked boudin recipe is perfect for you. I often share this dish because smoking Cajun boudin adds an incredible dimension to the smoke flavor, elevating it beyond the typical boiled or pan-seared methods. For the best results, I recommend purchasing your boudin from a locally supported vendor, or you can order it directly if you can’t find it in grocery stores like Walmart. Many meat sections carry boudin near the ribs or pork sausage. To begin, start by brushing the boudin with EVOO (extra virgin olive oil) and sprinkle it with your favorite rub. Place it on the grate of your smoker preheated to 225 degrees F, then close the lid and let the smoke slowly infuse the meats with rich flavor. Once the boudin is fully heated, it can be removed from the smoker and served in a variety of ways—whether eating it on crackers, making a Louisiana boudin burger, or simply enjoying it with banana skin for a more unique twist. The smoked boudin pairs well with ribs, making it a versatile dish for any occasion. Don’t forget that by choosing locally supported products, you’re helping sell the idea that quality smoked boudin is not just delicious but also supports the community—something that pays the bills for small vendors who rely on these donations to keep their businesses thriving. Whether you find smoked boudin in Tulsa or elsewhere, the effort you put into smoking and preparing it will be well worth it. Smoked Boudin Burger Recipe Ingredients: Steps: How Long to Cook Boudin on Pellet Grill? Steps: Competition BBQ Secrets Revealed – Ordering Info For those looking to master the art of BBQ, the Competition BBQ Secrets from 2008 is a must-have resource. This e-book is packed with rub and sauce recipes that have been engineered over the years through countless experiments. These recipes have been tested on everything from back ribs to brisket, sausage, and tritip, creating a savory symphony that dances on your tongue. The rub recipe alone has garnered rave testimonies from friends, family, and BBQ enthusiasts who swear by its magic. With emails and requests pouring in, it’s clear that these secrets are in high demand. You can order the e-book directly from the website, where you’ll find the price and easy payment options that help pay the bills. Whether you’re a seasoned pitmaster or just starting, these rub/sauce recipes are your gateway to BBQ greatness. Plus, storing these treasures in a Ziploc bag keeps them fresh for when you’re ready to impress your kids or wow a crowd. Don’t miss out on the chance to own a course that has been featured in books, magazines, and has become a staple for BBQ lovers everywhere. What is Boudin Sausage? Boudin sausage is a staple of Cajun cuisine, originating from South Louisiana and renowned for its unique combination of pork, rice, and spice. This Cajun sausage is typically made with dirty rice and seasoned with a blend of spicy and mild flavors, often featuring cayenne pepper as a key ingredient. Encased in a sausage casing, boudin can be found in many forms, whether at a gas station, grocery store, or in the heart of Cajun country. It’s commonly served as links, boudin balls, or even as smoked boudin, providing a rich, traditional Cajun sausage experience. When you cook boudin, whether boiled, grilled, or smoked, its flavor is a true reflection of Cajun heritage and culinary tradition. What to Serve with Boudin? When enjoying Boudin sausages, there are a variety of dishes that complement this flavorful Cajun delicacy. In restaurants across New Orleans, boudin is often served with gumbo or jambalaya for a hearty meal. For a more casual option, many people eat boudin with saltine crackers, particularly at breakfast alongside eggs, grits, and a few coffee refills to wash down the rich flavors. How to Cook Boudin – Boiled Method? To cook boudin using the boiling method, start by placing the sausages in a pot and cover them with water. Bring the water to a medium-high heat and allow it to simmer gently, being careful not to let the casing burst. Use an instant-read thermometer to check that the internal temperature reaches 160 F. Once cooked, remove the links with a slotted spoon and place them on a plate lined with paper towels to cool to room temperature before serving. The skin may be tough, but you can easily squeeze the stuffing out with each bite for a satisfying experience. How to Cook Boudin – Pan-Frying Method? For a crispy casing on your boudin, use a cast iron skillet and heat some oil over medium heat. Place the links in the skillet, turning them occasionally to achieve a golden brown color. Once done, remove the boudin and place them on paper towels to drain any excess grease. How to Cook Boudin – Roasted Method? Roasting is an easy and quick cooking method that results in a crispy exterior, making your boudin sausages delicious. Preheat your oven to 375 F and prepare a baking sheet with parchment paper, aluminum foil, or a silicone mat. Lightly coat the boudin with olive oil and arrange the links in a single layer with enough space between them. Bake for 20-25 minutes, turning them after 10 minutes for even cooking. How to Cook Boudin – Grilled Method? Grilling boudin is a great way to infuse it with a smoky flavor while achieving a crispy skin. Preheat your grill to medium heat (around 400-425F), and lightly grease the grill grates with butter or olive oil. Place the links evenly spaced on the grill, close the lid, and cook for about 10 minutes, flipping them halfway through. Use an instant-read meat thermometer to ensure the internal temperature reaches 170F. Once done, transfer the

How to Clean Ash Out of Charcoal Grill – DIY Cleanup
How to clean ash out of charcoal Grill? Things to Remember A properly cleaned charcoal grill is essential to avoid problems like burnt meat, stuck sauces, and spices that can discolor and make your grill tough to clean. Avoiding improper cleaning ensures a successful cooking session every time. Scrubbing your grill with the right tips and tools is the key to success. Clean Shortly After Cooking For a deeper clean, it’s best not to wait too long after cooking. Once cooled down, scrub the grill and start the de-ashing process. Utilizing tools like a grill basket or a Kick Ash Can can minimize the hassle, especially during tailgating or any game action. Cleaning your grill shortly after use can save you from a ruined sporting event and ensure the longevity of your grill for a long-running dynasty at your sports tailgate. This practice not only benefits your grill’s position in the long term but also makes it ready for the next cookout with minimal effort. Cleaning a Charcoal Grill Step by Step Cleaning a charcoal grill can seem daunting, but with the right tools and tips, it becomes an easy task that ensures your grill is always ready for the next barbecue session. Start by removing the grates and the basket to gain better leverage and access to all angles. A Kick Ash Basket simplifies this step, making it easy to dispose of ashes and clean the grill. Use an aluminum foil ball to scrub away debris from the grates; this method is effective and gentle, preventing damage to the grill. For tougher spots, a putty knife can be used to scrape off the black stuff that accumulates at the bottom and the top, including flakes of grease and cooked-on nasty food. For cleaning the grill’s bottom, an inverse plastic bag technique can be handy to reach all spots without getting your hands dirty. Wiping away the dirt and debris with soapy water will clean the outside and lid of the grill, restoring its shine and hygiene. Use a brush for finer pieces of debris and scrub the grates thoroughly with tools designed for grill cleaning, such as brushes and aluminum foil balls, to maintain the cleanliness of your cooking surface. Empty the Ashes Emptying the ashes is a critical step in maintaining your charcoal grill. Placing an ash can or a 4-gallon steel bucket under the grill makes it easy to collect and dispose of ashes. Ashes can be dumped on alkaline soils or around plants as they benefit from the alkaline nature of ashes. For those who grill frequently, wrapping the ashes in foil before disposal can minimize mess and is a tip every serious griller should know. Cleaning the Ceramic Cleaning the ceramic part of a grill involves a simple yet effective technique. Running the grill at high temperatures for about 15 minutes can burn off most of the gunk and grease from briskets, and other food leftovers, mimicking a self-cleaning oven. This process not only restores the bright white color of the ceramic but also seals the metal bands that hold the lid and base together, ensuring the longevity and efficiency of your grill. This segment of cleaning offers tricks that are particularly interested in maintaining a ceramic grill in top condition. Simple Grill Cleaning After Each Use Cleaning your grill after each use is not just about maintaining its aesthetic; it’s about safeguarding the quality of your cooking experience. From my own experience, using a high-quality brush or a wood scraper, especially one made from Juniper, has been the safest solution to remove stuck-on food and debris without the risk of metal bristles getting welded to the grate or worse, ending up in the food we consume. These scrubbing tools, when applied vigorously but carefully on a grill that is warm but not hot, can quickly clean the grates and basket, preventing deeper build-up. It’s a mistake to be tempted by the cheapest equipment on the market; spending a bit more on a higher-quality tool can make the effort last longer and prevent the need for deep cleaning sessions. This routine also minimizes downtime and ensures that your next grilling session begins on the right note, emphasizing the importance of cleaning before you cook. Deep Cleaning of a Charcoal Grill Deep cleaning a charcoal grill is a time-honored technique that dates back to the oldest methods of cooking food over an open fire. Throughout the year, buildups of carbon, ash, and rust can create not just an aesthetic issue but a gross safety hazard. As human beings, we’ve learned that keeping our tools of fire and cooking in prime condition is essential for safety and efficiency. A thorough clean, targeting every single nook and cranny, revitalizes the grill, ensuring it’s ready for another grilling year without the dangers associated with neglect. Drawing upon personal experience, this deep clean is not just a chore but a ritual that pays homage to the oldest cooking technique known to us, ensuring the charcoal grill remains a source of joy and quality meals. Conclusion: Cleaning ash out of a charcoal grill is a crucial step in maintaining the longevity and performance of your grill. By regularly removing ash and residual charcoal, you ensure optimal airflow and prevent food from sticking to the grate, thus enhancing your grilling experience. Utilizing tools like a standard paintbrush for sweeping ash or allowing coals to cool completely before disposal can make the process efficient and safe. Additionally, adopting proper cleaning techniques, such as using aluminum foil for scrubbing and a soapy water solution for a deeper clean, contributes to a well-maintained grill ready for your next barbecue session. Remember, keeping your grill clean not only facilitates better cooking conditions but also extends the life of your grill, making it a worthy effort after each use. FAQ How do you get charcoal ash out of a grill? To get charcoal ash out of a grill, a simple yet effective method involves the use
Transform Electric Grill to Charcoal – Taste Revolution
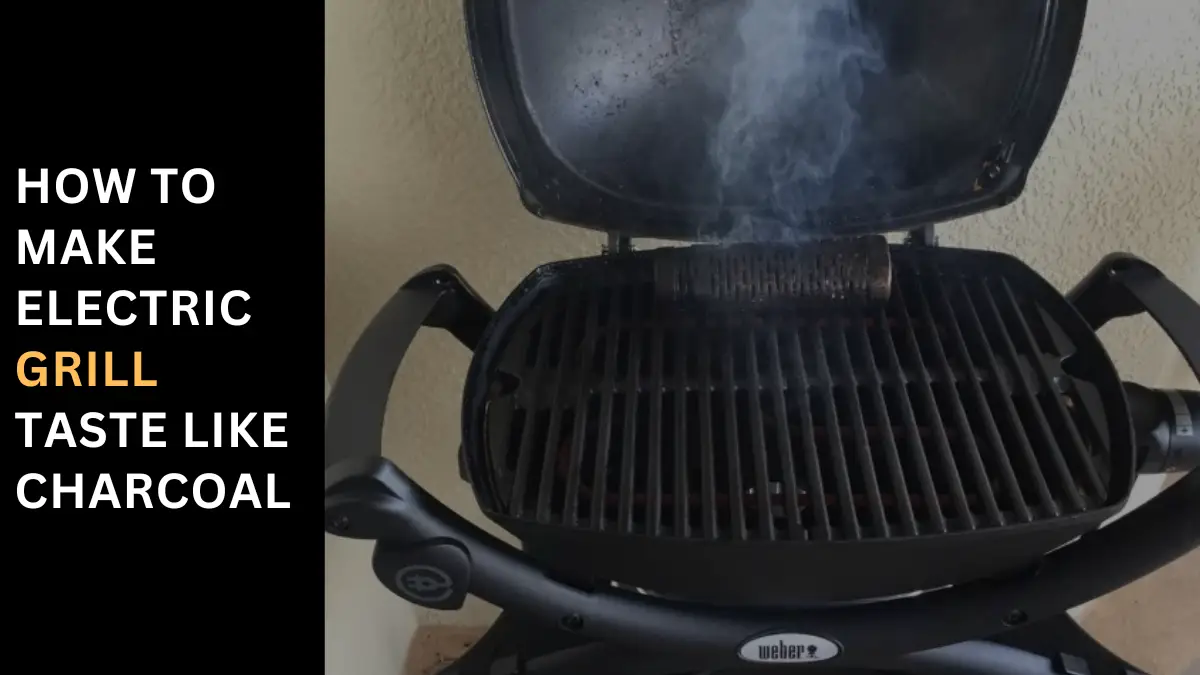
How to Make Electric Grill Taste Like Charcoal? Craving Charcoal Flavor? Here’s How to Achieve it on Your Electric Grill! In the heart of summer, the warmth of a weekend barbecue beckons, but what if you’re working with an electric grill and still crave that juicy, steak that bursts with flavors only a charcoal grill seems to provide? Fear not, as this seasoned chef and weekend griller is here to dive into a guide filled with magic, revealing how to elevate your culinary journey by infusing the essence of charcoal into your meals without the actual coals. By strategically using smoke-flavored wood chips or a smoker box, you can mimic those sizzle and smoke-infused flavors, making it seem impossible to tell the difference. This technique ensures your electric grill produces meals that are as seasoned and flavorful as any traditional charcoal barbecue, turning every grill session into an elevated culinary experience. How to Get a Charcoal Flavor on an Electric Grill? Achieving that coveted charcoal flavor on an electric grill often seems daunting, but it’s entirely possible with the right methods. Many grilling enthusiasts are hesitant to swap their traditional grills for electric versions, fearing they won’t acquire the same smoky flavor in their food. However, this article looks at two methods that can apply the essential ingredient of smokiness to your electric grill meals, ensuring the best results. Use Wood or Charcoal Chips You might be wondering how to use charcoal or wood/charcoal chips to attain that deep, smoky flavor without the open flame. It’s simpler than you think. By incorporating small pieces of dry wood or charcoal chips, you can ignite a flavor journey. These chips, when burned, produce smoke—not with flames but through a smoldering process that imparts smokiness and aroma into your food. Shavings or scraps from trees like maple, hickory, alder, or cider are readily available from various brands and can be used within a smoker box or wrapped in aluminum foil for best results. This method doesn’t require the charcoal chips to be burnt to ashes but to be heated enough to produce smoke, adding that essential smoky flavor to whatever you’re grilling. By understanding and applying these approaches, achieving charcoal flavor with an electric grill becomes a common and straightforward part of your grilling repertoire, bringing the best results and smokiness to your food without the need for a traditional charcoal setup. Smoker Box A smoker box is a specifically designed small container meant to hold a few wood or charcoal chips. Its purpose is to let out smoke after the chips have been burnt, adding that sought-after smoky flavor to your food. To use it effectively on an electric grill, which works best with a lid to cover the top, you should first moisten the wood chips before placing them in the smoker box. This step increases the amount of smoke produced. Then, set your grill to a higher temperature to ensure the smoker box absorbs heat faster and produces smoke. Once the chips have ignited, reduce the temperatures to avoid burning your food. Additionally, it’s wise to have a spray bottle with some water at hand to put off any flames if the chips catch fire. Remember, more wood chips in the smoker box mean thicker smoke over a long period, ideal for smoking. If you’re grilling for an extended period, you can fill up the box with more chips as needed to maintain the smoke and flavor. Source The Perfect Ingredients for Smoky Flavor When it comes to infusing your grilled foods with that irresistible smoky flavor, whether you’re using gas or charcoal, the infusion of smoky scents can replicate and enhance the taste of grilled, smoked, or charred dishes. Having the right ingredients on hand is crucial. Smoking Ingredients Wood chips are your best friend for creating big grilling flavors, whether you’re working with a roasting pan and rack combo or a stovetop smoker. The type of wood chips you choose can make a difference in the taste, as they determine the flavor of the smoke and the strength with which the wood burns. Experiment with hickory chips for ham, bacon, or chicken, and try mesquite wood for steak, ribs, or brisket. Soak your wood chips in water for several hours before smoking to moderate the intensity of the smoke. Remember to open windows and turn on the exhaust fan to keep your house from smelling like a hickory-smoked venue for a week. This approach ensures that your grilled dishes are not just food but a culinary adventure, enhancing the dining experience with each smoky bite. Marinades and Rubs Prep is important to capture that outdoor flavor on an indoor grill. Liquid smoke adds vapors of smoking with a simple ingredient, enhancing meat or veggie protein. Include it in your marinade for foods like burgers and chops. Dry rubs are essential, with all-purpose options like Everything Dry Rub or Jamaican Jerk Dry Rub adding moisture and texture, making food harder to sear. Ingredients like smoked paprika bring a grilled essence to super-moist pulled ribs that fall off the bone. Some might prefer a wet rub. Finishing Sauces To add a just-grilled flavor at the finish, a great sauce recalls summers past. From traditional A-1 steak sauce to merlot-peppercorn sauce or chimichurri, finding the perfect finishing sauce elevates grilling. A finishing whiskey-pineapple glaze can be fantastic, painting your meat into a masterpiece and kicking up your indoor grilling a notch. WRAP WOOD CHIPS IN A THICK ALUMINUM FOIL For those preferring to use wood chips, soaking them in water before use is a common practice, but dry chips can also be effective. Place the chips on a thick, double-layer of aluminum foil, then wrap them securely, creating a packet. Use a toothpick to poke vents on the top side to let smoke come out. This method of wrapping allows for a controlled release of smoke when placed on the grill over high heat for about 10 minutes. USE LIQUID
Ribs Mastery on Flat Top Grill- Quick Guide
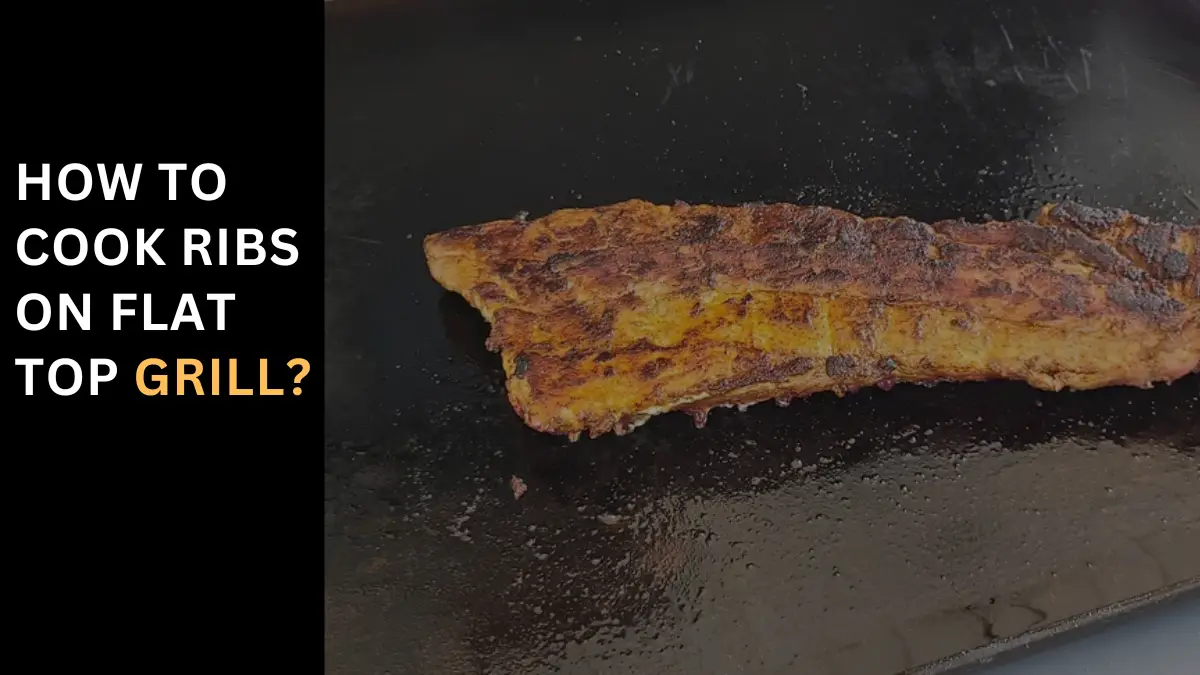
How to Cook Ribs on Flat Top Grill? As a seasoned grill master, I’ve found that cooking ribs on a flat-top grill not only challenges my grilling skills but elevates them to the next level. Initially, I was intimidated by the thought, fearing the process might compromise the tender, juicy goodness of the ribs. Yet, with a step-by-step guide and a few insider tips, I learned to walk through the cooking journey with confidence, achieving a mouthwatering meal that ensures a delicious and impressive outcome for family and friends. The flat-top grill offers a unique, flavorful twist to this classic barbecue dish, allowing for the perfect balance of smoky, caramelized goodness and succulent, fall-off-the-bone tenderness. Whether you’re a novice cook eager to impress or a seasoned master looking to expand your horizons, equipping yourself with the right techniques and knowledge will tackle this culinary challenge like a pro. So, fire up your grill, grab your favorite rack of ribs, and dive into the world of grilled perfection. How to Cook Ribs on a Flat-Top Grill? Whether you’re a beginner or an experienced griller, mastering the art of cooking ribs on a flat-top grill can transform your meat into a tender, juicy, and delicious feast with a smoky flavor that’s sure to impress your family and friends. This step-by-step guide is designed to make your ribs mouthwatering. Choosing the Right Ribs The journey to perfect ribs begins with choosing the right type of ribs. The selection is crucial; whether you opt for baby back ribs, which are smaller and leaner, making them a great choice for those who prefer a less fatty option, or spare ribs, known for their richer flavor. Due to more fat and connective tissue, ensuring your ribs are fresh and have a good amount of meat on them is vital. Preparing your ribs by removing the membrane on the bone side is a key step to help the flavors absorb and cook evenly. Simply use a knife to lift one corner of the membrane, then grab it with a paper towel and peel off for the best results. Preparing the Grill Preparing your grill is an essential step to properly prepare your flat-top grill for cooking. Clean the grill surface thoroughly to remove any residue from previous cookouts. Once clean, preheat the grill to medium-high heat to ensure the ribs cook evenly and develop a beautiful sear. While the grill is heating, prepare any additional seasonings or sauces you plan to use. A classic dry rub of salt, pepper, paprika, garlic powder, and brown sugar works well for ribs. Alternatively, you can opt for a marinade or homemade barbecue sauce to add extra flavor. Cooking the Ribs When it comes to cooking the ribs, place them bone-side down on the preheated flat-top grill. The direct heat will help render the fat and create a delicious crust on the meat. Allow the ribs to cook for about 5-7 minutes per side, or until they develop a beautiful caramelized color. Once seared, reduce the heat to medium-low and cover the grill with a lid or aluminum foil. This creates an indirect cooking environment, allowing the ribs to become tender slowly. Let the ribs cook for approximately 1.5 to 2 hours, or until the meat is fork-tender and easily pulls away from the bone. Serving and Enjoying Once the ribs are done, carefully remove them from the grill and let them rest for a few minutes. This resting period allows the juices to redistribute, ensuring the meat remains moist and flavorful. Cut the ribs into individual portions and serve them with your favorite sides, such as coleslaw, cornbread, or grilled vegetables. Now that you know how to cook ribs on a flat-top grill, you can confidently host a barbecue and impress your loved ones with your grilling skills. Just remember to choose the right ribs, prepare the grill properly, cook the ribs to perfection, and enjoy the mouthwatering results. What Does Liquid Smoke Do To Your Ribs? Ever since my mother-in-law introduced a bottle of liquid smoke into our family BBQ, the way we marry smoky flavor to our ribs has been transformed. She swore it was the secret to bringing that outdoor grill taste indoors, especially when air frying or cooking on a flat-top grill. Skeptical at first, my husband and I were amazed at how just a few drops could infuse the ribs with a great flavor that seemed to elevate the dish to a whole other level. It’s like having the same flavor you’d expect from traditional smoking methods, without spending hours tending to the grill. Whether you’re aiming for a subtle hint or a deep smokiness, liquid smoke is the way to go, making every bite remind you of a well-spent day around the fire. How To Store Leftover Ribs? After enjoying the rich, smoky goodness of your ribs, storing any leftover ribs properly is crucial for maintaining their flavor and safety. Let them cool to room temperature before tucking them into an airtight container; this keeps the great flavor intact and prevents any unwanted bacteria growth. Once sealed, place them in the refrigerator where they can be safely enjoyed for the next 3 to 4 days. This method ensures your ribs remain just as delicious as they were the day you cooked them, ready to be savored again with minimal effort. To Reheat Leftover Blackstone Ribs When it’s time to reheat those leftover Blackstone Ribs, choosing the right method is key to preserving their moisture and flavor. While the microwave might seem convenient, using either an air fryer or the Blackstone Griddle brings out the best in your ribs, especially if you brush them with a bit of BBQ sauce before heating. This helps heat the ribs evenly rejuvenates the smoky flavor and ensures the meat remains tender and juicy. Whether it’s a quick lunch or a part of your dinner feast, reheated ribs can taste as good as fresh off the grill with
Expert Secrets Revealed – How to Smoke Meat on a Gas Grill
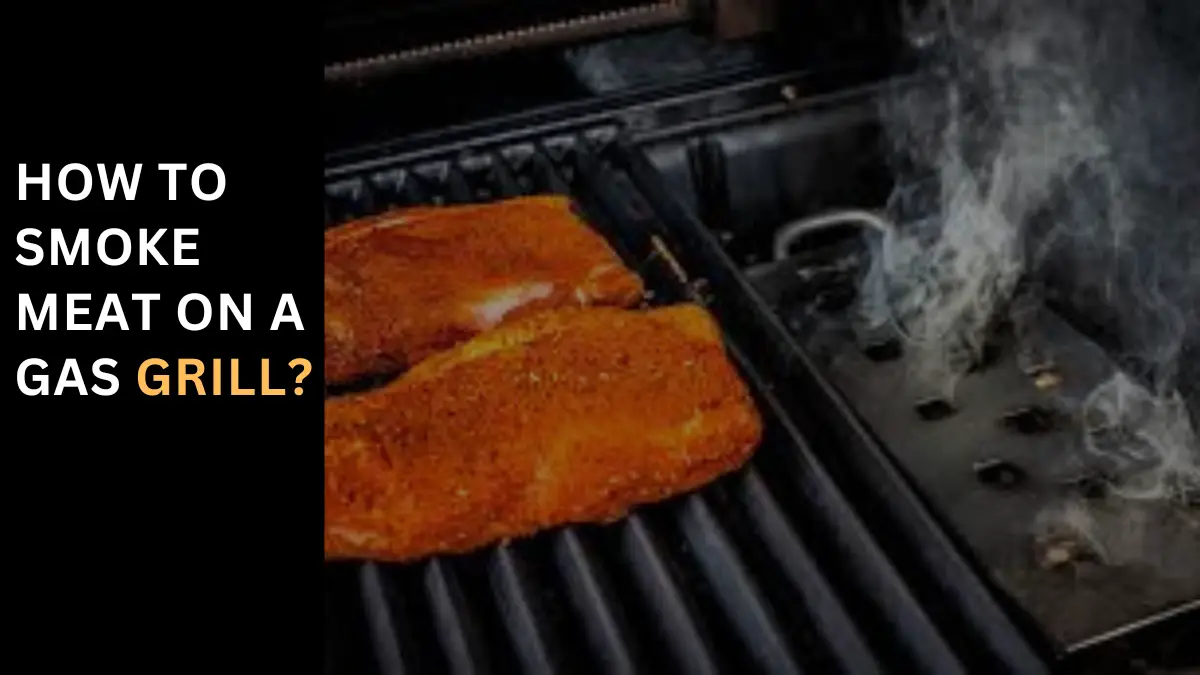
How to smoke meat on a gas grill? Can You Smoke Meat on a Gas Grill? You most definitely can smoke meat on a gas grill! You can smoke whatever food you want on a grill. If you only have a trusty gas grill on your patio, but you’re craving that delicious flavor of smoked meat, no fear! Whether you want to cold smoke or hot smoke something tasty, you can add some smoke to your gas grill to get the best of both worlds! How to Smoke on a Gas Grill: Grill Setup & Best Technique If you want to get into smoking foods, but only have a gas grill, fear not – you can still make it work. Is it easy to smoke on a gas grill? The short answer is yes, but if you plan to cook a lot of barbecue we recommend having a dedicated smoker. Gas grills are not designed to smoke meat. The gaps around the lid and burners allow heat and smoke to escape easily. While you can make a decent meal, it won’t be the same as food cooked on a smoker. However, if you have only a gas grill, don’t think that delicious barbecue is out of reach. Follow the steps in this article and you’ll be impressing family and friends in no time. Create a two-zone indirect heat setup Before we take you through the step-by-step instructions for smoking on a gas grill, let’s review some basics. The key to your smoking success (no matter what type of grill you’re using) is the ability to control your temperature for a long period. You’re not going to want your temperature to go above 300°F or expose your meat to direct flame. For a gas grill, that means preparing a two-zone indirect setup. The grill will have a “hot zone” and a “cool zone,” hence the name. To do this you will have at least one burner turned on providing heat while your food is cooking on the opposite side via the ambient temperature in the cooking chamber. In the example below the burner on the left is on, so heat and smoke are generated. The pork ribs are not exposed to any flame so they can slowly smoke and become tender without burning. A water pan is optional but serves two purposes: The water pan helps to keep temps inside of your grill stable by absorbing heat. Don’t worry it doesn’t steam your meat! Because it’s not hot enough to boil it acts more as a temperature regulator. Gas grill burner configuration for low and slow If you have a two-burner grill, obviously you can only have one burner on and the other off. If you have more burners, you have different options to get the right temperature. Here are some configurations you can try if you are using a four-burner grill: Setup 1 On Off Off Off Setup 2 On Off Off On Setup 3 On On Off Off The idea here is to experiment with the heat controls and the number of burners while measuring the ambient air temperature on the other side where your food will sit. Once you’ve found a configuration that can hold steady between 225 – 250°F you can go back to that setup repeatedly. It’s important to remember that there are other variables to consider. Your grill will act differently in the summer than it will in the winter, if it is windy outside, or even if it is raining. The bottom line, you do need to experiment with your grill and try different options before you can understand how to maintain your desired cooking temperature. Monitoring grill temperature The built-in thermometers on propane grills are ok in a pinch, but they’re not always as accurate as you need them to be, especially when you are smoking and want to keep the temperature nice and stable. It may surprise you to know that they are commonly off by as much as 100°F! That’s not very helpful when we’re trying to maintain a steady low temperature for barbecue. To make monitoring temps easier on yourself, we recommend using a quality digital thermometer like the Thermoworks Smoke. A dual probe unit like the Smoke allows you to measure the temperature of your meat and grill on the same device. If your thermometer has a probe clip, simply clip the probe on the grill grate close to the food so you know the actual temperature you’re cooking with. If you don’t have a probe clip, you can ball up some aluminum foil and place the probe through it, then place the ball on the grill grate. This way your probe doesn’t fall through the grate. How to make smoke on a propane grill? 1. Create smoke with a pellet tube 2. Make an aluminum foil pouch 3. Place hardwood chunks directly on the burner How to smoke on a gas grill: step-by-step instructions Step 1: Light your propane burner to medium heat Step 2: Add your wood Step 3: Get Smokin! Tips for smoking on a gas grill 1. Don’t over smoke 2. Use the right type of wood 3. Plan how much space you will need Final thoughts: Mastering the art of smoking meat on a gas grill adds an incredible layer of flavor to your barbecues, transforming ordinary meals into gourmet experiences. To ensure success, it’s essential to maintain a consistently low temperature and use the right wood chips for a subtle, smoky taste. Whether you’re preparing ribs, brisket, or chicken, the key lies in patience and precise temperature control. By following these tips, you can achieve that perfect, slow-cooked smokiness right in your backyard, making every cookout a hit with friends and family. People also ask What is Cold Smoking? Cold smoking is a great way to smoke a variety of foods when you don’t want to cook them. I use cold smoking for making smoked cheese, cold smoked salmon, smoked salt, and
Grill Master’s Guide – Crafting Perfect Deer Meat Every Time
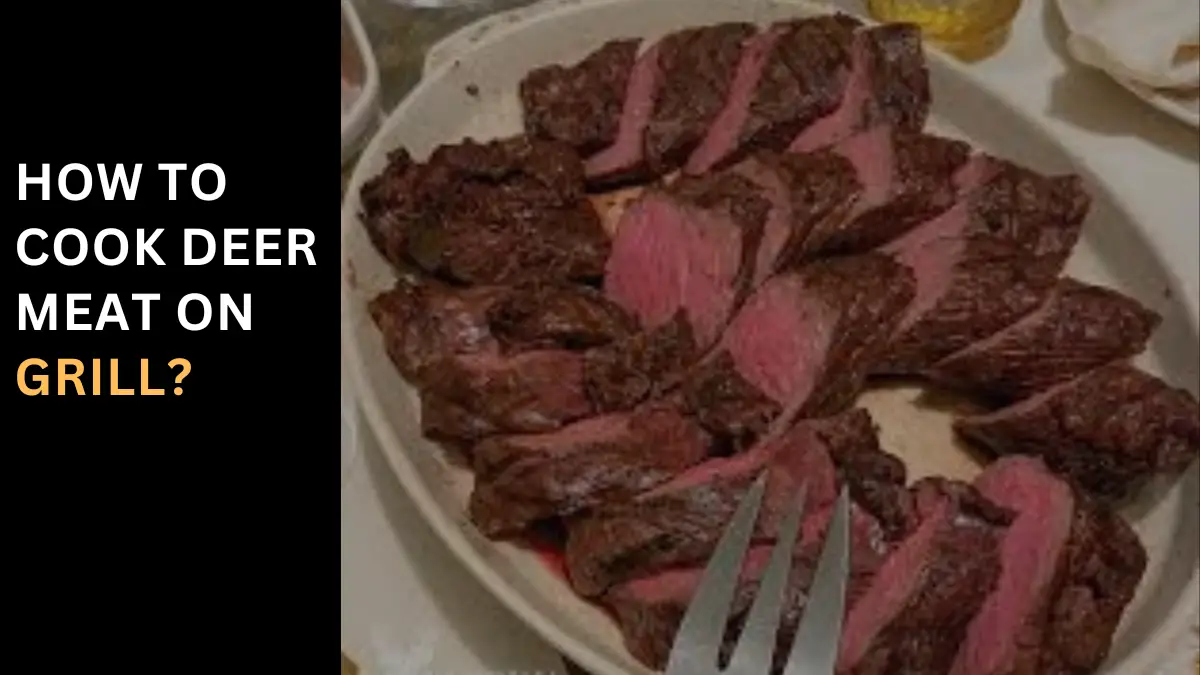
How to Cook Deer Meat on Grill? Grilling the Perfect Venison Cut When it comes to grilling deer meat, the cut you choose makes all the difference. Backstrap and tenderloin are prime choices for their tenderness and flavor. These special parts of the deer offer versatile options, whether you’re aiming for a classic steak or something more innovative like hamburger patties. The key to cooking these cuts right is understanding the mistake many make: overcooking. To avoid tough, dry meat, I keep a close eye on the grill, ensuring the heat is just right to seal in the juices without drying out the meat. My suggestions? Use a meat thermometer to monitor for the perfect medium-rare, and let the meat rest before serving to retain its succulence. These steps guarantee results that highlight the natural flavors of the venison, making each bite a memorable experience. Venison Neck: A Culinary Delight The venison neck might be someone else’s first choice, but for those in the know, it’s a hidden gem among cuts. This odd-shaped piece is packed with collagen and connective tissue, making it perfect for slow cooking. When treated with low heat and patience, the silver skin and fat melt away, transforming the tough texture into something as tender and flavorful. My favorite way to prepare it is by braising or making a pot roast, letting it simmer until it’s so tender it falls off the bone. The shredded meat then becomes incredibly versatile, ideal for dishes like tamales, tacos, burritos, enchiladas, stew, soup, sandwiches, and even as a topping for pizza or mixed into pasta sauces. Don’t overlook those bone-in pieces; they add a rich depth to stews and soups. Serving this with a side of creamy mashed potatoes turns any meal into a hearty feast. The venison neck proves that with the right approach, even the most underestimated cuts can become the star of your culinary repertoire. Cajun Smoked Venison Neck Recipe For a flavorful twist on a classic cut, this Cajun Smoked Venison Neck Recipe brings the deep, aromatic flavors of the South right to your table. Starting with a venison neck, bone-in for that extra depth of flavor, this dish is a symphony of smoky and spicy notes, balanced with the earthiness of vegetables and herbs. First, bring your meat to room temperature after removing it from the refrigerator, which ensures even cooking. Soak your wood chips—hickory or applewood adds a nice touch—and get your smoker ready. A surprising ingredient, vanilla extract, can be brushed lightly over the venison before smoking, adding a subtle sweetness that complements the smoke. Ingredients For the ingredients, you’ll need a deer neck (preferably bone-in for flavor), Vidalia onions, bell peppers, and celery for that classic Cajun mirepoix. Portobello mushrooms and garlic add earthiness, while green onions and a basil chiffonade bring freshness. The liquid base is a rich combination of beef stock, demi-glace, and a splash of red wine, deepening the layers of taste. Smoked kielbasa sausage introduces a hearty, meaty element, pairing beautifully with the venison. Seasoning is key: blackened steak seasoning and cayenne pepper offer heat, while Zatarain’s Pro Boil infuses the dish with the quintessential Cajun flavor profile. Slow-smoking the venison neck until it’s tender, then simmering it with these robust ingredients, results in a dish that’s complex, smoky, and utterly satisfying. Mastering Venison Neck with a Dry Rub and Slow Cooking For an unforgettable venison dish, start by mixing a dry rub with your chosen ingredients and thoroughly coat the venison neck. Wrap it in plastic wrap and let it marinate in the refrigerator for several hours or even overnight to infuse deeply. When it’s time to cook, transfer the venison to a smoker preheated to a gentle temperature, allowing the smoke to tenderize and flavor the meat. After smoking, move the venison to a cast iron pot in the oven preheated for braising. Add beef stock and red wine to the pot, along with onion, celery, bell peppers, and mushrooms for a rich base. Incorporate chunks of sausage for added depth and cook on the stovetop over medium-high heat. To thicken the sauce into a gravy, whisk in a flour slurry made from white flour and water until you reach the desired consistency. The meat should be tender enough to pull apart with a fork. Serve garnished with green onions and basil chiffonade for a burst of freshness. Crafting Tender Venison Ribs on the Grill Venison ribs offer a unique twist on traditional grilling. After removing the meat from rib bones, consider grinding the trimmings for use as filler meat in stew or chili. Ribs from larger deer might need sawing into manageable pieces. Like beef ribs, venison ribs can dry out if not cooked carefully. The key is to slow cook them, either covered in a smoker or submerged in liquid on a grill, to keep them tender. This method imbues the ribs with a smoky flavor and a rich color, making them a hearty choice for winter meals. Particularly with Nebraska deer, the fat renders beautifully, enhancing the taste without leaving a waxy texture on the tongue. Amazing Venison Ribs Recipe Introduction to Venison Ribs Dive into the world of slow-cooked venison ribs, a tender and delicious option that often goes unnoticed. Inspired by Steven Rinella of MeatEater, known for his expertise in hunting and wild game recipes, this cut of meat represents an underutilized treasure. Typically, these ribs might be ground down for sausage meat, but this recipe, drawing from The Barbecue Bible by Matt, showcases a different, flavorful preparation ideal for summertime grilling. Ingredients for the Perfect Rub The key to these ribs lies in the rub, a blend that includes a rack of ribs coated in paprika, ground black pepper, dark brown sugar, salt, celery salt, cayenne pepper, garlic powder, dry mustard, and ground cumin. This mix infuses the meat with a complex layer of flavors, balancing sweetness, heat, and savory notes. Step-by-Step Cooking Directions Begin by using a
Smoke Meat on a Charcoal Grill- Secrets to Delicious Results
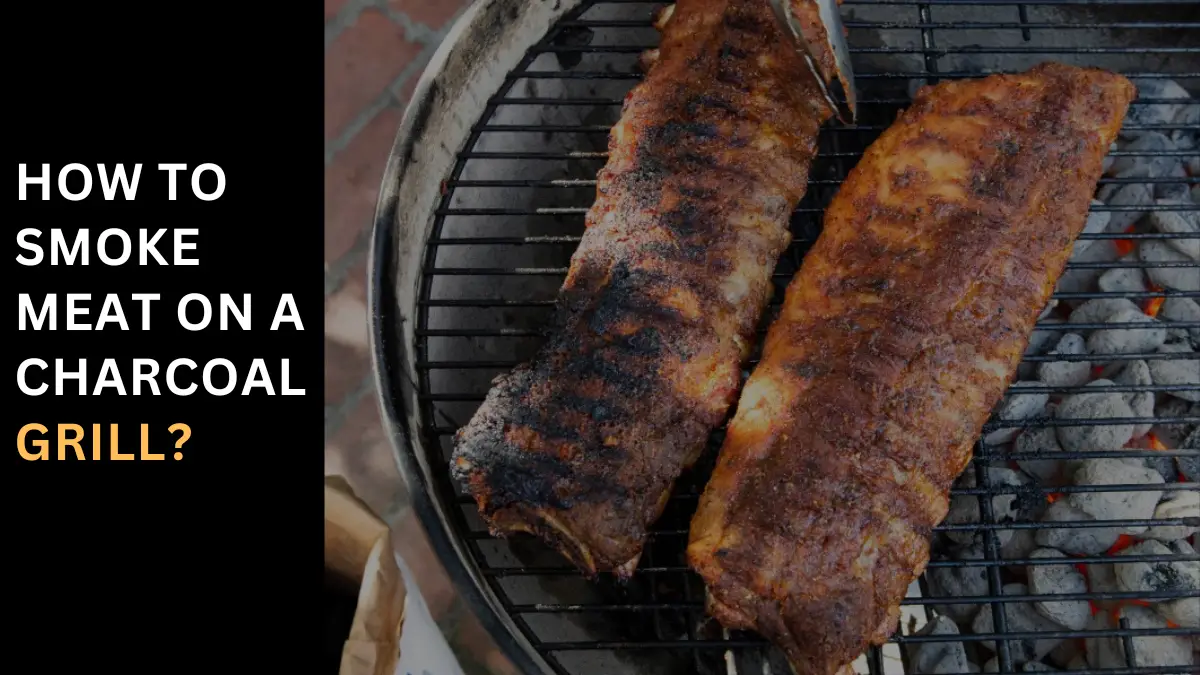
How to Smoke Meat on a Charcoal Grill? How to Smoke Foods on a Charcoal Grill Smoking meat on a charcoal grill combines the traditional essence of BBQ with the skillful technique of low-temperature cooking. By maintaining live coals and adding hardwood, you achieve a delicious, smoky taste without the need for a dedicated smoker. The key is mastering the standard kettle grill to create an indirect heat source, allowing the meat to be cooked slowly and imbued with flavor. This method transforms simple ingredients into a smoky delight, showcasing the art of BBQ smoking. Background in Barbecue Despite the allure of complicated and expensive equipment, I’ve found my Weber kettle meets all my smoking needs, offering the best smoke flavor. My journey reflects a never-ending pursuit of perfection, with each new smoker and recipe tweak. I believe in the power of experimentation, and my charcoal grill results have been nothing but awesome. What is Smoking Meat? Smoking meat involves using a grill to cook with indirect heat over a long period at a consistent, low temperature between 225º and 275º F. Wood, positioned near the hot coals, produces clean smoke that absorbs into the meat. A smoke session can last many hours, aiming for internal temperatures north of 200ºF. This process allows fat and collagen to break down, resulting in tender and flavorful smoked meat. Let’s get Started Easy Approach with Step By Step Guide Step 1: Preparing the Coals for Extended Smoking To begin smoking on your charcoal grill, the first step is to prepare the coals for a long, slow cook. This involves creating an environment for indirect cooking, which usually takes place over hours at low temperatures. Achieve this by arranging a combination of lit and unlit coals in indirect coal configurations. This setup allows for a fire to burn for a long period, essential for the smoking methods you’ll be employing. It’s the foundation for smoking meat, ensuring it’s cooked thoroughly with that delicious, smoky taste. Technique 1:Parallel Two-Zone Fire For the Two-Zone Fire setup, begin by lighting a chimney of charcoal. Once the charcoal is lit, pile the coals on either side of the grill, leaving a space in the center void. This space is ideally filled with a foil pan containing hot water, which helps to regulate the temperature and add moisture inside the grill. This parallel configuration is perfect for smoking, as it creates an optimal indirect cooking environment by maintaining low temperatures for a long, slow cook. Technique 2:Crafting a Charcoal Serpent The Charcoal Snake is popular for long, slow smoking on a kettle grill. To set it up, lay out unlit briquets in two rows along the outer edge of your grill, covering ¾ way around to form what looks like the letter C. Some people think it looks like a snake, hence the name. Scatter-soaked wood chips or chunks along the line of coals for an extra smoky taste. Place a foil pan with hot water in the center for moisture. Light six to eight briquets and place them at the head of the charcoal snake. They will burn slowly down the line for hours, providing a consistent long, slow smoke. Wait a few minutes before you add the meat to ensure the grill is ready. This method requires time and patience but is always worth it in the end. Technique 3:Employing the Burn-Down Approach for Smokers The Burn-Down Method is a great way to cook slow and low in a smoker. Begin by filling your charcoal bed with unlit coals, then add a few lit coals on top. This setup allows the fire to slowly light the coals below and burn down over time. It’s a straightforward approach that requires minimal intervention, making it ideal for long smoking sessions. This method ensures a steady temperature for hours, ideal for those dedicated to the art of low and slow cooking. Step 2: Introducing Smoke Wood Using hardwood adds an extra flavor to your BBQ, turning simple meat into a gourmet experience. Larger wood chunks are more convenient for extended smoking sessions, with products like Kingsford® Chips ‘n Wood Chunks being ideal choices. These should be soaked in water beforehand to prevent them from burning too quickly. Different woods impart different flavors; Hickory, mesquite, and oak give a bold flavor suitable for beef, while apple, cherry, and other fruit woods offer a milder taste, perfect for chicken. Step 3: Maintaining a Temperature Range of 225°F to 250°F Maintaining a consistent temperature is key to successful smoking, with the ideal range being between 225°F and 250°F. Monitoring this can be simple with the use of a meat thermometer. Place the probe so it hangs down from the top vent of the grill, measuring the air temperature inside. If the temperature rises above this range, close down the vents to reduce the amount of oxygen. If it dips below, open up the vents fully to increase it. Learning to control the airflow is crucial for smoking perfection. Step 4: Ensuring Consistent Fire When smoking ribs, and brisket, these meats require hours to smoke properly. Adding coals is typically necessary to maintain the right temperature. There are two strategies to keep in mind. The first way involves adding unlit coals to the fire as temperatures begin to dip, which will then start to light gradually from the existing lit ones. T The second strategy is to have a chimney of lit coals ready; this is important if the temperature drops below 225°F and you need to increase it quickly. Fire up a new batch of lit coals and pour them carefully into the cooker with tongs to avoid disrupting the smoking environment too much. Step 5: Avoiding Unnecessary Opening of the Grill Perhaps the most difficult part of smoking is resisting the urge to lift the lid every time you want to peek at the progress. Whenever you open the grill, valuable heat and smoke escape, potentially affecting the cooking process. Resist
Grill Ribs Meat Side Up or Down? – Mistakes to Avoid
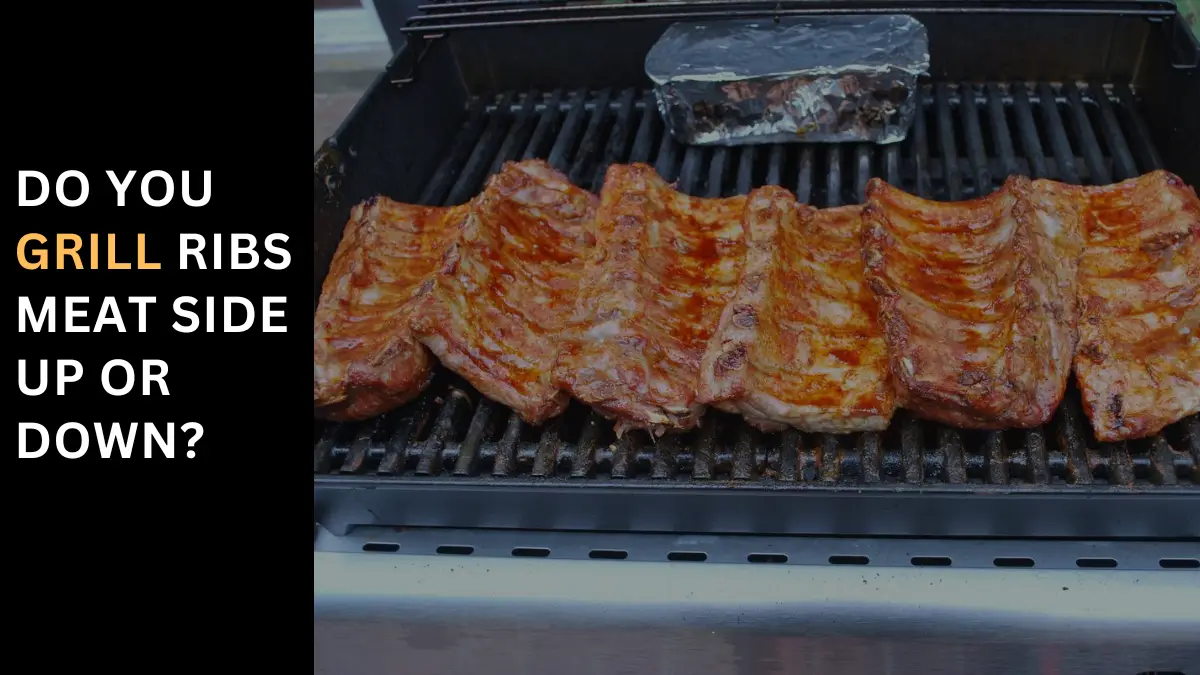
Grill Ribs Meat Side Up or Down? – Mistakes to Avoid How to Grill Ribs Meat? Which Side to Cook First Mastering the perfect rib recipe is essential for any aspiring grill master. The principles of first-class ribsmanship involve several key steps: skinning the ribs, rubbing the meat, and applying a mop sauce. The art of glazing with barbecue sauce and harnessing the mouth-watering powers of wood smoke are crucial. This simple yet effective recipe is easy to prepare, from start to finish, taking about an hour and a half, with only ten minutes of actual work. Following this foolproof recipe, you can create competition-quality ribs, where the bones and meat meld in a symphony of flavor and texture. RECIPE NOTES For this rib recipe, there’s None required for Advance Prep. The Yield is about six servings. The Method involves Indirect grilling along with some direct grilling for finishing. Equipment needed includes cups of wood chips or chunks, preferably hickory or apple, which should be soaked for an hour in water, and then drained before use. Don’t forget the barbecue mop for basting. INGREDIENTS For the mop sauce The rub for the ribs requires: You’ll also need racks of baby back ribs (about four pounds total), and of course, your favorite barbecue sauce or the special Lemon Brown Sugar Barbecue Sauce for that extra zing. RECIPE STEPS Step 1: Mop Sauce Creation Begin by making the mop sauce. Melt the butter in a nonreactive saucepan over medium heat. Then, stir in the cider, bourbon, and soy sauce. Keep this mixture warm until you’re ready to use it. Step 2: Crafting the Rub It’s time to make the rub. In a small bowl, place the salt, brown sugar, paprika, pepper, mustard, garlic powder, and celery seed. Mix these with your fingers, ensuring to break up any lumps of garlic powder. Step 3:Prepping the Ribs To prepare the ribs, lay a rack of meat side down on a baking sheet. Remove the thin, papery membrane from the back of the rack by inserting a slender implement, like a butter knife or the tip of a meat thermometer. The best place to start is in the middle of the bones. Use a dishcloth, paper towel, or pliers to gain a secure grip and peel off the membrane. Repeat this with the remaining rack. Step 4: Rub Application Set aside a tablespoon of the rub for serving later. Sprinkle the remaining rub over all sides of the ribs, rubbing it into the meat thoroughly. Cover the ribs with plastic wrap and refrigerate them until you’re ready to set up the grill. Step 5: Grill Preparation Now, set up your grill for indirect grilling and preheat to a medium temperature (around 325° to 350°F). Place a large drip pan in the center of the grill to catch any drippings. Step 6: Grilling the Ribs Ready to Cook: Once your grill is ready, brush the grill grate with oil. Place the ribs, bone side down, in the center of the grate, above the drip pan, and away from the heat. If you have limited space, you can stand the racks of ribs upright using a rib rack. For those cooking on a charcoal grill, toss half of the wood chips over the mound of coals. Cover and cook for 45 minutes. Step 7: Mopping the Ribs Mop the Ribs: After the initial cooking time, mop the ribs on both sides with the mop sauce. Then, re-cover the grill and continue cooking until the ribs are browned, cooked through, and tender enough to pull apart with your fingers. This could take another 45 minutes to an hour or longer (a total of 1 1/4 to 1 1/2 hours). The meat should have shrunk back from the ends of the bones by about an inch. Mop every 15 minutes, and if you’re using a charcoal grill, replenish the coals as needed. Step 8: Final Glazing Just Before Serving: Brush the ribs on both sides with Lemon Brown Sugar Barbecue Sauce and move them directly over the fire. Grill the ribs until the barbecue sauce is browned and bubbling, which should take about 1 to 3 minutes per side. Step 9: Serving the Ribs Transfer the ribs to a large platter or cutting board and let them rest for a few minutes. Then, cut the racks in half or into individual ribs. Serve at once, with barbecue sauce and the reserved rub on the side. RECIPE TIPS Cooking First-Timer’s Ribs on a Smoker: If you’re using a smoker, set it up and light it according to the manufacturer’s instructions. Preheat to a low temperature, around 250°F. Place the ribs in the smoker, bone side down, and let them smoke until they are cooked through, which should take about 4 to 5 hours. Start mopping the ribs with the mop sauce after the first hour, repeating every hour. Brush the ribs with Lemon Brown Sugar Barbecue Sauce during the last half hour of smoking. Remember, you may need to replenish wood chips or chunks during the first and second hours and check the coals every hour. Smoke Unwrapped on the Grill For the initial hours of smoking, start by coating your ribs with mustard, then applying Pit Boss Sweet Rib Rub. Lay them on the grill, bone side down, and smoke at 225°F. This slow-smoking process infuses the ribs with a rich, deep flavor. Wrap Ribs in Foil After a few hours, it’s time to wrap the ribs tightly in foil. Many pit bosses like to add a liquid to the process, so it’s worth trying different ways to see what you prefer. A popular method is to lay down butter, brown sugar, and honey before sealing the ribs, then pour about ¼ cup of apple juice into the foil for a steamed, tender texture. Place these foil-wrapped ribs back on the grill, this time with the flesh side down. Unwrap and Throw the Ribs Back on the Grill

Great BBQ Debate -Smoking Meat vs. Grilling Health Showdown
Is Smoking Meat Healthier than Grilling? Smoking vs Grilling: Pros and Cons of Both When it comes to backyard barbecues, the smell of meats sizzling on the grill is a quintessential part of summer. However, using a smoker has become one of the staples for achieving that rich, woodsy flavor. Smoking involves slow-cooking the meat until it falls apart and melts in your mouth, creating an unforgettable barbecue event. On the other hand, grilling is about firing up the grill – a popular season activity, whether it’s a sunny day or a blizzard outside. It’s a time of year when snow can’t stop the Pit Barrel Cooker fans and enthusiasts of different types of cooking. When asked which is better, the answer often depends on the preferences of the people involved and the specific cooking method used. Each method has its unique appeal and health implications, making them both beloved choices for different reasons. Smokers When it comes to preparing meats, smokers offer a unique method, distinct from traditional grilling. In smokers, the smoke from burning wood or smoldering charcoal is used to cook meat or other foods, unlike a grill that cooks with direct heat and flames. The process involves indirect heat, where the smoke is captured and the air temperature is controlled to be consistent, maintaining the desired temperature for the doneness level of the meat. This method results in stronger flavors being infused into the fibers of the meat, creating a taste that’s deeply rich and satisfying. Smokers, therefore, offer a distinct culinary experience, different in technique and flavor from the direct heat of grilling. Smokers – Pros For meat geeks, a smoker often stands as a better option than a traditional grill, especially when it comes to cooking various types of meat. Smokers are revered for their ability to create a large smoke ring and intense flavor in the meat. The slow cooking process, with precise controlling of the temperature, allows the fibers in tougher cuts of meat to break down gently, with the fat being reabsorbed, resulting in a rich and juicy outcome. The benefits of owning a smoker stand out prominently. They operate at a lower cooking temperature, which helps to tenderize the meat without scorching the outside. Smoked foods tend to be more tender, juicy, and flavorful compared to those cooked on high heat. This slow-cooking method effectively breaks down connective tissue and meat fibers, enhancing the taste and texture. Smokers allow for the use of different types of wood and seasonings, which, under long, slow cooking temperatures, develop complex flavors. Many smokers are designed for a set-it-and-forget-it approach, making them convenient for long cooking processes. The quality of smokers means they can last a long time, representing a worthwhile investment for anyone serious about their barbecue. Smokers – Cons While smokers are highly versatile and capable of cooking various types of foods beyond just meat, they do come with their drawbacks. Despite their ability to reduce the toughness of cuts of meat, making them fall off-the-bone tender, one significant downside is their cost. Smokers tend to be more expensive than grills, although they do last a long time. Smaller models might not yield as much food as one would like, and while delicious, the larger ones, like the Pit Barrel Cooker, come in various sizes and price points, which might not always fit everyone’s budget. Moreover, the process of smoking requires more time and patience to figure out. For beginners, it might involve a steep learning curve, often requiring consulting a team or website for tips and tricks on how to get the kind of smoke and flavor desired. This can be a significant factor for those looking for a quicker and more straightforward cooking method. Grills Grills typically operate at higher temperatures using direct heat. This method allows the meat to have direct contact with the flames, creating a browning effect at the point of contact. As you cook the food on the rack above the heat source, which can be either wood or charcoal briquettes, the searing on the outside results in a charred exterior, offering a robust taste. Grilled meats, especially tender cuts like steak, benefit from this method. Grills – Pros One of the key advantages of grills is their ability to reach hotter temperatures, allowing for cooking outside while maintaining the interior temperature of the meat to your desired degree. Grills are more versatile than smokers, making them ideal for a varied menu when entertaining. You can cook something different each night with relative ease of use. Once you master the grill, you can enjoy healthy, homemade meals that are cheaper than those made by smokers. A starter grill is a great option for those with limited means. Grills – Cons However, food can easily burn on a grill, leading to a disappointing experience, especially after you’ve spent money on a nice steak. Cleaning is a constant task, involving scraping off debris from the grill rack after each use. Also, you might find less flavor in the meat due to the shorter cooking time, as smoke tends to escape rather than being captured like in a smoker. The tender, juicy quality that is the hallmark of smoked meats is often less pronounced in grilled foods. Clearing the Air on Cancer Risks of Smoked or Grilled Meats With summer barbecues featuring juicy steaks and burgers, concerns often arise about whether grilled or smoked meats increase the risk of developing cancer. Dr. Kathleen Egan, an epidemiologist at the Moffitt Cancer Center, highlights that higher levels of consumption of red meat are linked to chronic diseases. There’s convincing evidence of an association between colorectal cancer risk and intake of red meat. A recent pooled analysis of 19 prospective studies found a 25% higher risk of colon cancer when comparing the highest and lowest levels of beef intake. These studies show an increased association of cancer not just with red meat but also with chicken and fish. The mechanism explaining