How Long to Cook Brisket in Ninja Foodi Grill?
Ninja Foodi Brisket
What type of brisket should you use for Ninja Foodi Brisket?
When choosing a brisket for your Ninja Foodi, keep in mind that you’ll want a trimmed piece that will comfortably fit in the cooker.
Typically, a flat cut brisket, known for its full flavor and nice, moist texture, is ideal. It works great for a variety of meals, from sandwiches that can be easily shredded, chopped, or sliced. My last purchase was a 4-pounder, which was just the right size.
Tips for Making Ninja Foodi Brisket
To achieve that desirable crust on your brisket, brush and coat the pot of your Ninja Foodi before you start. Using the saute function, sear the brisket until it turns a rich brown—avoiding any gray areas which indicate under-searing.
Transitioning to the pressure cooker function, add either water or broth for moisture, followed by your choice of sauce. Securely place the lid, set it to seal, and pressure cook according to your recipe. It’s crucial to let it naturally release to enhance the flavor and give the meat ample rest. Once cooked, chop or shred it using a food processor if you prefer it coarsely chopped.
Ingredients and Instructions for Ninja Foodi Brisket
Ingredients
- Trimmed flat cut or point cut brisket
- Water or beef broth
- Barbecue sauce
- Olive oil
Instructions
- Start by pouring a little olive oil into the pot of the Ninja Foodi and use a brush to spread it around.
- Turn the Ninja Foodi Multi-Cooker to ‘saute‘ and sear the meat on both sides.
- Switch the device to ‘pressure‘ mode, add water or beef broth to the Foodi, and brush some barbecue sauce onto the brisket.
- Place the pressure cooker lid on the Foodi, ensure the nozzle is set to ‘seal‘, and cook under manual high pressure.
- After the timer goes off, allow the pressure to naturally release. Once done, open the lid.
- Carefully remove the brisket, then chop or shred as desired and serve with additional barbecue sauce.
Notes on Cooking Beef Brisket in the Ninja Foodi

Choosing the right cut for your brisket—flat cut or point cut—is essential, as it affects both the texture and taste of the finished dish. The flat cut is generally leaner, making it perfect for slicing, while the point cut, with more fat marbling, offers a juicier bite.
It’s crucial to consider these attributes when deciding whether to shred or chop your brisket post-cooking. The trimmed brisket typically cooks faster and more evenly, providing a more consistent texture that is neither too tough nor too soft.
When pressure cooked in the Ninja Foodi, brisket achieves a tender texture in a fraction of the time it would take to smoke, making it an excellent option for those seeking to reduce cooking times without sacrificing flavor.
Ninja Foodi Beef Brisket
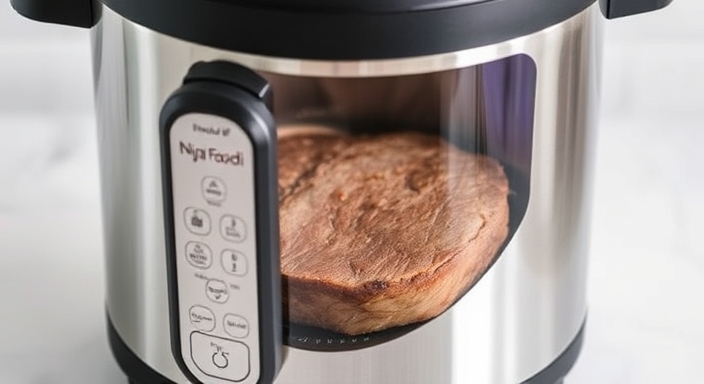
The Ninja Foodi transforms beef brisket into a succulent main course that’s ideal for celebrating Father’s Day weekend or any other occasion. This versatile appliance allows you to bypass the traditional smoker, cooking the brisket rapidly with its pressure cooker function.
The result is a tender beef brisket with a crispy outside and a juicy center, seasoned to perfection and cooked in mere minutes compared to traditional methods. The Ninja Foodi ensures that your brisket is not only quick to prepare but also rich in flavor, providing a smoked brisket taste and texture without the need for a smoker.
How to Pressure Cook a Beef Brisket in the Ninja Foodi?
Preparing the Beef Brisket for the Ninja Foodi
- Gather Ingredients: Make sure you have olive oil, beef brisket, dry onion soup mix, garlic powder, brown sugar, and Heinz chili sauce.
- Prepare the Cooking Pot: Use a brush to apply olive oil evenly across the bottom of the Ninja Foodi cooking pot.
- Season the Brisket: Place the beef brisket in the pot. Sprinkle dry onion soup mix, garlic powder, and brown sugar evenly over the brisket.
- Add Liquids: Pour enough water into the pot to come up about an inch on the sides of the brisket.
- Apply Chili Sauce: Generously coat the top of the brisket with Heinz chili sauce.
- Pressure Cook the Brisket: Secure the pressure lid on the Ninja Foodi, ensuring the valve is set to ‘seal’. Select the pressure cook option and set the timer according to the thickness of the brisket (generally, about 90 minutes for a 3-pound brisket).
- Release Pressure: After the cooking time ends, allow the pressure to release naturally for about 20 minutes, then use the quick release method to release any remaining pressure.
- Serving: Carefully remove the brisket from the Ninja Foodi, slice or shred as desired, and serve immediately.
This step-by-step method ensures your brisket is cooked perfectly with minimal monitoring, utilizing the Ninja Foodi’s efficient pressure cooking capabilities to deliver tender and flavorful meat every time.
Tips for Pressure Cooking a Beef Brisket in the Ninja Foodi
Are Point or Flat Cut Briskets Best?
When pressure cooking in the Ninja Foodi, selecting between a point cut or flat cut brisket can significantly affect your dish’s outcome. The flat cut is typically leaner and more uniform, ideal for those who prefer their brisket in neat slices for serving. In contrast, the point cut, with its extra fat and marbling, yields a juicier and more flavorful brisket, perfect for more decadent meals.
What Should I Serve with Beef Brisket?
A well-prepared brisket, whether served with mashed potatoes, air-fried vegetables, or made into hearty brisket sandwiches accompanied by seasoned french fries, can elevate any meal into a feast. This versatility makes brisket an excellent choice for various dining occasions.
Tips for Pressure Cooking a Beef Brisket
To ensure your brisket remains moist and delicious during pressure cooking, start by placing the brisket with the fat side up in your Ninja Foodi. This position helps the fat render slowly, naturally basting the meat while it cooks.
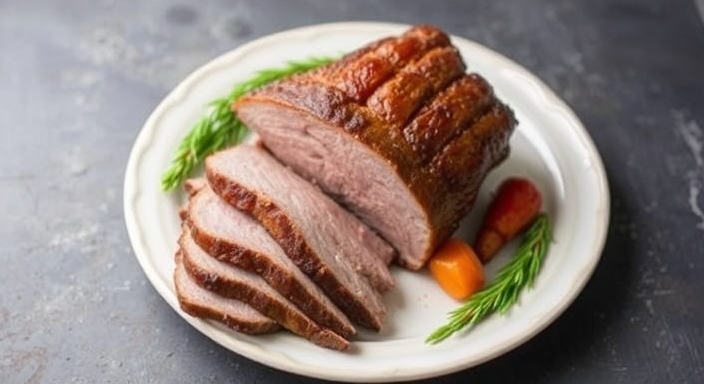
Add a mix of water or beef broth to the pot to enhance the flavor, and consider sprinkling rosemary, black pepper, and paprika for an extra flavor boost. After cooking, trim any excess fat before serving to balance the richness of the dish.
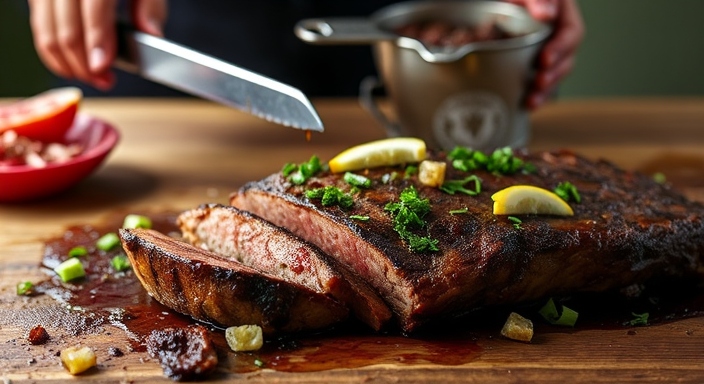
Should I Shred or Slice Beef Brisket?
Deciding whether to slice or shred your beef brisket often comes down to personal preference and the intended use of the meat. Slicing the brisket into thin, uniform pieces against the grain is ideal for standalone dishes or neatly stacked sandwiches.
On the other hand, shredding—pulling the meat apart into smaller, stringy pieces—is perfect for more casual dishes like barbecue sandwiches or tacos. Both methods enhance the taste and needs of your specific dish, allowing you to tailor your brisket to the occasion.
How Do You Store Leftover Beef Brisket?
To keep leftover beef brisket tasting fresh, store it in an airtight container in the refrigerator for 3-4 days. When ready to reheat, place the brisket in a pan, cover it lightly, and warm it gently in its own juices to maintain its moisture and flavor, ensuring it remains delicious until the very last serving.
Conclusion:
In summary, cooking brisket in the Ninja Foodi Grill requires a careful balance of time and temperature to achieve tender, flavorful results. Typically, a brisket should be cooked low and slow, around 250°F, for approximately 60-75 minutes per pound, ensuring the internal temperature reaches 195°F for optimal tenderness. By utilizing the grill’s pressure cooking and air crisping features, you can significantly reduce cooking time while still achieving that perfect, smoky brisket finish. Adjust timing based on the size and thickness of your brisket, and always allow for a proper rest period before slicing.
People also ask
How Long to Cook Brisket on Ninja Grill?
For those using the Ninja grill, cooking brisket requires setting the dial to SMOKER mode, adjusting the temperature to 250°F, and timing it for approximately 5 hours. The process doesn’t need preheating; simply select START/STOP to begin. However, depending on the size and shape of your beef brisket, you might need to adjust the cooking cycle—use the arrows to add more time if necessary, ensuring the brisket is thoroughly cooked through.
How Long Does It Take to Cook Brisket in an Air Fryer?
Cooking brisket in an air fryer is significantly quicker. Place the brisket in the air fryer basket, set the temperature to 365 degrees F, and cook for 35 minutes. After cooking, transfer the cooked brisket to a cutting board to rest for 10 minutes. Remove any string, then slice the brisket into thin slices using an electric carving knife, perfect for serving immediately. This method is ideal for those seeking a faster alternative without sacrificing the savory taste of well-cooked brisket.
How Long Does a 2kg Brisket Take to Cook?
Cooking a 2kg brisket typically requires about 2 hours per kilo when using a smoker or similar slow-cooking method. Start by cooking the brisket until it reaches an internal temperature of 165°F (74°C), then wrap it in foil or butcher’s paper to retain moisture and continue cooking until it reaches 203°F (95°C). The meat should feel like soft warm butter when probed, indicating it is perfectly tender and ready.
How Many Hours Per Pound to Cook Brisket?
When baking a brisket in the oven, expect to allocate about 1 hour 15 minutes per pound. For example, a 4 1/2 lb. flat brisket typically takes about 4 hours 15 minutes to reach a temperature of 170-180°F. A larger 7 lb. whole brisket might take upwards of 5 hours to fully cook to 180 degrees, ensuring that every slice is juicy and tender, ideal for a range of dishes from casual barbecues to formal dinners.