Can you Cook Frozen Meat in a Ninja Foodi Grill?
Delicious Midweek Favorite
In the hustle of midweek chaos, discovering a delicious and convenient meal solution can be a game-changer. That’s where the Ninja Foodi comes into play, especially when cooking frozen chicken breast.
I was skeptical the first time I tried cooking frozen chicken in my Ninja Foodi. Could it turn out well from frozen? To my surprise, not only did it work, but it became my new midweek favorite. The texture and flavor were spot on, and it saved me the time of defrosting.
How To Cook Frozen Chicken Breast In Ninja Foodi
To cook frozen chicken breast in the Ninja Foodi, begin by dumping your big block of frozen chicken breasts into the Ninja Foodi. Add liquid (such as broth or water) over the chicken until they are fully submerged. This helps in cooking them evenly and keeping them moist.
Next, you’ll move on to pressure cooking.
- Place the pressure cooker lid on the Ninja Foodi, set the valve to sealing, and cook for 20 minutes. This duration ensures that the chicken is thoroughly cooked without drying out.
- After the cooking time has elapsed, allow for a natural release of pressure.
- This step is crucial as it lets the chicken rest and reabsorb some of the moisture, making it juicier.
- Once done, you now have Ninja Foodi frozen chicken breasts that are perfectly cooked and ready for serving at dinner.
This method is straightforward and guarantees moist and flavorful chicken every time.
A Sustainable Culinary Adventure
One of the biggest joys in my life is finding sustainable ways to live, which extends into my kitchen practices as well. I have a passion for recycling, whether buying second-hand clothes, or having a second-hand sofa.
This love for reuse and recycling has found its way into my cooking habits too, especially with my Ninja Foodie.
Cooking frozen chicken breast in the Ninja Foodi has been a delightful discovery. It’s not just about the convenience or the taste, but also about the philosophy it represents.
Just like I recycle items and give them a new life, using the Ninja Foodi to transform a simple frozen chicken breast into a delectable meal feels like culinary recycling.
It’s about making the most out of what we have, and in this case, it’s turning a frozen piece of meat into a warm, inviting dinner that brings joy to my family.
This practice aligns perfectly with my weekend routine, where I love taking the kids to the big recycling bins, and teaching them the importance of sustainability.
Similarly, as we sit down to enjoy the Ninja Foodi-cooked chicken, I share with them how we’re making the most of our resources in the kitchen, turning something ordinary into extraordinary.
Can You Recommend A Ninja Foodi?
I often get asked about which kitchen gadgets I recommend and which ones I use. For the Ninja Foodi, we have this particular model. It doesn’t have as many bells and whistles compared to some of the newer models, but it does a great job. Its versatility is impressive.
we can dehydrate, air fry, pressure cook, sauté, slow cook, and even make yogurt, among other things. Plus, I recommend you head over to our Ninja Foodi recipes category.
We have been using the Ninja Foodi since 2020 and just love it for its simplicity, how delicious the recipes are when cooked in it, and how much time it saves us in the kitchen. We even take the Ninja Foodi on holiday with us.
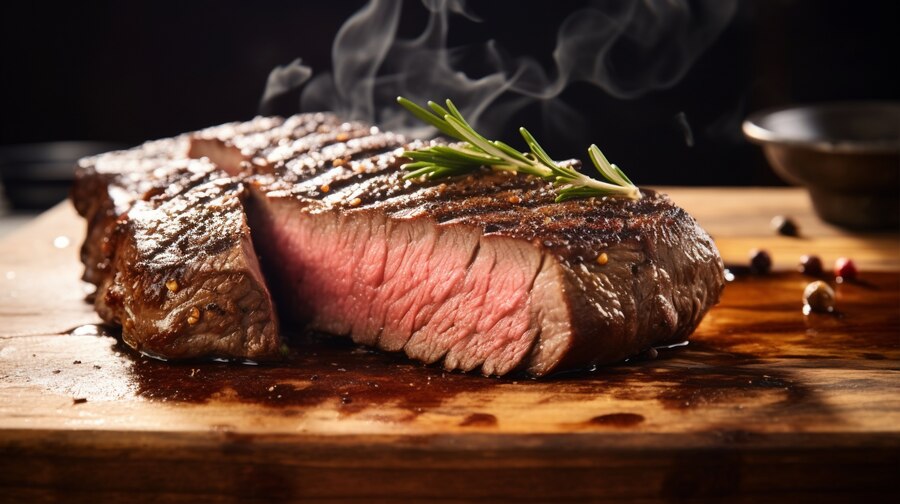
Tips for Cooking the PERFECT Steak in the Ninja Foodi Indoor Grill

Cooking the perfect steak on your Ninja Foodi Indoor Grill is an art, and here are some invaluable tips to elevate your grilling game:
1. Preheat for Success
Preheat your grill on the Max grill setting for at least 10 minutes. This ensures your grill grate is sizzling hot and ready to sear your steak to perfection.
2. Bring It to Room Temperature
Allow your steak to come to room temperature for about 30 minutes before cooking. This ensures even cooking throughout.
3. Season with Care
Season your steak liberally and wrap it in cling wrap. Let it sit in the refrigerator for 24-48 hours to develop a flavorful crust. The longer it marinates, the better.
4. Trust Your Thermometer
Invest in a reliable meat thermometer. The trustworthy thermometer is your hardest-working tool. Grill your steaks to within 5-10° of your target temp for that perfect doneness.
5. The Rest is Key
Allow your steak to rest for 5-10 minutes before serving. Don’t forget the probe! Leaving it in as the steak rests prevents precious juices from leaking out.
6. Monitor Temperatures
Keep an eye on the thermometer’s readings as your meat rests. If it’s pressing down or holding steady, you’re good. If you see any manual feature errors, remember the XL grill can err, so give it a double-check.
7. Stay Calm and Have Fun
Don’t stress! Cooking steak should be enjoyable. If it overcooks or you don’t like it, don’t chop it; turn it into something else, like a steak & cheese or a twice-baked potato. Grill on and have fun!
Obsessed with Recycled Food
As someone who’s obsessed with the idea of recycling food, I find real enjoyment in reimagining leftovers into something new and exciting. A once ordinary meal becomes extraordinary on days two or three.
My home is a haven for creative cooking, where even a simple frozen chicken breast in the Ninja Foodi gets a new life.
Revolutionizing Meal Preparation
My dinner habit transformed when I started using Ninja Foodi’s frozen chicken technique. This method has become a staple in my kitchen, especially on busy days.
Before, I used the slow cooker way too much, often resulting in meals that, while tasty, were left to be dumped in the freezer as stock for future soup.
Now, with the Ninja Foodi, I’ve developed a new routine: make a meal, load the leftovers into the Foodi, and blend them into something ready to serve the next day.
It only needs a quick reheat, saving significant time. This technique, as mentioned above, has been a game-changer for me.
I can pour in frozen chicken, and it comes out perfectly pressure-cooked and solid, just the way I always liked. What I once saw as a daunting task has now become a simple, enjoyable process.
Rinse and Repeat with Chicken Thighs
The beauty of the Ninja Foodi is its versatility. Once you’ve mastered the frozen chicken breast recipe, you can also rinse and repeat our method with chicken thighs. The process remains largely the same, yet the result is equally satisfying.
Each time I switch from breasts to thighs, the Ninja Foodi adapts seamlessly, delivering that perfect juicy interior and crisp exterior we all crave.
Conclusion
In conclusion, the Ninja Foodi Grill is a culinary powerhouse that defies the limitations of frozen meat. It opens up a world of possibilities, allowing you to cook a wide variety of frozen meats with ease and convenience.
Whether it’s chicken, beef, or steak, the Ninja Foodi Grill’s versatility and expertise in handling frozen ingredients make it a valuable addition to any kitchen. Its ability to deliver succulent, flavorful results from frozen meats transforms ordinary cooking into an extraordinary culinary experience.
So, when the question arises, “Can you cook frozen meat in a Ninja Foodi Grill?” the resounding answer is yes, and it’s an invitation to explore the exciting world of frozen meat dishes with confidence and creativity.
People also ask
Can you cook frozen food in the Ninja Foodi grill?
Yes, you can indeed cook frozen food in the Ninja Foodi Grill! It’s a versatile appliance that allows you to grill your favorite ingredients even if they are straight from the freezer.
When grilling frozen meat or other frozen items, remember to let them rest for 5-10 minutes after cooking. This resting period helps in cutting and ensures the food retains its moisture, so it stays juicy and delicious. Enjoy the convenience of grilling frozen goodies with your Ninja Foodi Grill!
What is the Ninja Foodi Grill Steak Cooking Times Chart?
When using your Ninja Foodi Grill, follow this handy chart to ensure your steak is cooked to perfection:
- Grill Temperature: Let your grill tell you when it’s ready.
- Add Steak: Place your steak on the grill.
- Grill One Side: Grill one side for 5 minutes.
- Flip Steaks: Flip the steaks.
- Cook 1 to 5 Minutes: Depending on the steak’s thickness and your desired doneness, cook for:
- For a one-inch thick steak:
- 1 minute for rare
- 2 minutes for medium-rare
- 3-4 minutes for medium
- 5 minutes for well done.
With this simple chart, you’ll be able to grill your steak to your preferred level of doneness with ease. Enjoy your perfectly cooked steak!


